Wireless remote controller kit
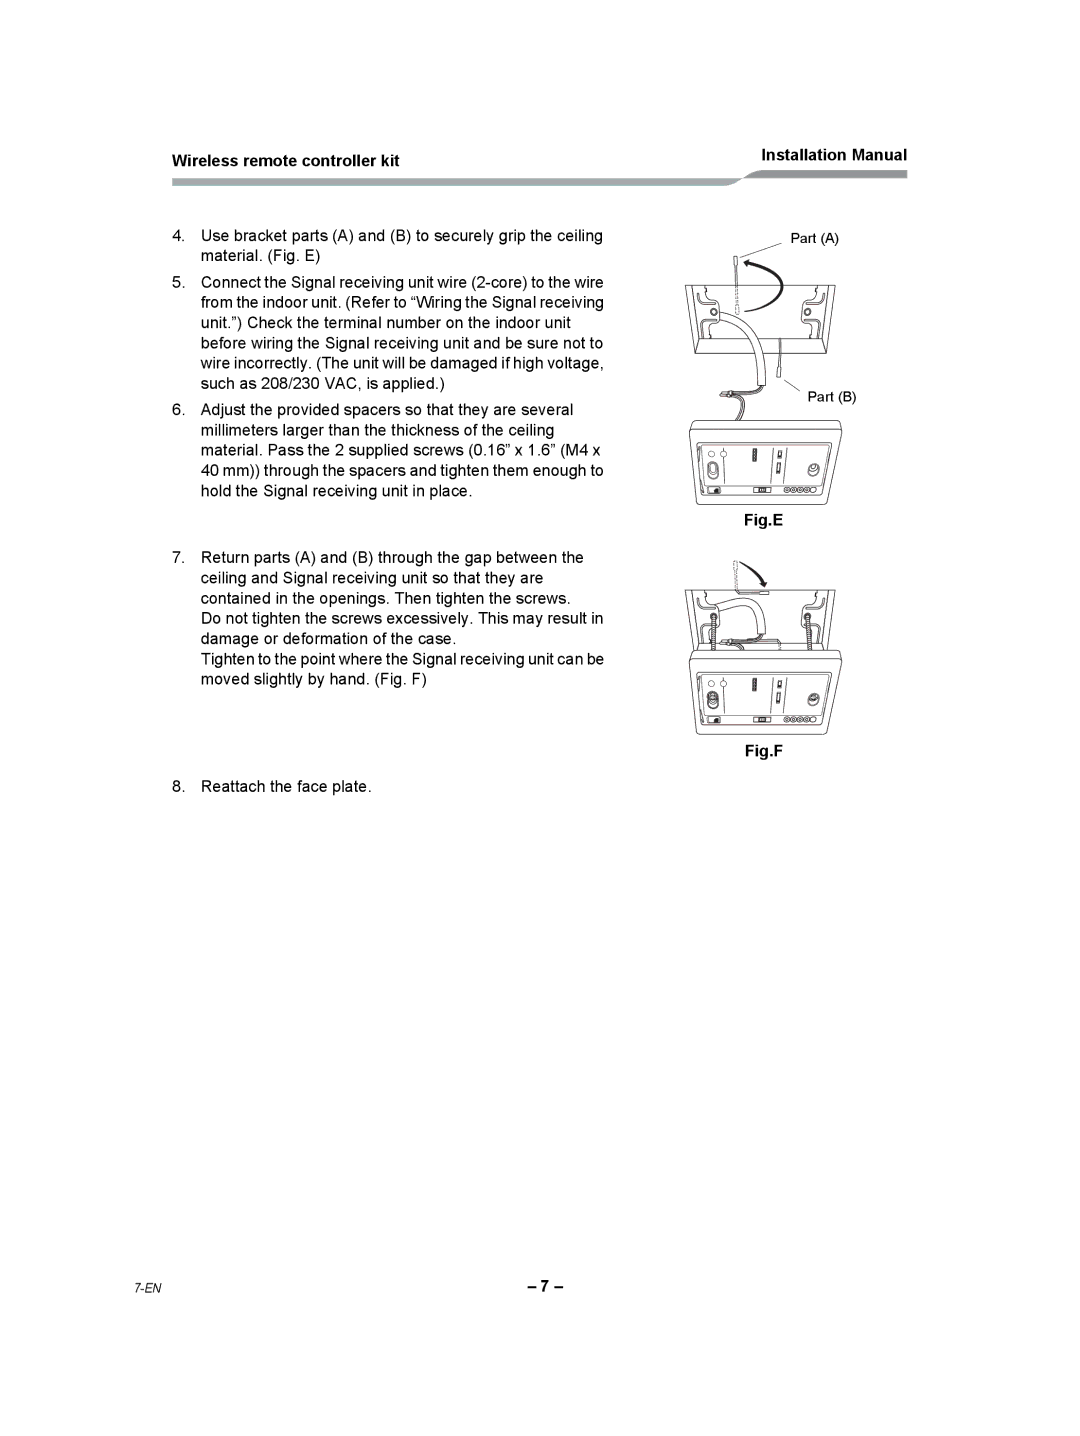
4.Use bracket parts (A) and (B) to securely grip the ceiling material. (Fig. E)
5.Connect the Signal receiving unit wire
6.Adjust the provided spacers so that they are several millimeters larger than the thickness of the ceiling material. Pass the 2 supplied screws (0.16” x 1.6” (M4 x 40 mm)) through the spacers and tighten them enough to hold the Signal receiving unit in place.
7.Return parts (A) and (B) through the gap between the ceiling and Signal receiving unit so that they are contained in the openings. Then tighten the screws.
Do not tighten the screws excessively. This may result in damage or deformation of the case.
Tighten to the point where the Signal receiving unit can be moved slightly by hand. (Fig. F)
8.Reattach the face plate.
Installation Manual
Part (A)
Part (B)
Fig.E
Fig.F
– 7 – |