Adjustment of the Projection Screen
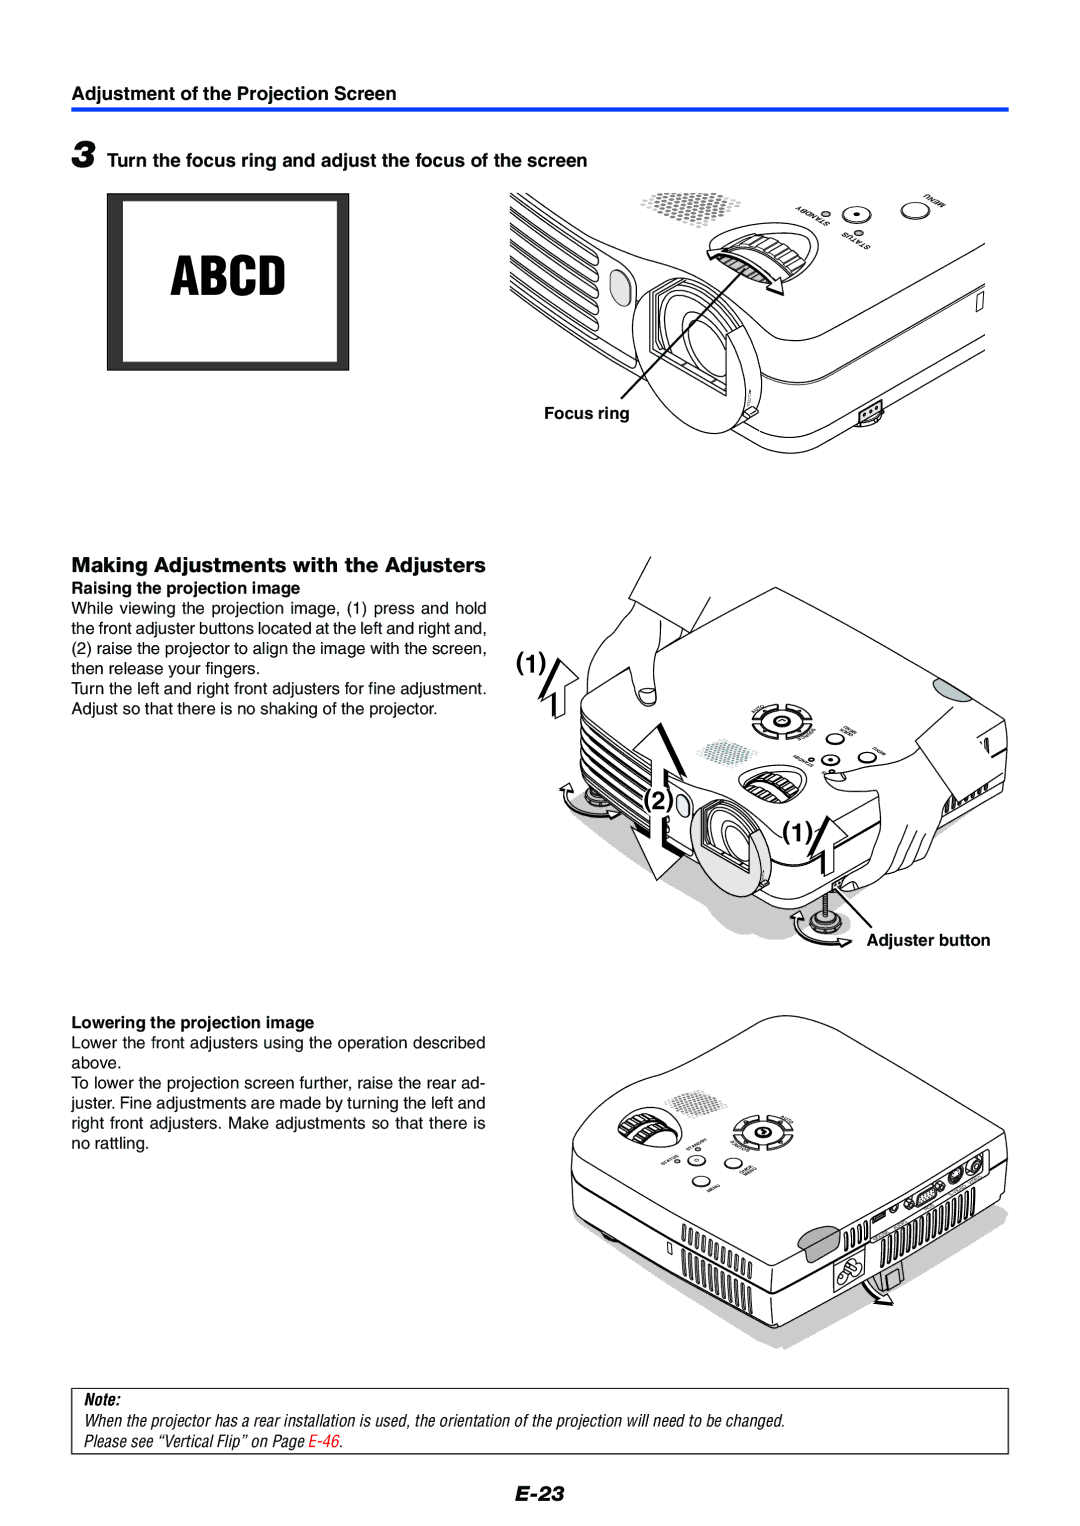
3 Turn the focus ring and adjust the focus of the screen
STANDBY | MENU |
| |
| STATUS |
Focus ring
CLOZE
Making Adjustments with the Adjusters
Raising the projection image
While viewing the projection image, (1) press and hold the front adjuster buttons located at the left and right and,
(2) raise the projector to align the image with the screen,
then release your fingers.(1) Turn the left and right front adjusters for fine adjustment.
Adjust so that there is no shaking of the projector.
| TO |
U | |
A |
|
O | S |
RU |
|
EC |
|
DBY | STAN |
|
(2)![]()
(1)
CLOZE
KMENU QUIC
NU | ME |
|
TUS | STA |
|
Lowering the projection image
Lower the front adjusters using the operation described above.
To lower the projection screen further, raise the rear ad- juster. Fine adjustments are made by turning the left and right front adjusters. Make adjustments so that there is no rattling.
Adjuster button
|
|
| A |
|
|
| UT |
|
|
| O |
STANDBY | E | OS |
|
| C |
|
|
| RU |
|
|
STATUS | QUICK |
| |
|
| ||
|
| MENU | VIDEO |
MENU |
|
| |
|
| ||
|
|
| S |
|
|
| RGB |
|
|
| AUDIO |
|
|
| MOUSE |
Note:
When the projector has a rear installation is used, the orientation of the projection will need to be changed. Please see “Vertical Flip” on Page