E6581299c
4. Connecting and starting the USB001Z unit
To connect the USB001Z unit to your computer, follow these steps:
1)Turn off the input power to the inverter, and after waiting for at least 15 minutes, make sure that the charge lamp on the inverter is no longer lit. (Your personal computer can remain powered on.)
2)Connect a USB cable to the USB port on the USB001Z unit and to a USB port on your computer.
When connecting the USB001Z unit to your computer for the first time, you have to install its driver. Refer to Section 2.
3)Connect an
RS 485
LOGIC side:Connectable to such a common serial interface port as that of the
*Connect the cable only to either RS485 or LOGIC.
4)Turn on the power to the inverter, and set communication parameters.
*Before disconnecting the USB communication unit, also perform above step 1) beforehand.
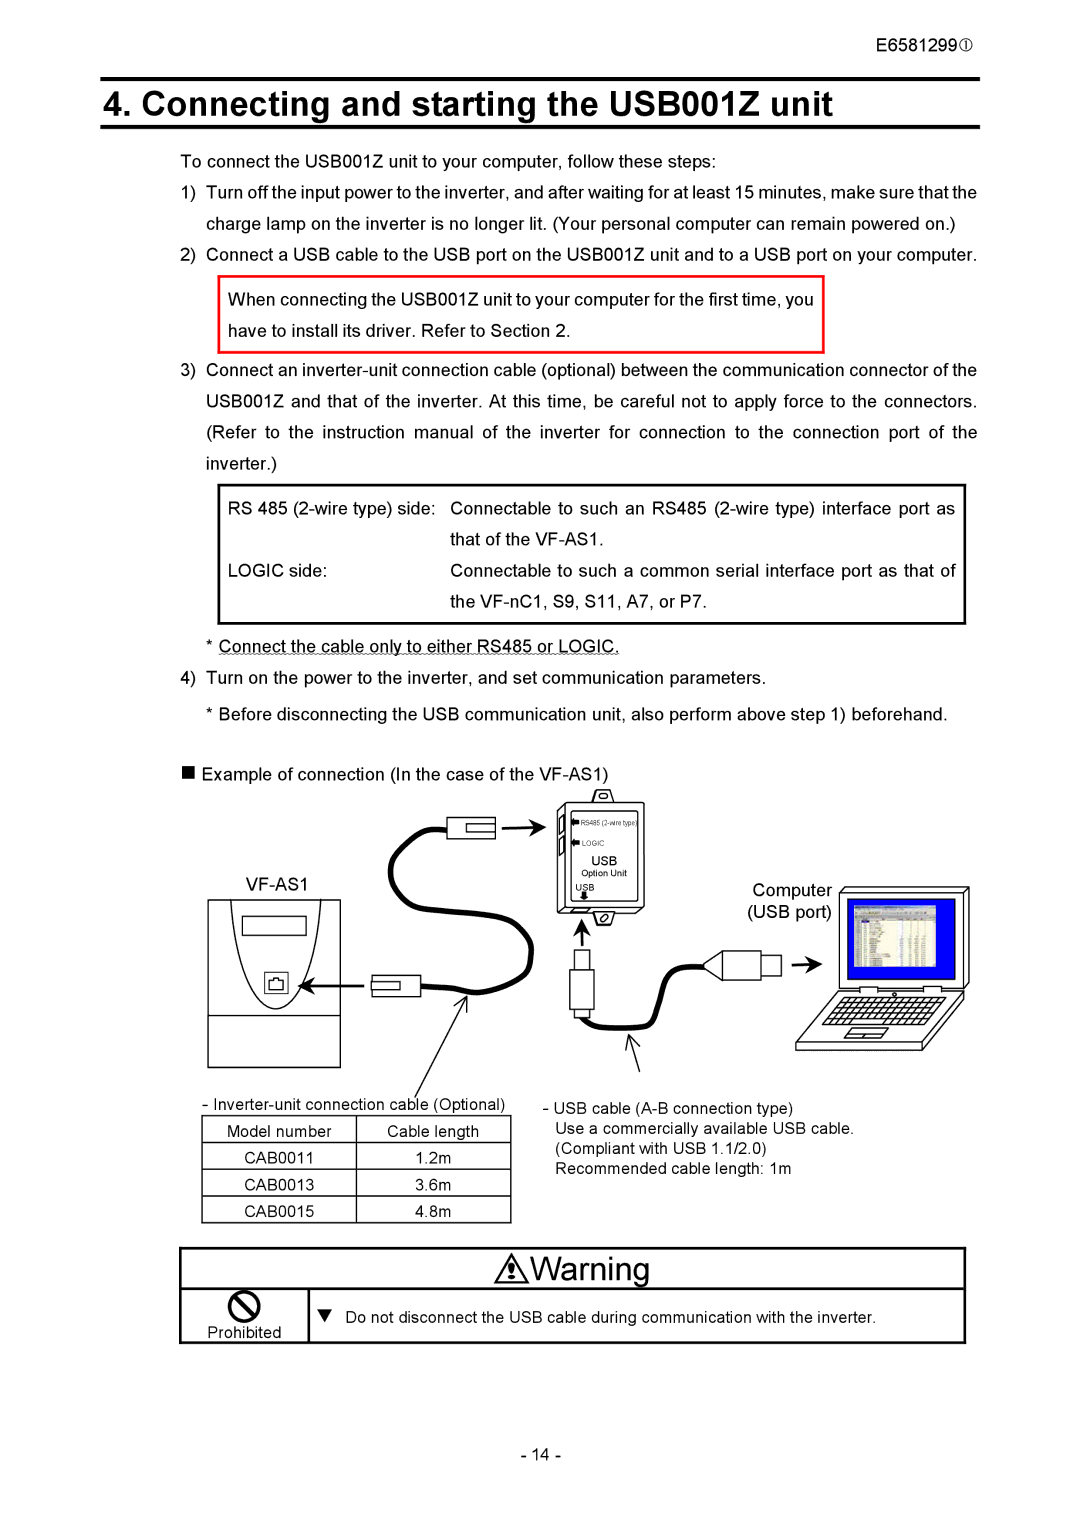
Example of connection (In the case of the
VF-AS1
![]() RS485
RS485
![]() LOGIC
LOGIC
USB
Option Unit
USB
Computer (USB port)
-
Model number | Cable length |
CAB0011 | 1.2m |
CAB0013 | 3.6m |
CAB0015 | 4.8m |
-USB cable
Use a commercially available USB cable. (Compliant with USB 1.1/2.0) Recommended cable length: 1m
![]() Warning
Warning
Prohibited
Do not disconnect the USB cable during communication with the inverter.
- 14 -