![]()
![]()
![]() Ethernet LED
Ethernet LED
Solid | The Ethernet port is connected, but there is no data | |
being transferred. | ||
| ||
Blinking | The Ethernet port is transferring data. | |
Off | The Ethernet port isn’t connected. |
Note:
5 minutes after the device connected to the adapter is turned off, and the adapter will automatically switch to the
1.4 Physical Interface
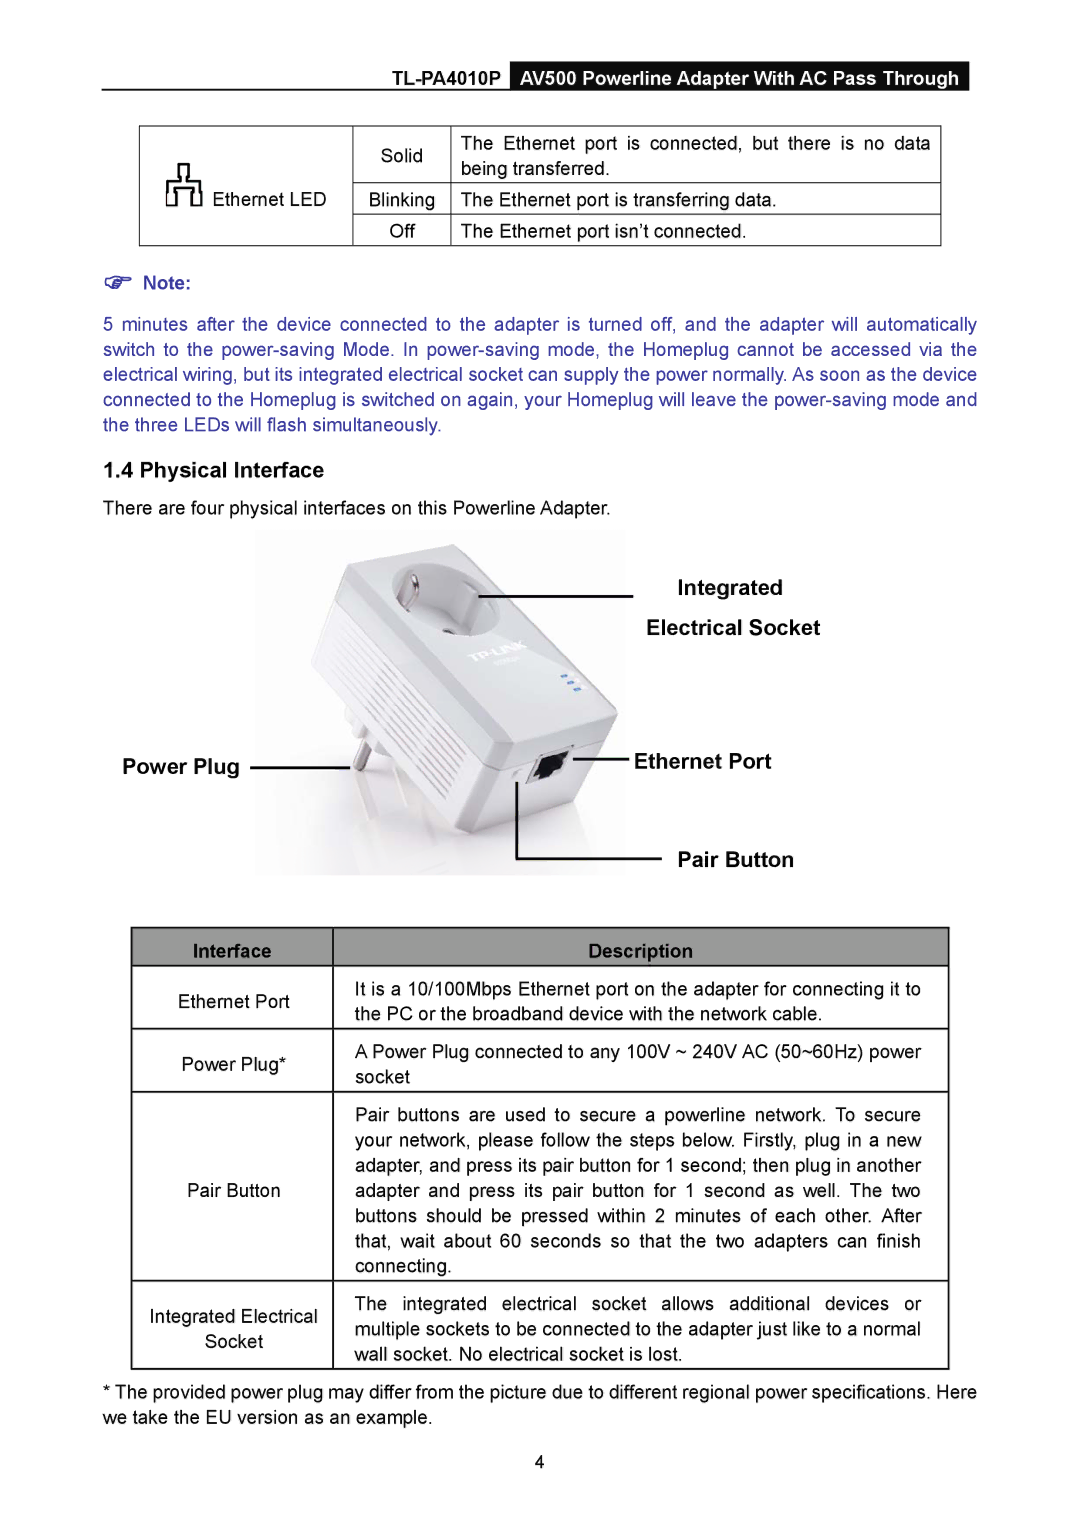
There are four physical interfaces on this Powerline Adapter.
Integrated
Electrical Socket
Power Plug |
|
|
|
|
| Ethernet Port | ||
|
|
| ||||||
|
|
|
|
| ||||
|
|
|
|
|
|
|
| Pair Button |
|
|
|
|
|
|
|
| |
|
|
|
|
|
| |||
| Interface |
|
|
| Description | |||
| Ethernet Port |
| It is a 10/100Mbps Ethernet port on the adapter for connecting it to | |||||
|
| the PC or the broadband device with the network cable. | ||||||
|
|
|
| |||||
| Power Plug* |
| A Power Plug connected to any 100V ~ 240V AC (50~60Hz) power | |||||
|
| socket | ||||||
|
|
|
| |||||
|
|
|
| Pair buttons are used to secure a powerline network. To secure | ||||
|
|
|
| your network, please follow the steps below. Firstly, plug in a new | ||||
|
|
|
| adapter, and press its pair button for 1 second; then plug in another | ||||
| Pair Button |
| adapter and press its pair button for 1 second as well. The two | |||||
|
|
|
| buttons should be pressed within 2 minutes of each other. After | ||||
|
|
|
| that, wait about 60 seconds so that the two adapters can finish | ||||
|
|
|
| connecting. | ||||
| Integrated Electrical |
| The integrated electrical socket allows additional devices or | |||||
|
| multiple sockets to be connected to the adapter just like to a normal | ||||||
| Socket |
| ||||||
|
| wall socket. No electrical socket is lost. | ||||||
|
|
|
| |||||
*The provided power plug may differ from the picture due to different regional power specifications. Here we take the EU version as an example.
4
