TL-PS110U
Single USB2.0 Port Fast Ethernet Print Server
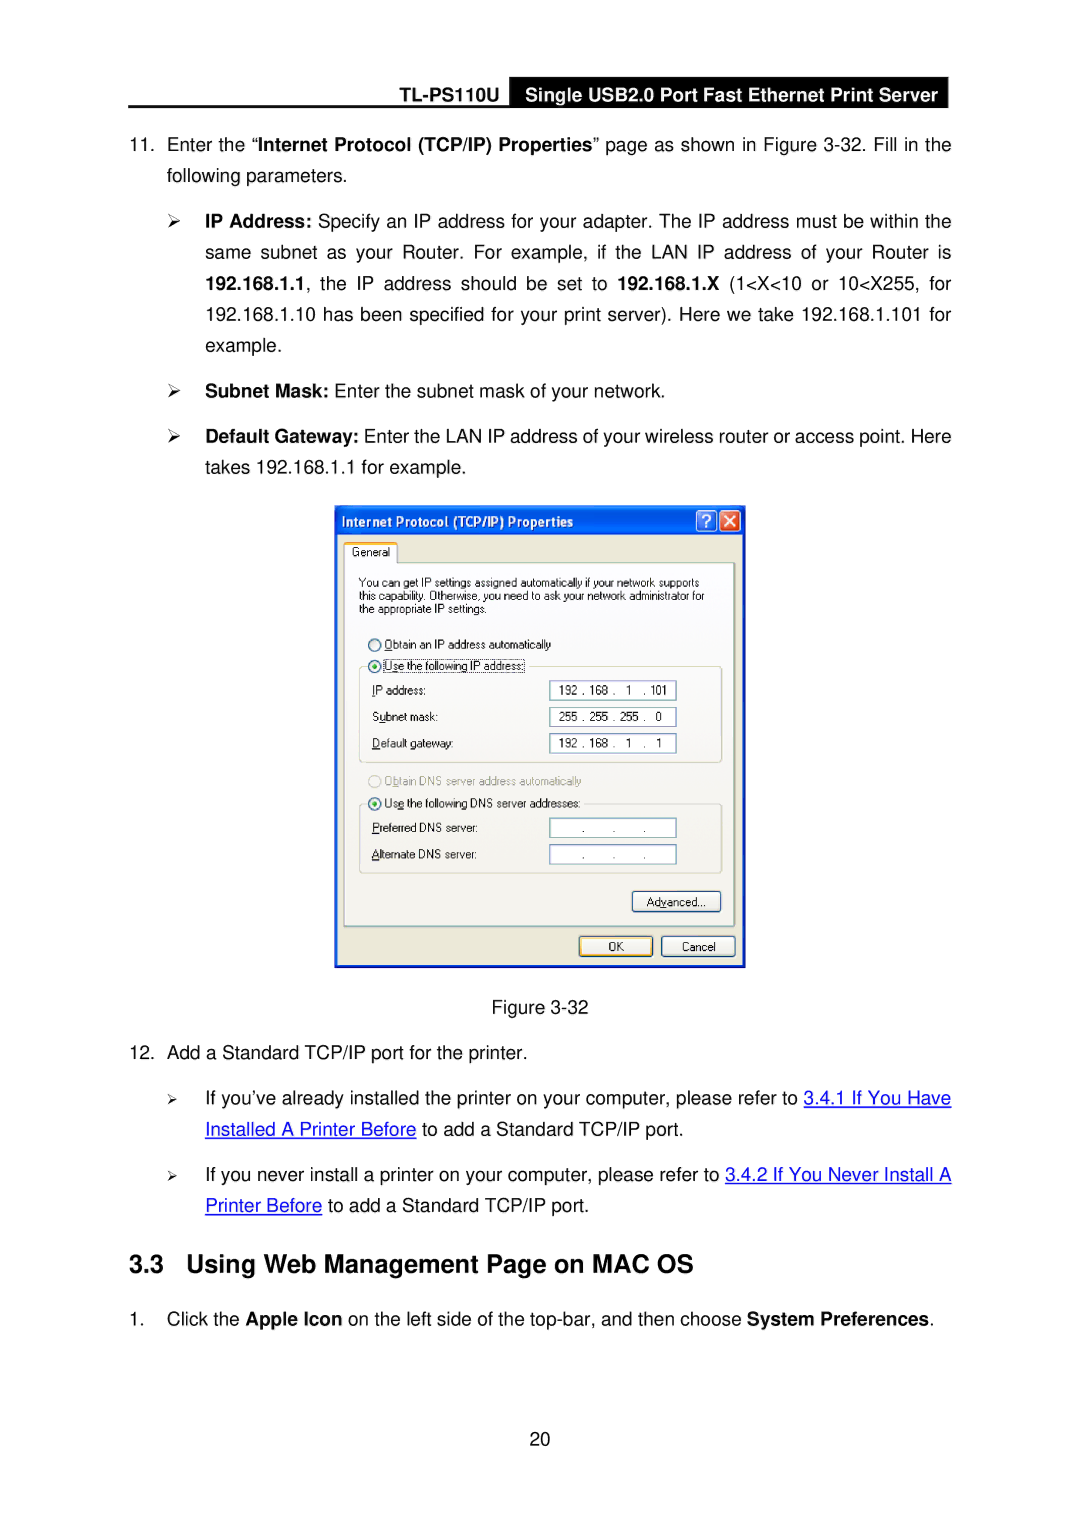
11.Enter the “Internet Protocol (TCP/IP) Properties” page as shown in Figure
¾IP Address: Specify an IP address for your adapter. The IP address must be within the same subnet as your Router. For example, if the LAN IP address of your Router is 192.168.1.1, the IP address should be set to 192.168.1.X (1<X<10 or 10<X255, for 192.168.1.10 has been specified for your print server). Here we take 192.168.1.101 for example.
¾Subnet Mask: Enter the subnet mask of your network.
¾Default Gateway: Enter the LAN IP address of your wireless router or access point. Here takes 192.168.1.1 for example.
Figure
12.Add a Standard TCP/IP port for the printer.
¾If you’ve already installed the printer on your computer, please refer to 3.4.1 If You Have Installed A Printer Before to add a Standard TCP/IP port.
¾If you never install a printer on your computer, please refer to 3.4.2 If You Never Install A Printer Before to add a Standard TCP/IP port.
3.3 Using Web Management Page on MAC OS
1.Click the Apple Icon on the left side of the
20