Installation
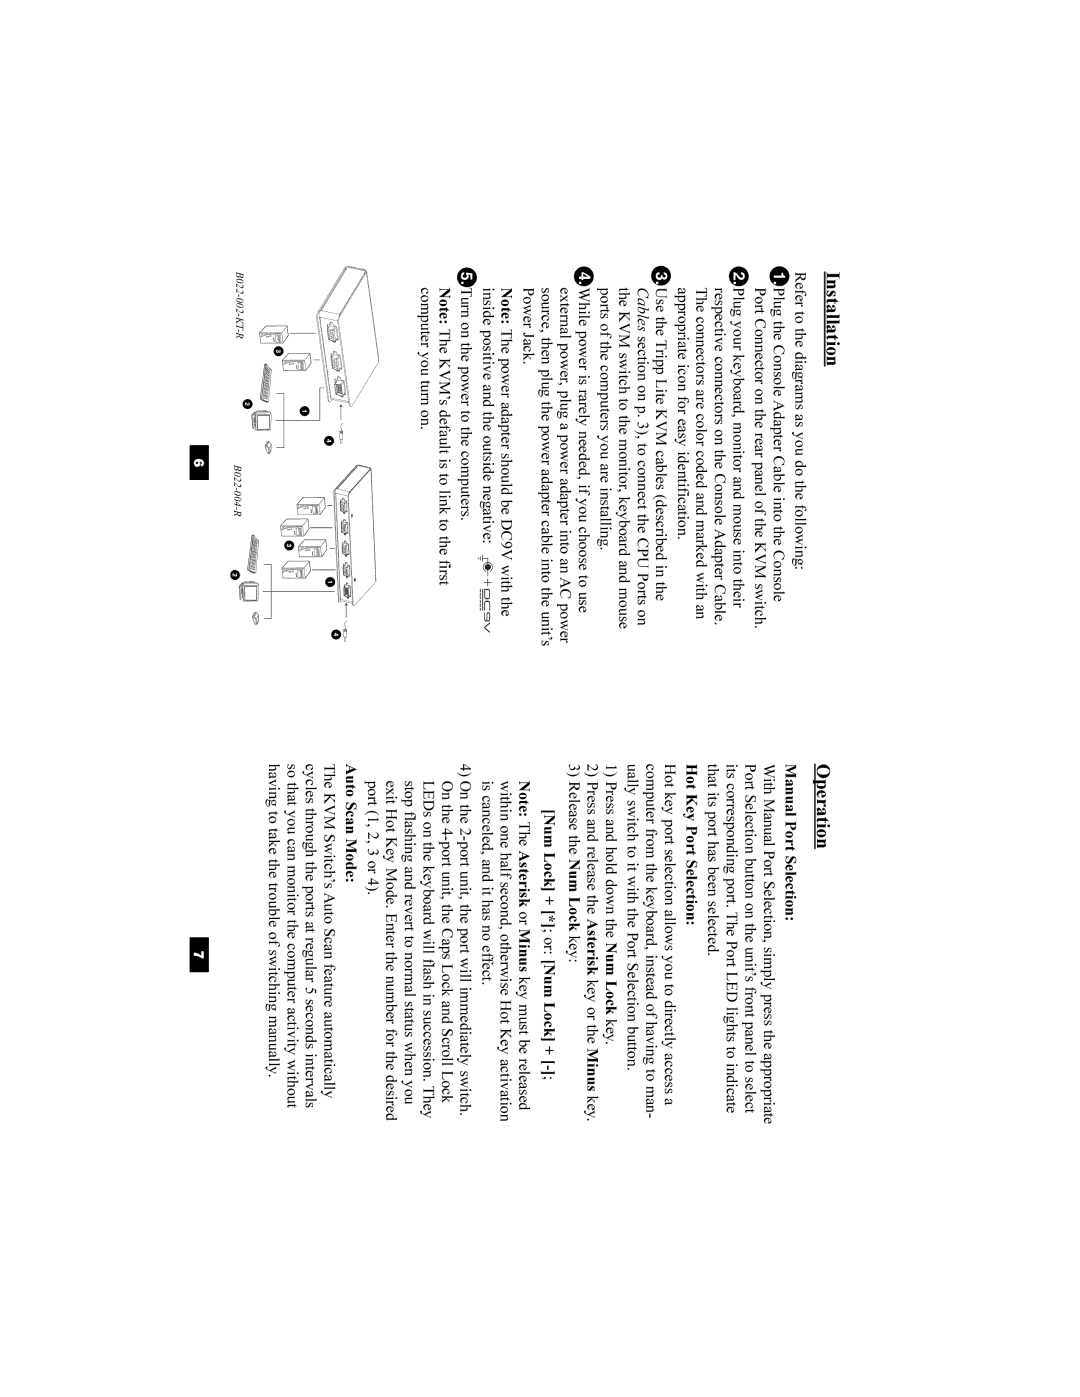
Refer to the diagrams as you do the following:
1.Plug the Console Adapter Cable into the Console Port Connector on the rear panel of the KVM switch.
2.Plug your keyboard, monitor and mouse into their respective connectors on the Console Adapter Cable. The connectors are color coded and marked with an appropriate icon for easy identification.
3.Use the Tripp Lite KVM cables (described in the Cables section on p. 3), to connect the CPU Ports on the KVM switch to the monitor, keyboard and mouse ports of the computers you are installing.
4.While power is rarely needed, if you choose to use external power, plug a power adapter into an AC power source, then plug the power adapter cable into the unit’s Power Jack.
Note: The power adapter should be DC9V with the inside positive and the outside negative: ![]()
![]()
![]()
5.Turn on the power to the computers.
Note: The KVM’s default is to link to the first computer you turn on.
Operation
Manual Port Selection:
With Manual Port Selection, simply press the appropriate Port Selection button on the unit’s front panel to select its corresponding port. The Port LED lights to indicate that its port has been selected.
Hot Key Port Selection:
Hot key port selection allows you to directly access a computer from the keyboard, instead of having to man- ually switch to it with the Port Selection button.
1)Press and hold down the Num Lock key.
2)Press and release the Asterisk key or the Minus key.
3)Release the Num Lock key:
[Num Lock] + [*]; or: [Num Lock] +
Note: The Asterisk or Minus key must be released within one half second, otherwise Hot Key activation is canceled, and it has no effect.
4)On the
Auto Scan Mode:
The KVM Switch’s Auto Scan feature automatically cycles through the ports at regular 5 seconds intervals so that you can monitor the computer activity without having to take the trouble of switching manually.
6 | 7 |
