BP48V60RT3U specifications
The Tripp Lite BP48V60RT3U is an innovative battery pack designed to provide reliable and extended power to compatible Tripp Lite UPS systems. With a focus on enhancing the runtime of connected equipment, this external battery pack is ideal for data centers, network closets, and critical infrastructure that require uninterrupted power supply.One of the standout features of the BP48V60RT3U is its capability to support 48V systems, making it compatible with a variety of Tripp Lite UPS units. This battery pack is equipped with a high-capacity 60Ah battery, providing users with extended runtime during power outages or fluctuations, ensuring that essential devices remain operational. The modular design of the BP48V60RT3U allows for easy installation and maintenance, ensuring that users can quickly replace or upgrade the battery as needed.
In terms of technology, the BP48V60RT3U utilizes advanced battery management systems (BMS) to optimize performance and prolong battery life. The BMS monitors the battery's health, temperature, and charge levels, ensuring efficient energy use and enhancing safety. This intelligent management ensures that users receive maximum reliability and minimizes the risk of battery failure.
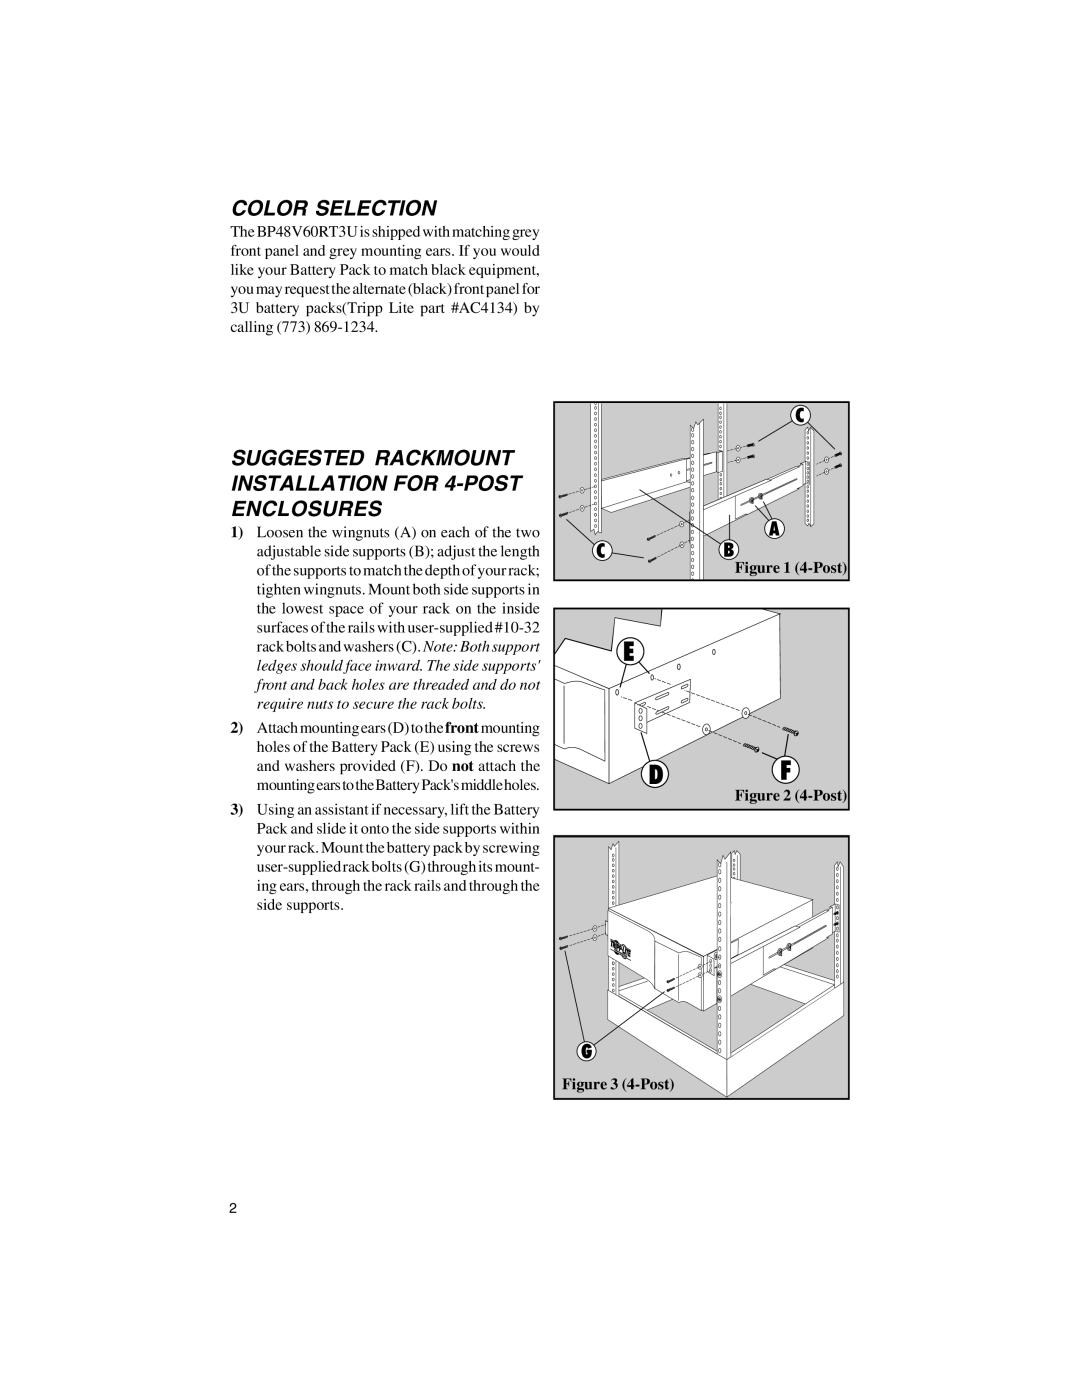
The BP48V60RT3U is designed with user convenience in mind. Its compact 3U rack-mountable design enables seamless integration into existing server racks or cabinets, saving valuable space. Additionally, the unit features hot-swap capability, allowing users to replace the battery without powering down connected systems, ensuring continuous operation during maintenance.
Safety is another critical characteristic of the BP48V60RT3U. It is designed to meet rigorous safety standards, which includes features like short-circuit protection, temperature monitoring, and overcharge protection, ensuring safe operation in various environments. Moreover, the unit boasts LED indicators that provide real-time information about its status, including charge level and battery health, making it easy for users to monitor performance.
In summary, the Tripp Lite BP48V60RT3U battery pack is a robust and reliable solution for enhancing the power backup capabilities of Tripp Lite UPS systems. With its advanced technology, user-friendly design, and essential safety features, it provides an ideal choice for businesses and organizations that demand consistent power and uninterrupted operation in a world that increasingly relies on technology.

