ee--mmaaiill:: support@broadcasttools.com vvooiiccee:: 360.854.9559 ffaaxx:: 360.854.9479
11
SRC-2X Installation and Operation Manual
QUICK START
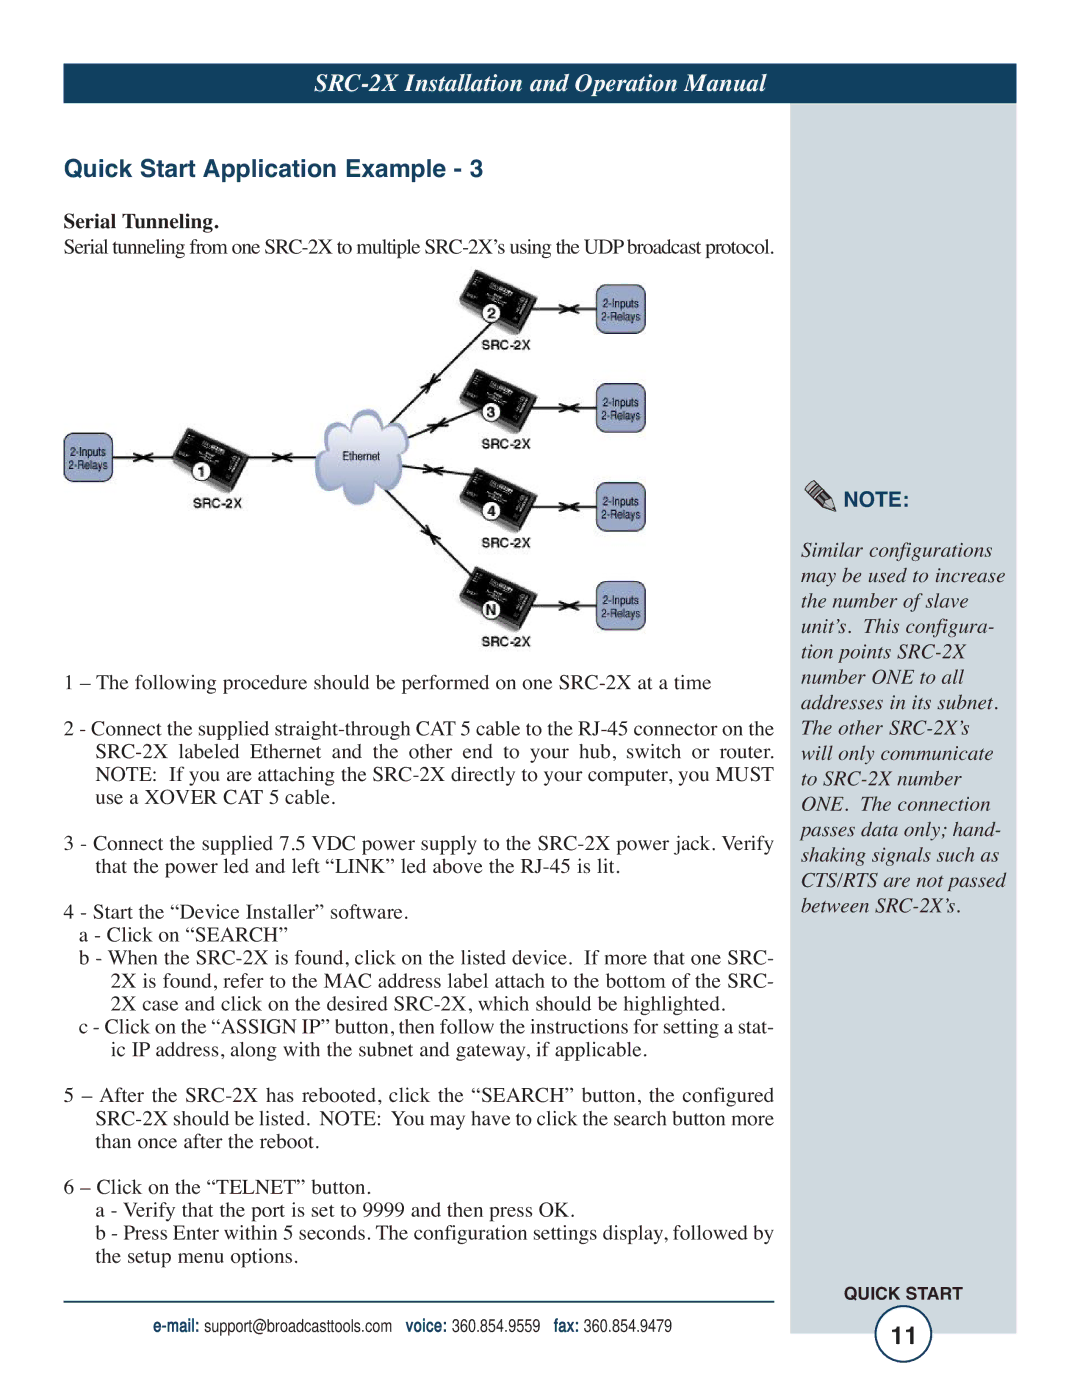
Quick Start Application Example - 3
Serial Tunneling.
Serial tunneling from one SRC-2X to multiple SRC-2X’s using the UDPbroadcast protocol.
1 – The following procedure should be performed on one SRC-2X at a time
2 - Connect the supplied straight-through CAT5 cable to the RJ-45 connector on the
SRC-2X labeled Ethernet and the other end to your hub, switch or router.
NOTE: If you are attaching the SRC-2X directly to your computer, you MUST
use a XOVER CAT5 cable.
3 - Connect the supplied 7.5 VDC power supply to the SRC-2X power jack. Verify
that the power led and left “LINK” led above the RJ-45 is lit.
4 - Start the “Device Installer” software.
a - Click on “SEARCH”
b - When the SRC-2X is found, click on the listed device. If more that one SRC-
2X is found, refer to the MAC address label attach to the bottom of the SRC-
2X case and click on the desired SRC-2X, which should be highlighted.
c - Click on the “ASSIGN IP” button, then follow the instructions for setting a stat-
ic IP address, along with the subnet and gateway, if applicable.
5 – After the SRC-2X has rebooted, click the “SEARCH” button, the configured
SRC-2X should be listed. NOTE: You may have to click the search button more
than once after the reboot.
6 – Click on the “TELNET” button.
a - Verify that the port is set to 9999 and then press OK.
b - Press Enter within 5 seconds. The configuration settings display, followed by
the setup menu options.
NOTE:
Similar configurations
may be used to increase
the number of slave
unit’s. This configura-
tion points SRC-2X
number ONE to all
addresses in its subnet.
The other SRC-2X’s
will only communicate
to SRC-2X number
ONE. The connection
passes data only; hand-
shaking signals such as
CTS/RTS are not passed
between SRC-2X’s.