•As engine warms up, rotate choke knob slowly to OFF position. If engine falters, return to FULL choke, then slowly move to OFF position.
To Stop Engine
•Run engine for a few minutes before stopping to help dry off any moisture on the engine.
•To help prevent possible
Electric Starter:
•Connect power cord to switch box on engine, then to 120 volt AC receptacle. With the engine running, push starter button and spin the starter for several seconds. The unusual sound made by spinning the starter will not harm engine or starter. Disconnect the power cord from receptacle first, and then from switch box.
Recoil Starter
•With engine running, pull starter rope with a rapid, continuous full arm stroke three or four times. Pulling the starter rope will produce a loud clattering sound, which is not harmful to the engine or starter.
•Move throttle control to “stop” or “off” position.
•Remove ignition key to prevent unauthorized use of equipment. Do not turn key.
NOTE: Keep key in a safe place. Engine will not start without ignition key.
•Wipe all snow and moisture from the carburetor cover in the area of the control levers. Also, move control levers back and forth several times.
To Engage Augers
•To engage augers and start throwing snow, squeeze the auger control against the left handle.
•To disengage power to the augers, release both the auger control and the drive control, if engaged.
The auger control can be locked so you can turn the chute directional control without interrupting the snow throwing process.
Auger Control Test
IMPORTANT: Perform the following test before operating the snow thrower for the first time and at the start of each winter season.
Check the adjustment of the auger control as follows:
•When the auger control is released and in the disengaged “up” position, the cable should have very little slack, but should NOT be tight.
WARNING: Do not
•In a
•While standing in the operator’s position (behind the snow thrower) engage the auger.
•Allow the auger to remain engaged for approximately ten (10) seconds before releasing the auger control. Repeat this several times.
•With the engine running in the FAST position and the auger control in the disengaged “up” position, walk to the front of the machine.
•Confirm that the auger has completely stopped rotating and shows NO signs of motion.
IMPORTANT: If the auger shows ANY signs of rotating, immediately return to the operator’s position and shut off the engine. Wait for all moving parts to stop before readjusting the auger control cable.
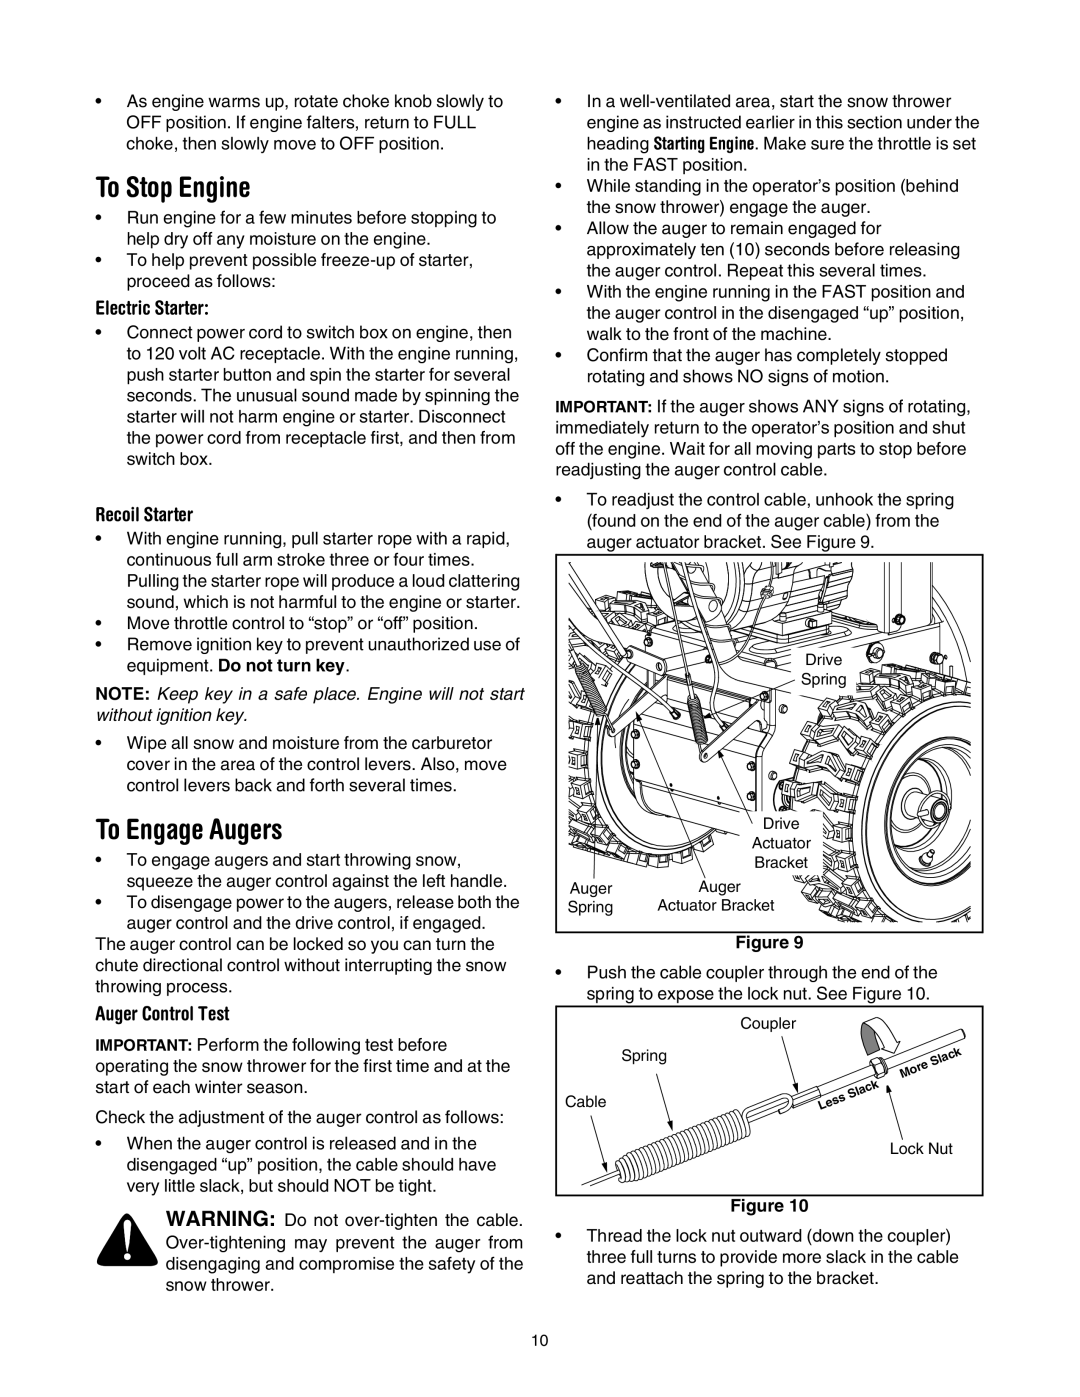
•To readjust the control cable, unhook the spring (found on the end of the auger cable) from the auger actuator bracket. See Figure 9.
| Drive |
| Spring |
| Drive |
| Actuator |
| Bracket |
Auger | Auger |
Spring | Actuator Bracket |
Figure 9
•Push the cable coupler through the end of the spring to expose the lock nut. See Figure 10.
| Coupler |
|
|
|
|
|
|
|
|
Spring |
|
|
|
|
|
|
|
| k |
|
|
|
|
|
|
| c | ||
|
|
|
|
|
| la |
| ||
|
|
|
|
|
| e | S |
|
|
|
|
|
|
| r |
|
|
| |
|
|
|
| o |
|
|
|
| |
|
|
|
| M |
|
|
|
|
|
|
|
|
| k |
|
|
|
|
|
|
|
| c |
|
|
|
|
| |
|
| la |
|
|
|
|
|
| |
Cable |
| sS |
|
|
|
|
|
|
|
s |
|
|
|
|
|
|
| ||
Le |
|
|
|
|
|
|
|
| |
|
|
|
| Lock Nut | |||||
Figure 10
•Thread the lock nut outward (down the coupler) three full turns to provide more slack in the cable and reattach the spring to the bracket.
10