Section 5: Maintenance |
|
|
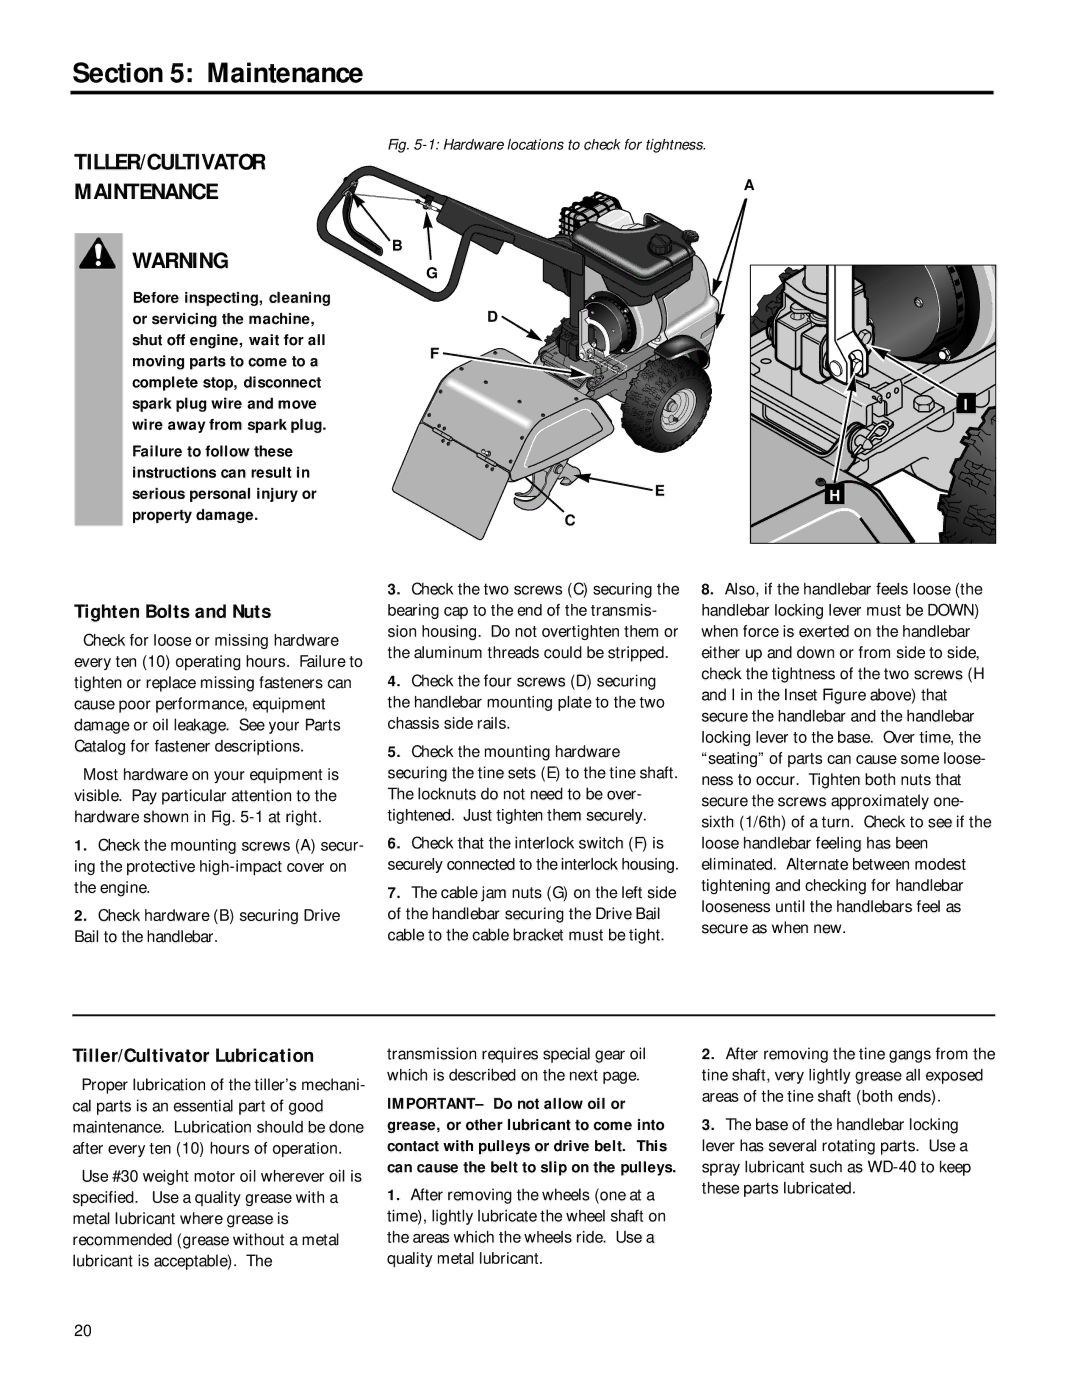
TILLER/CULTIVATOR | Fig. |
|
| A | |
MAINTENANCE |
| |
WARNING | B |
|
G |
| |
|
| |
Before inspecting, cleaning | D |
|
or servicing the machine, |
| |
shut off engine, wait for all | F |
|
moving parts to come to a |
| |
|
| |
complete stop, disconnect |
|
|
spark plug wire and move |
| I |
wire away from spark plug. |
|
|
Failure to follow these |
|
|
instructions can result in | E |
|
serious personal injury or | H | |
property damage. | C |
|
Tighten Bolts and Nuts
Check for loose or missing hardware every ten (10) operating hours. Failure to tighten or replace missing fasteners can cause poor performance, equipment damage or oil leakage. See your Parts Catalog for fastener descriptions.
Most hardware on your equipment is visible. Pay particular attention to the hardware shown in Fig.
1.Check the mounting screws (A) secur- ing the protective
2.Check hardware (B) securing Drive Bail to the handlebar.
Tiller/Cultivator Lubrication
Proper lubrication of the tiller’s mechani- cal parts is an essential part of good maintenance. Lubrication should be done after every ten (10) hours of operation.
Use #30 weight motor oil wherever oil is specified. Use a quality grease with a metal lubricant where grease is recommended (grease without a metal lubricant is acceptable). The
3.Check the two screws (C) securing the bearing cap to the end of the transmis- sion housing. Do not overtighten them or the aluminum threads could be stripped.
4.Check the four screws (D) securing the handlebar mounting plate to the two chassis side rails.
5.Check the mounting hardware securing the tine sets (E) to the tine shaft. The locknuts do not need to be over- tightened. Just tighten them securely.
6.Check that the interlock switch (F) is securely connected to the interlock housing.
7.The cable jam nuts (G) on the left side of the handlebar securing the Drive Bail cable to the cable bracket must be tight.
transmission requires special gear oil which is described on the next page.
IMPORTANT– Do not allow oil or grease, or other lubricant to come into contact with pulleys or drive belt. This can cause the belt to slip on the pulleys.
1.After removing the wheels (one at a time), lightly lubricate the wheel shaft on the areas which the wheels ride. Use a quality metal lubricant.
8.Also, if the handlebar feels loose (the handlebar locking lever must be DOWN) when force is exerted on the handlebar either up and down or from side to side, check the tightness of the two screws (H and I in the Inset Figure above) that secure the handlebar and the handlebar locking lever to the base. Over time, the “seating” of parts can cause some loose- ness to occur. Tighten both nuts that secure the screws approximately one- sixth (1/6th) of a turn. Check to see if the loose handlebar feeling has been eliminated. Alternate between modest tightening and checking for handlebar looseness until the handlebars feel as secure as when new.
2.After removing the tine gangs from the tine shaft, very lightly grease all exposed areas of the tine shaft (both ends).
3.The base of the handlebar locking lever has several rotating parts. Use a spray lubricant such as
20