1 |
Wheel Drive Belt
NOTE: The wheel drive belt is under the least amount of load and will wear at a slower rate. It may not be necessary to replace the wheel drive belt as often as the tine belts. Inspect the belt and read the following steps before proceeding.
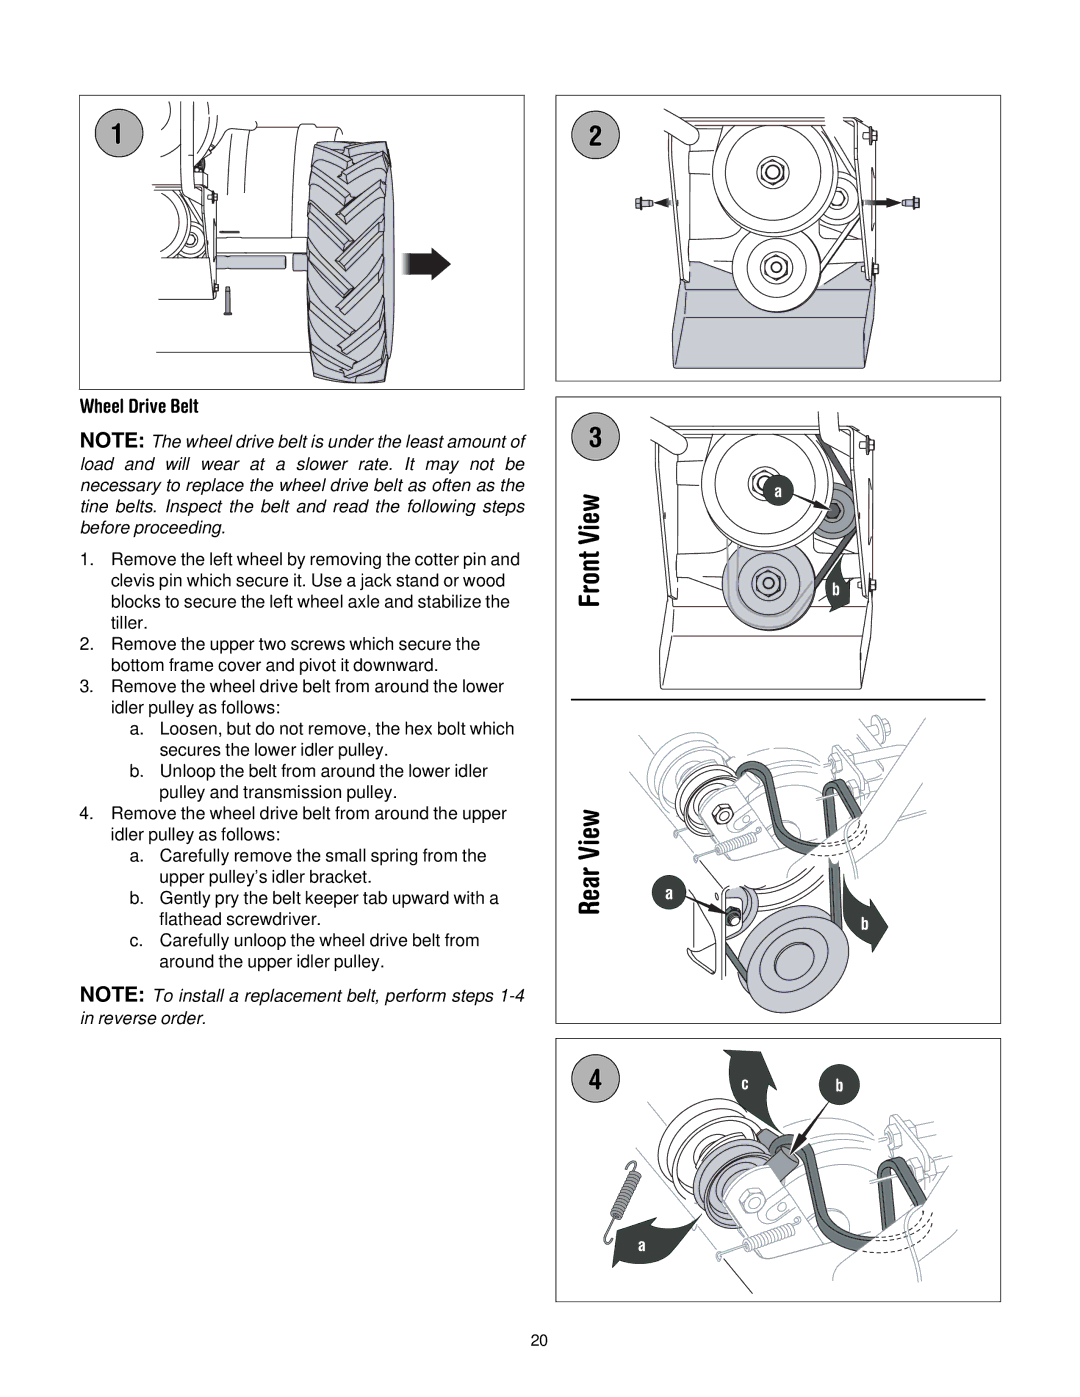
1.Remove the left wheel by removing the cotter pin and clevis pin which secure it. Use a jack stand or wood blocks to secure the left wheel axle and stabilize the tiller.
2.Remove the upper two screws which secure the bottom frame cover and pivot it downward.
3.Remove the wheel drive belt from around the lower idler pulley as follows:
a.Loosen, but do not remove, the hex bolt which secures the lower idler pulley.
b.Unloop the belt from around the lower idler pulley and transmission pulley.
4.Remove the wheel drive belt from around the upper idler pulley as follows:
a.Carefully remove the small spring from the upper pulley’s idler bracket.
b.Gently pry the belt keeper tab upward with a flathead screwdriver.
c.Carefully unloop the wheel drive belt from around the upper idler pulley.
NOTE: To install a replacement belt, perform steps
2 |
3 |
| |
View | a | |
| ||
Front | b | |
| ||
View |
| |
Rear | a | |
b | ||
|
4 | c | b |
| a |
|
20
