SECTION 2: ASSEMBLING THE TILLER
NOTE: All references to the RIGHT or LEFT side of the tiller are observed from operator’s position.
Tools Needed for Assembly
• | 9/16” Wrench | (Handle Mount Bracket) |
•7/16” Wrench or Nutdriver (Control Box)
• | Two 1/2” Wrenches | (Threaded Cable Adjuster) |
• | Phillips Screwdriver | (Control Box) |
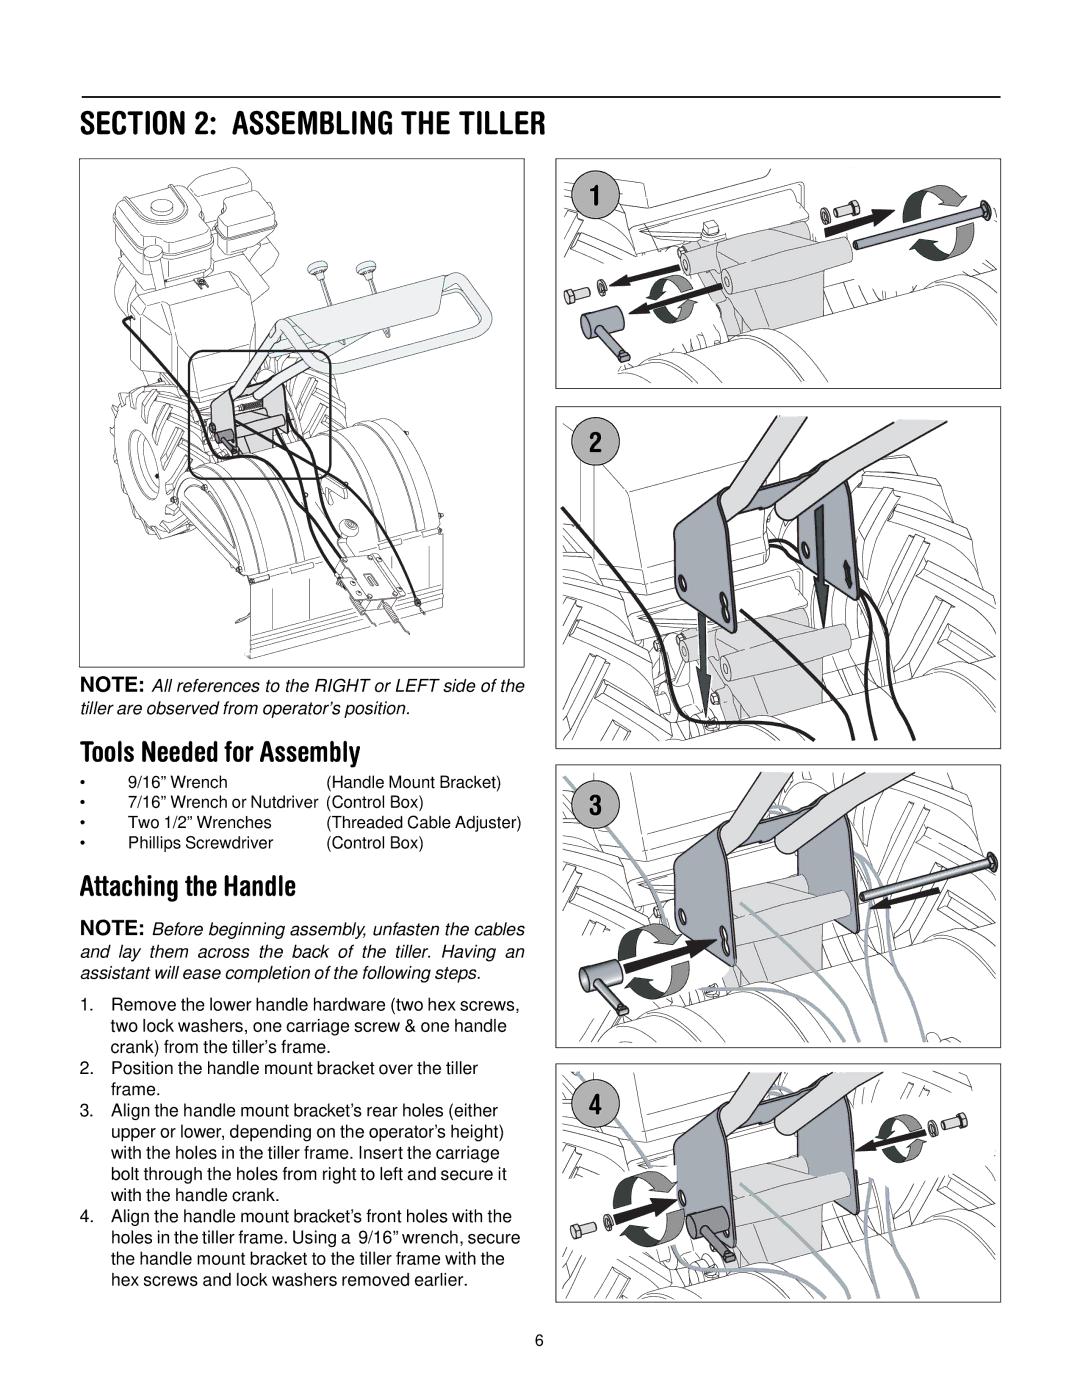
Attaching the Handle
NOTE: Before beginning assembly, unfasten the cables and lay them across the back of the tiller. Having an assistant will ease completion of the following steps.
1.Remove the lower handle hardware (two hex screws, two lock washers, one carriage screw & one handle crank) from the tiller’s frame.
2.Position the handle mount bracket over the tiller frame.
3.Align the handle mount bracket’s rear holes (either upper or lower, depending on the operator’s height) with the holes in the tiller frame. Insert the carriage bolt through the holes from right to left and secure it with the handle crank.
4.Align the handle mount bracket’s front holes with the holes in the tiller frame. Using a 9/16” wrench, secure the handle mount bracket to the tiller frame with the hex screws and lock washers removed earlier.
1 |
2 |
3 |
4 |
6