IEEE 802.11g PCI Card Wireless Network Adapter
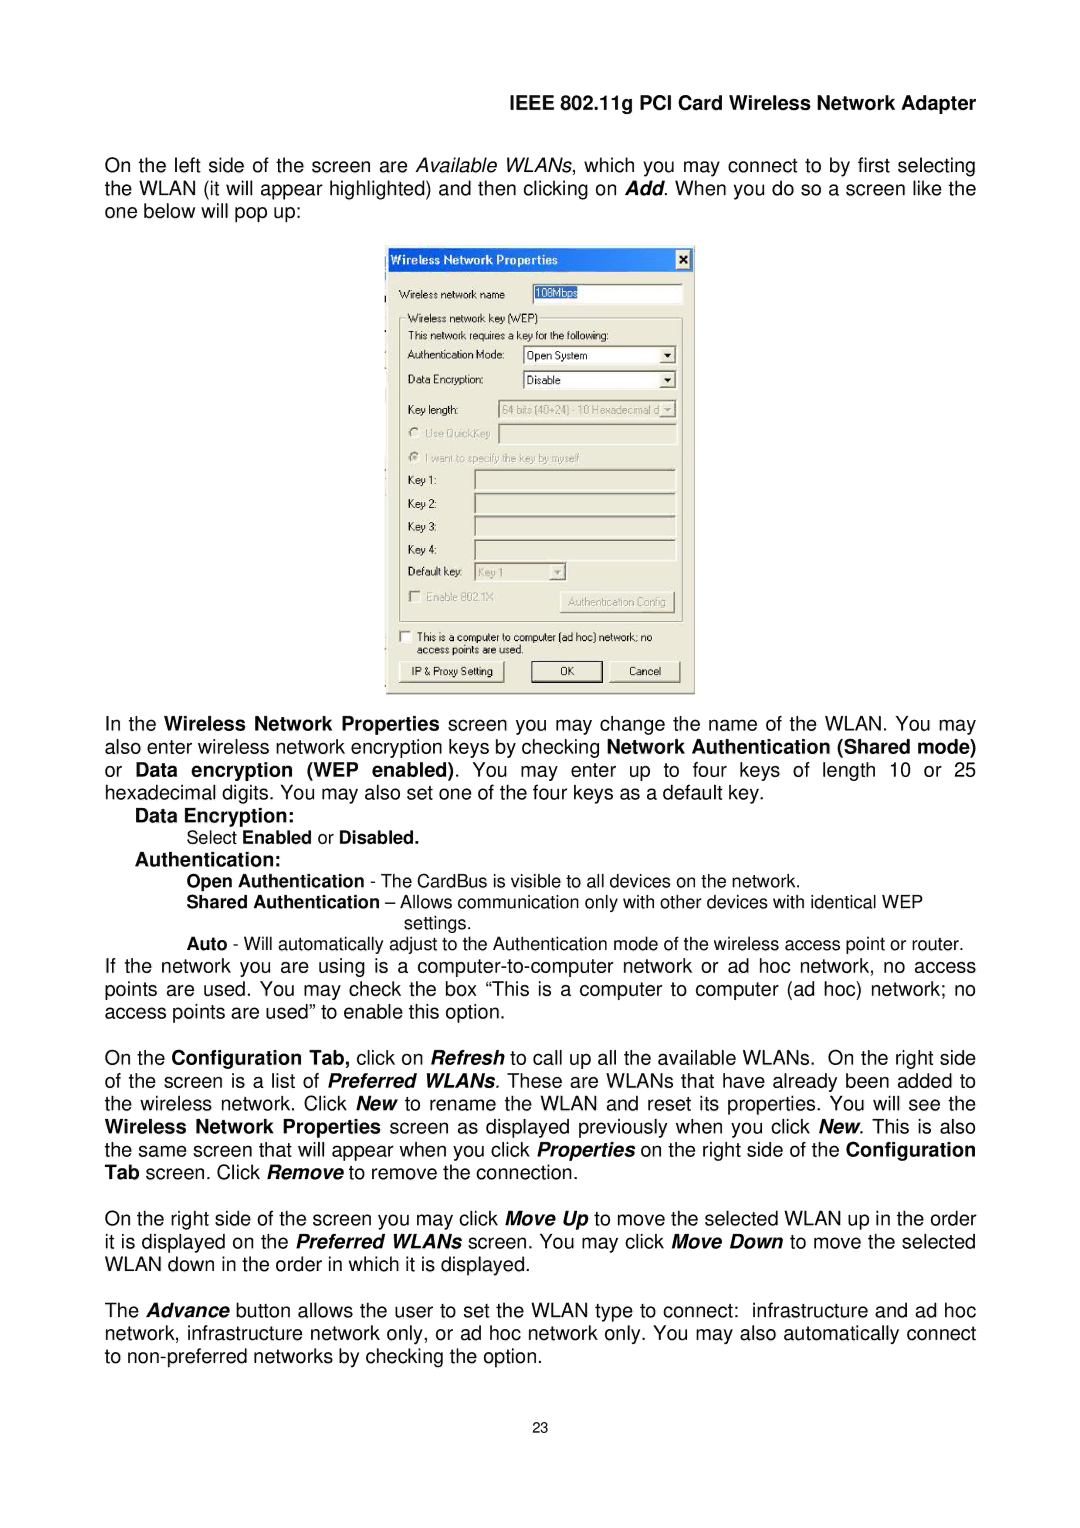
On the left side of the screen are Available WLANs, which you may connect to by first selecting the WLAN (it will appear highlighted) and then clicking on Add. When you do so a screen like the one below will pop up:
In the Wireless Network Properties screen you may change the name of the WLAN. You may also enter wireless network encryption keys by checking Network Authentication (Shared mode) or Data encryption (WEP enabled). You may enter up to four keys of length 10 or 25 hexadecimal digits. You may also set one of the four keys as a default key.
Data Encryption:
Select Enabled or Disabled.
Authentication:
Open Authentication - The CardBus is visible to all devices on the network.
Shared Authentication – Allows communication only with other devices with identical WEP settings.
Auto - Will automatically adjust to the Authentication mode of the wireless access point or router.
If the network you are using is a
On the Configuration Tab, click on Refresh to call up all the available WLANs. On the right side of the screen is a list of Preferred WLANs. These are WLANs that have already been added to the wireless network. Click New to rename the WLAN and reset its properties. You will see the Wireless Network Properties screen as displayed previously when you click New. This is also the same screen that will appear when you click Properties on the right side of the Configuration Tab screen. Click Remove to remove the connection.
On the right side of the screen you may click Move Up to move the selected WLAN up in the order it is displayed on the Preferred WLANs screen. You may click Move Down to move the selected WLAN down in the order in which it is displayed.
The Advance button allows the user to set the WLAN type to connect: infrastructure and ad hoc network, infrastructure network only, or ad hoc network only. You may also automatically connect to
23
