12 Install
Leveling Information
ADA15IM & BI2115
It is recommended that the unit is level.
1. Use a level to check the levelness of the unit from front to back and from side to side. Level should be placed along top edge and side edge as shown
2. If the unit is not level, adjust |
|
the feet on the corners of | 1 |
the unit as necessary (not |
|
available in all models).
Turn Foot to Adjust
3.Check the levelness after each adjustment and repeat the previous steps until the unit is level.
INSTALLATION TIP
If the room floor is higher than the floor in the
All Other Models
IMPORTANT
It is extremely important that these units sit on a level surface, as they do not have feet levelers. If they are not level, the ice mold will not fill evenly.
Use a level to check the levelness of the unit from front to back and from side to side. Level should be placed along top edge and side edge as shown.
1
Installation
1.Open the water supply valve in the main water source.
2.Plug in the powercord.
3.Gently push the unit into position. Be careful not to kink the water supply line or entangle the electrical cord.
4.
Grille Installation
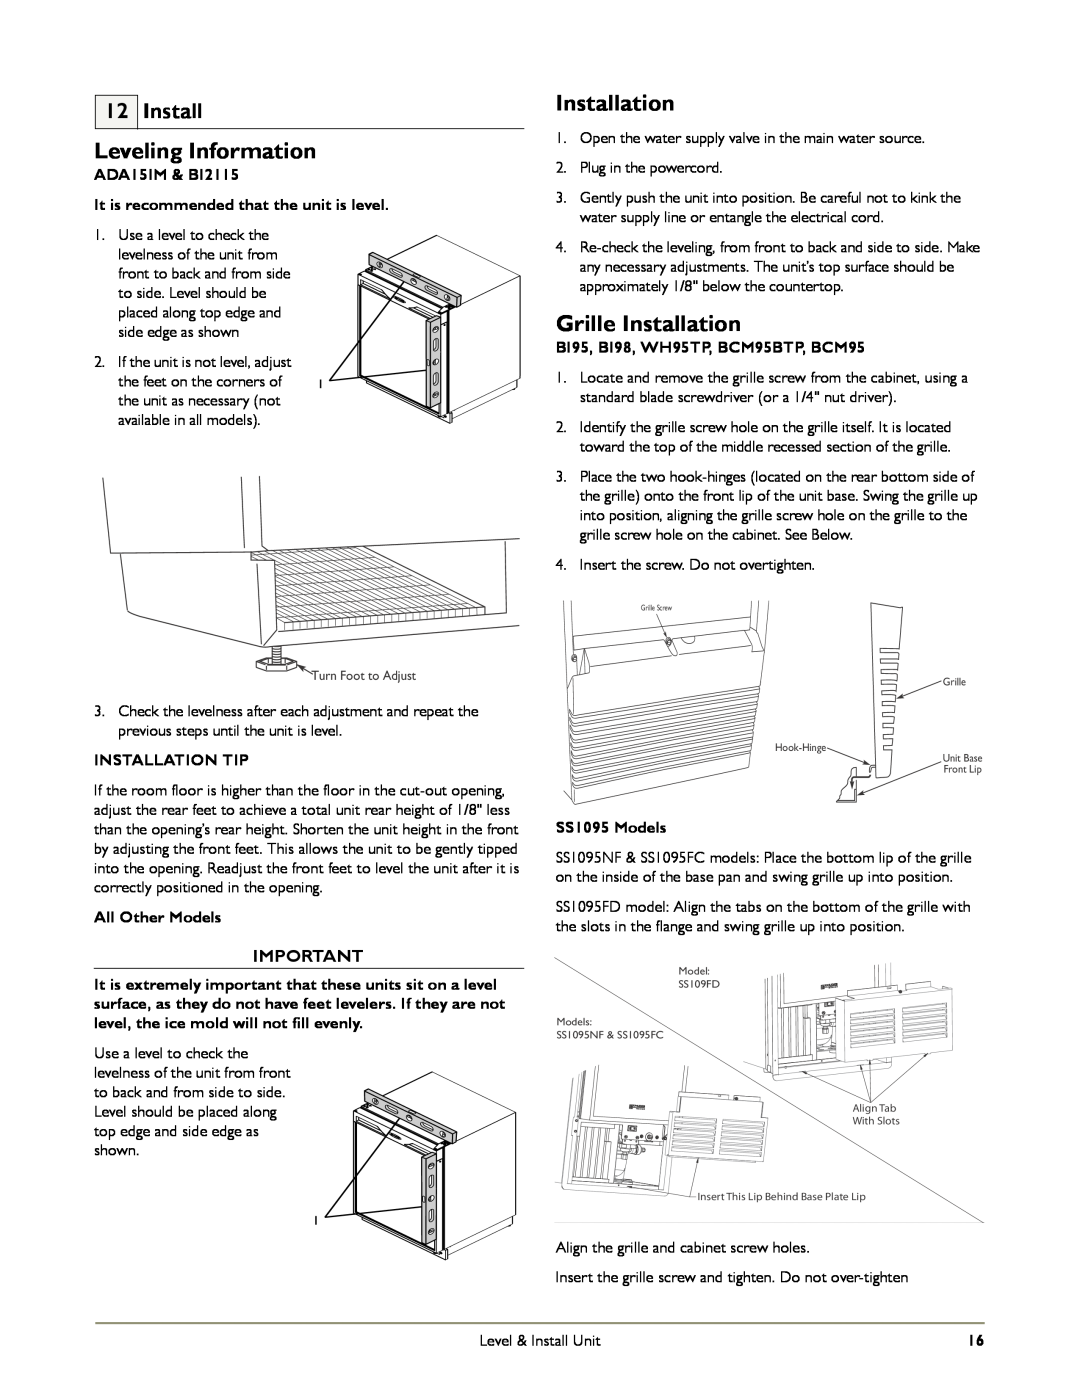
BI95, BI98, WH95TP, BCM95BTP, BCM95
1.Locate and remove the grille screw from the cabinet, using a standard blade screwdriver (or a 1/4" nut driver).
2.Identify the grille screw hole on the grille itself. It is located toward the top of the middle recessed section of the grille.
3.Place the two
4.Insert the screw. Do not overtighten.
Grille Screw
![]() Grille
Grille
Unit Base
Front Lip
SS1095 Models
SS1095NF & SS1095FC models: Place the bottom lip of the grille on the inside of the base pan and swing grille up into position.
SS1095FD model: Align the tabs on the bottom of the grille with the slots in the flange and swing grille up into position.
Model:
SS109FD
Models:
SS1095NF & SS1095FC
Align Tab
With Slots
![]()
![]() Insert This Lip Behind Base Plate Lip
Insert This Lip Behind Base Plate Lip
Align the grille and cabinet screw holes.
Insert the grille screw and tighten. Do not
Level & Install Unit | 16 |