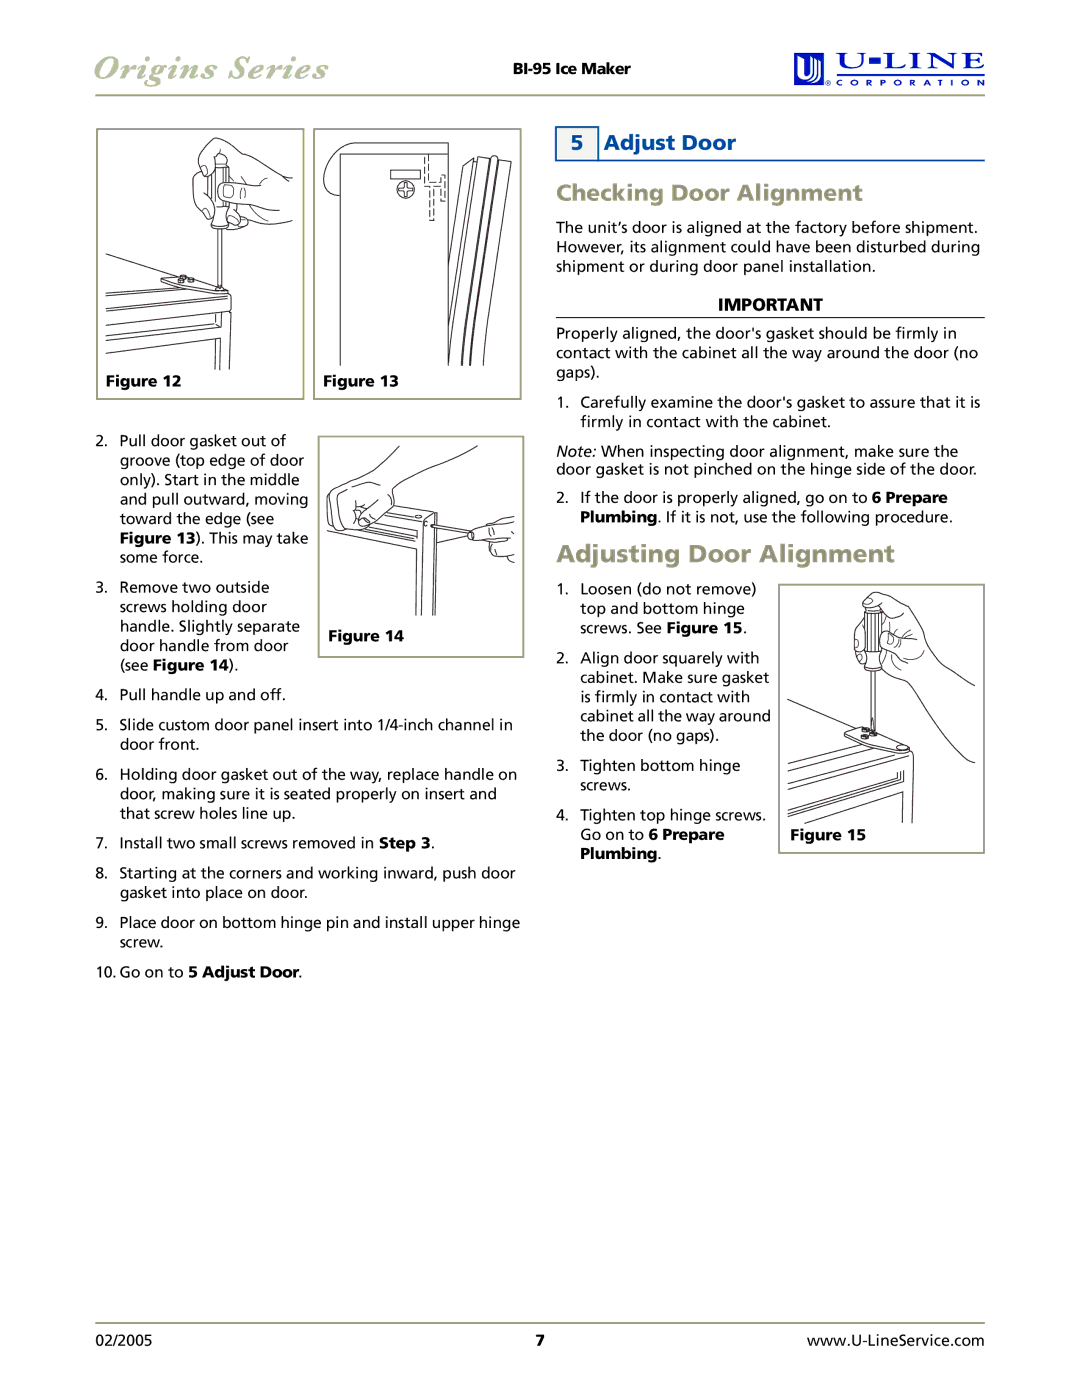
Figure 12 | Figure 13 |
2. Pull door gasket out of |
| |
groove (top edge of door |
| |
only). Start in the middle |
| |
and pull outward, moving |
| |
toward the edge (see |
| |
Figure 13). This may take |
| |
some force. |
| |
3. Remove two outside |
| |
screws holding door |
| |
handle. Slightly separate | Figure 14 | |
door handle from door | ||
| ||
(see Figure 14). |
|
4.Pull handle up and off.
5.Slide custom door panel insert into
6.Holding door gasket out of the way, replace handle on door, making sure it is seated properly on insert and that screw holes line up.
7.Install two small screws removed in Step 3.
8.Starting at the corners and working inward, push door gasket into place on door.
9.Place door on bottom hinge pin and install upper hinge screw.
10.Go on to 5 Adjust Door.
5 Adjust Door
Checking Door Alignment
The unit’s door is aligned at the factory before shipment. However, its alignment could have been disturbed during shipment or during door panel installation.
IMPORTANT
Properly aligned, the door's gasket should be firmly in contact with the cabinet all the way around the door (no gaps).
1.Carefully examine the door's gasket to assure that it is firmly in contact with the cabinet.
Note: When inspecting door alignment, make sure the door gasket is not pinched on the hinge side of the door.
2.If the door is properly aligned, go on to 6 Prepare Plumbing. If it is not, use the following procedure.
Adjusting Door Alignment
1.Loosen (do not remove) top and bottom hinge
screws. See Figure 15.
2. Align door squarely with cabinet. Make sure gasket is firmly in contact with cabinet all the way around the door (no gaps).
3.Tighten bottom hinge screws.
4.Tighten top hinge screws.
Go on to 6 Prepare | Figure 15 |
Plumbing. |
|
|
02/2005 | 7 |