Using the TV Features |
|
|
| |
Channel Name Setting |
|
|
| |
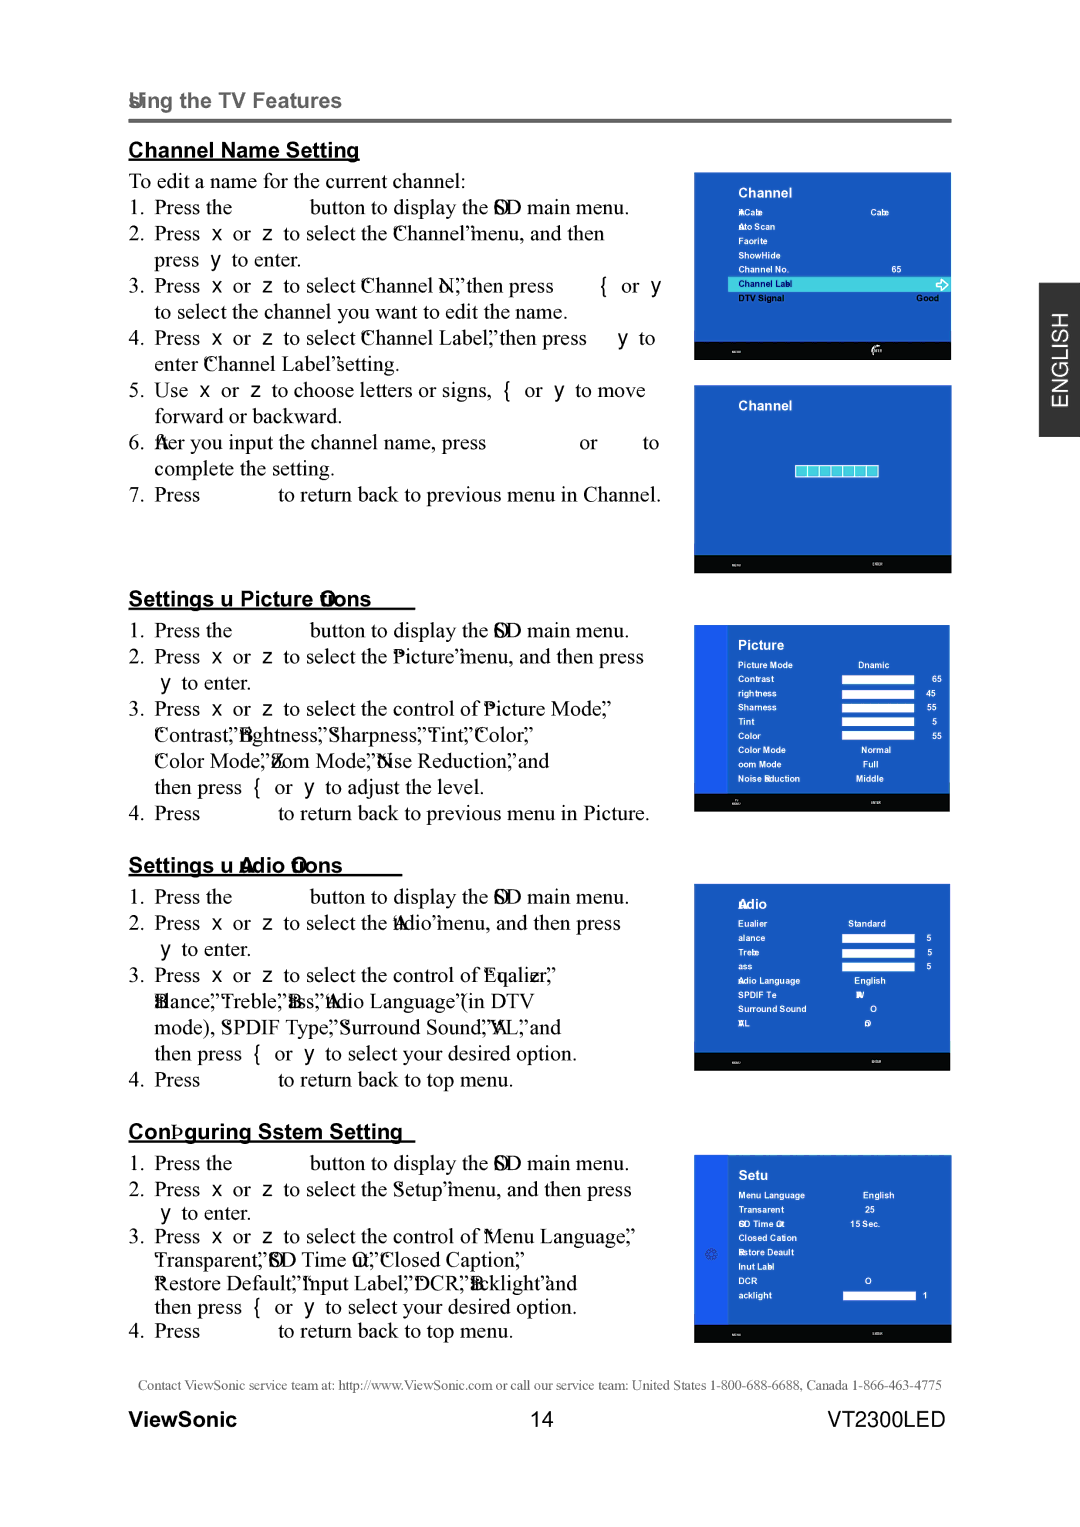
To edit a name for the current channel: |
|
|
| |
| Channel |
| ||
1. | Press the MENU button to display the OSD main menu. |
|
| |
| Air/Cable | Cable | ||
2. | Press ▲ or ▼ to select the “Channel” menu, and then |
| Favorite |
|
| press ► to enter. |
| Auto Scan |
|
|
| Channel No. | 65 | |
|
|
| Show/Hide |
|
3. | Press ▲ or ▼ to select “Channel No.”, then press ◄ or ► |
|
|
|
| Channel Label |
| ||
| to select the channel you want to edit the name. |
| DTV Signal | Good |
|
|
|
| |
4. | Press ▲ or ▼ to select “Channel Label”, then press ► to |
|
|
|
|
| ENTER | ||
| enter “Channel Label” setting. |
| MENU | |
|
|
|
| |
|
|
|
| |
5. | Use ▲ or ▼ to choose letters or signs, ◄ or ► to move |
| Channel |
|
| forward or backward. |
|
| |
|
|
|
| |
6. After you input the channel name, press MENU or OK to complete the setting.
7. Press MENU to return back to previous menu in Channel.
ENGLISH
Settings up Picture Options
1.Press the MENU button to display the OSD main menu.
2.Press ▲ or ▼ to select the “Picture” menu, and then press ► to enter.
3.Press ▲ or ▼ to select the control of “Picture Mode”, “Contrast”, “Brightness”, “Sharpness”, “Tint”, “Color”,
“Color Mode”, “Zoom Mode”, “Noise Reduction”, and then press ◄ or ► to adjust the level.
4.Press MENU to return back to previous menu in Picture.
Settings up Audio Options
1.Press the MENU button to display the OSD main menu.
2.Press ▲ or ▼ to select the “Audio” menu, and then press ► to enter.
3.Press ▲ or ▼ to select the control of “Equalizer”, “Balance”, “Treble”, “Bass”, “Audio Language” (in DTV
mode), “SPDIF Type”, “Surround Sound”, “AVL”, and then press ◄ or ► to select your desired option.
4.Press MENU to return back to top menu.
Configuring System Setting
1.Press the MENU button to display the OSD main menu.
2.Press ▲ or ▼ to select the “Setup” menu, and then press ► to enter.
3.Press ▲ or ▼ to select the control of “Menu Language”, “Transparent”, “OSD Time Out”, “Closed Caption”, “Restore Default”, “Input Label”, “DCR”, “Backlight” and then press ◄ or ► to select your desired option.
4.Press MENU to return back to top menu.
MENUENTER
Picture
Picture Mode | Dynamic | ||||
Contrast |
|
|
|
| 65 |
|
|
|
| ||
Brightness |
| 45 | |||
| |||||
Sharpness |
|
| 55 | ||
|
| ||||
Tint |
| 50 | |||
| |||||
Color |
| 55 | |||
| |||||
| |||||
Color Mode | Normal | ||||
Zoom Mode | Full | ||||
Noise Reduction | Middle | ||||
TV | ENTER | ||||
MENU | |||||
|
|
|
|
|
|
Audio
Equalizer | Standard |
|
Balance | | 50 |
Treble | | 50 |
Bass | | 50 |
Audio Language | English |
|
SPDIF Type | RAW |
|
Surround Sound | Off |
|
AVL | On |
|
|
|
|
MENU | ENTER |
|
|
|
|
Setup
Menu Language | English | |
Transparent | 25% |
|
OSD Time Out | 15 Sec. | |
Closed Caption |
|
|
Restore Default |
|
|
Input Label |
|
|
DCR | Off | |
Backlight |
| 100 |
| ||
|
|
|
MENU | ENTER | |
|
|
|
Contact ViewSonic service team at: http://www.ViewSonic.com or call our service team: United States
ViewSonic | 14 | VT2300LED |
