Hinge Adjustment
5
2
1![]()
![]()
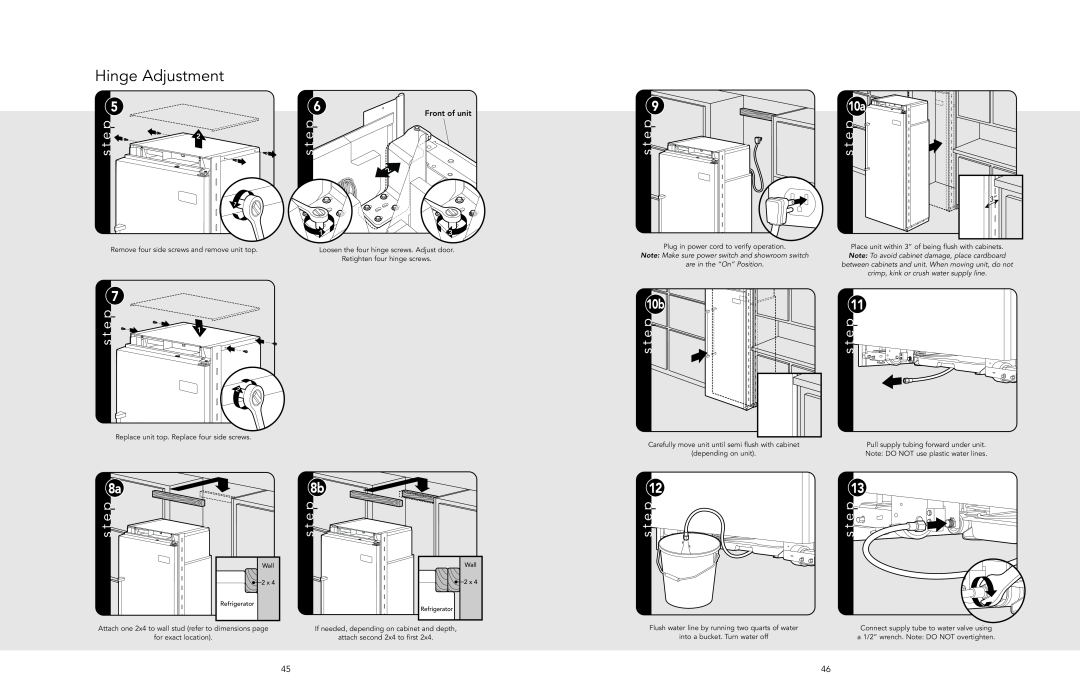
Remove four side screws and remove unit top.
7
1
2![]()
Replace unit top. Replace four side screws.
6
Front of unit
2
1 | 3 |
Loosen the four hinge screws. Adjust door.
Retighten four hinge screws.
9 | 10a |
3” |
Plug in power cord to verify operation. | Place unit within 3” of being flush with cabinets. |
Note: Make sure power switch and showroom switch | Note: To avoid cabinet damage, place cardboard |
are in the “On” Position. | between cabinets and unit. When moving unit, do not |
| crimp, kink or crush water supply line. |
10b | 11 |
Carefully move unit until semi flush with cabinet | Pull supply tubing forward under unit. |
(depending on unit). | Note: DO NOT use plastic water lines. |
8a
Wall |
2 x 4 |
Refrigerator |
Attach one 2x4 to wall stud (refer to dimensions page
for exact location).
8b
Wall |
2 x 4 |
Refrigerator |
If needed, depending on cabinet and depth,
attach second 2x4 to first 2x4.
1213
Flush water line by running two quarts of water | Connect supply tube to water valve using |
into a bucket. Turn water off | a 1/2” wrench. Note: DO NOT overtighten. |
45 | 46 |