VIVOTEK - A Leading Provider of Multimedia Communication Solutions
Source: Select the recording source (stream 1 or stream 2).
Recording Schedule: Specify the recording duration.
■Select the days on weekly basis.
■Select the time for recording in
Destination: Select the network storage you’ve just setup for the recorded video files.
Max. recording capacity: Please note that when the maximum capacity is reached, the oldest file will be overwritten by the latest one.
File size for each recording: Specify the file size for each recording media.
File name prefix: Enter the text that will be put in front of the file name.
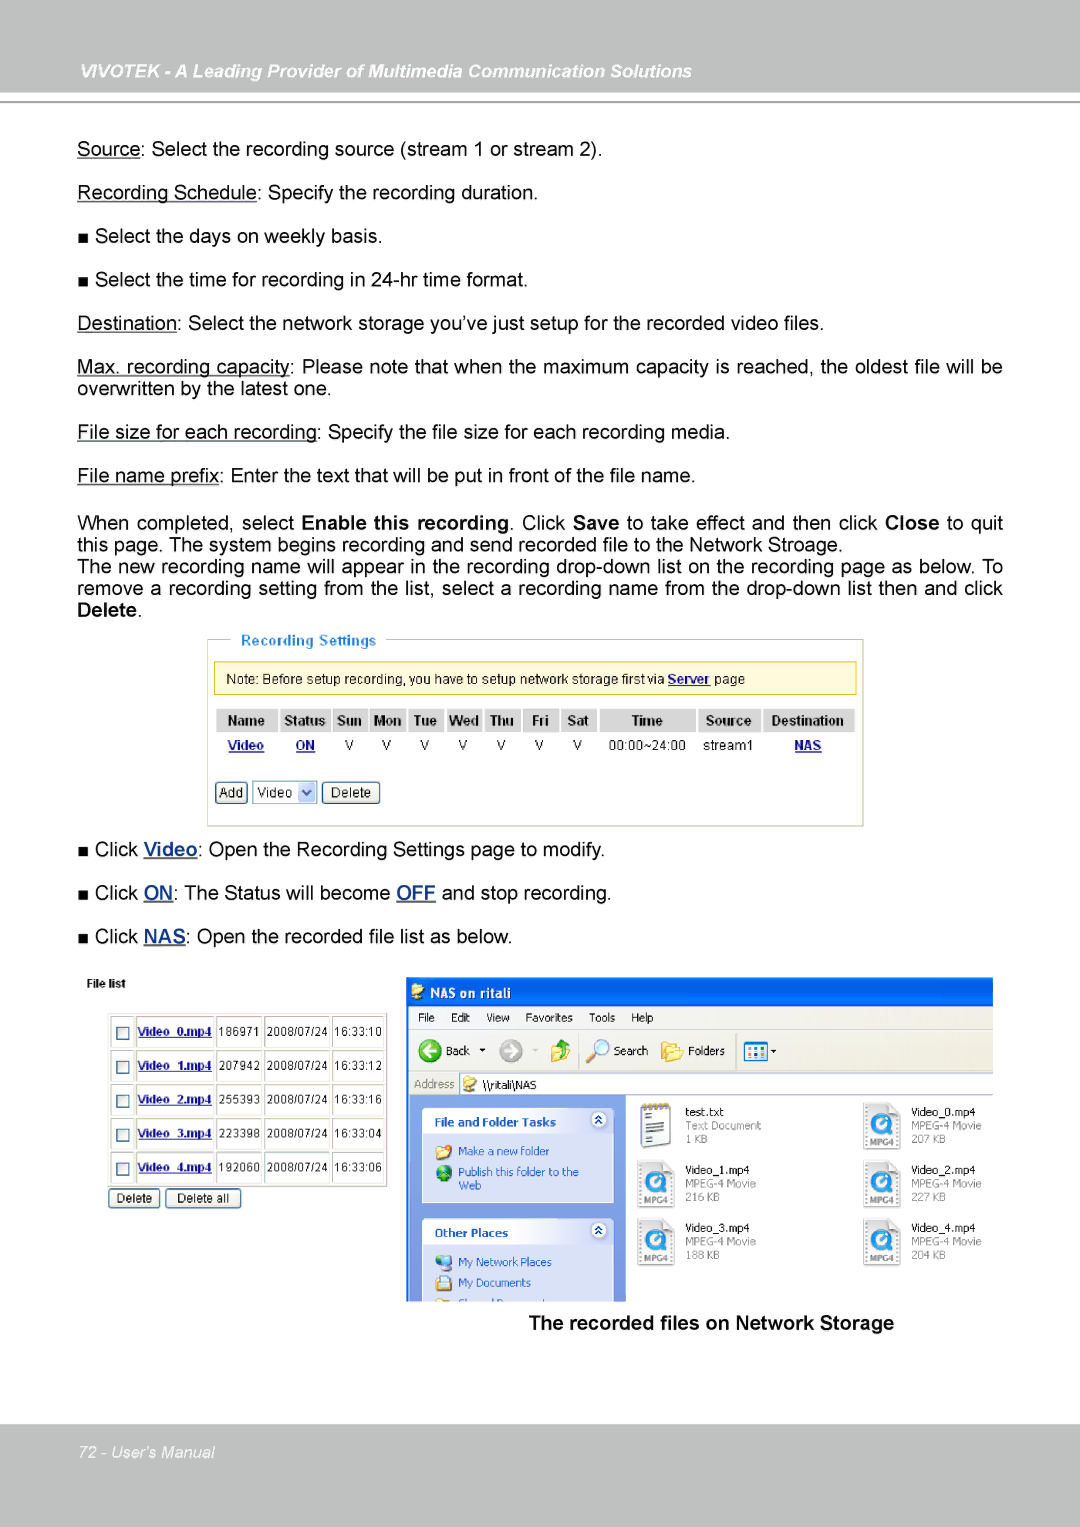
When completed, select Enable this recording. Click Save to take effect and then click Close to quit this page. The system begins recording and send recorded file to the Network Stroage.
The new recording name will appear in the recording
■Click Video: Open the Recording Settings page to modify.
■Click ON: The Status will become OFF and stop recording.
■Click NAS: Open the recorded file list as below.
The recorded files on Network Storage
72 - User's Manual
