Using Your
Everyday Steam Mop
ADDING WATER
1.Make sure On/Off Switch is set to “off” position (red Power Indicator Light will not be illuminated) and power cord is unplugged.
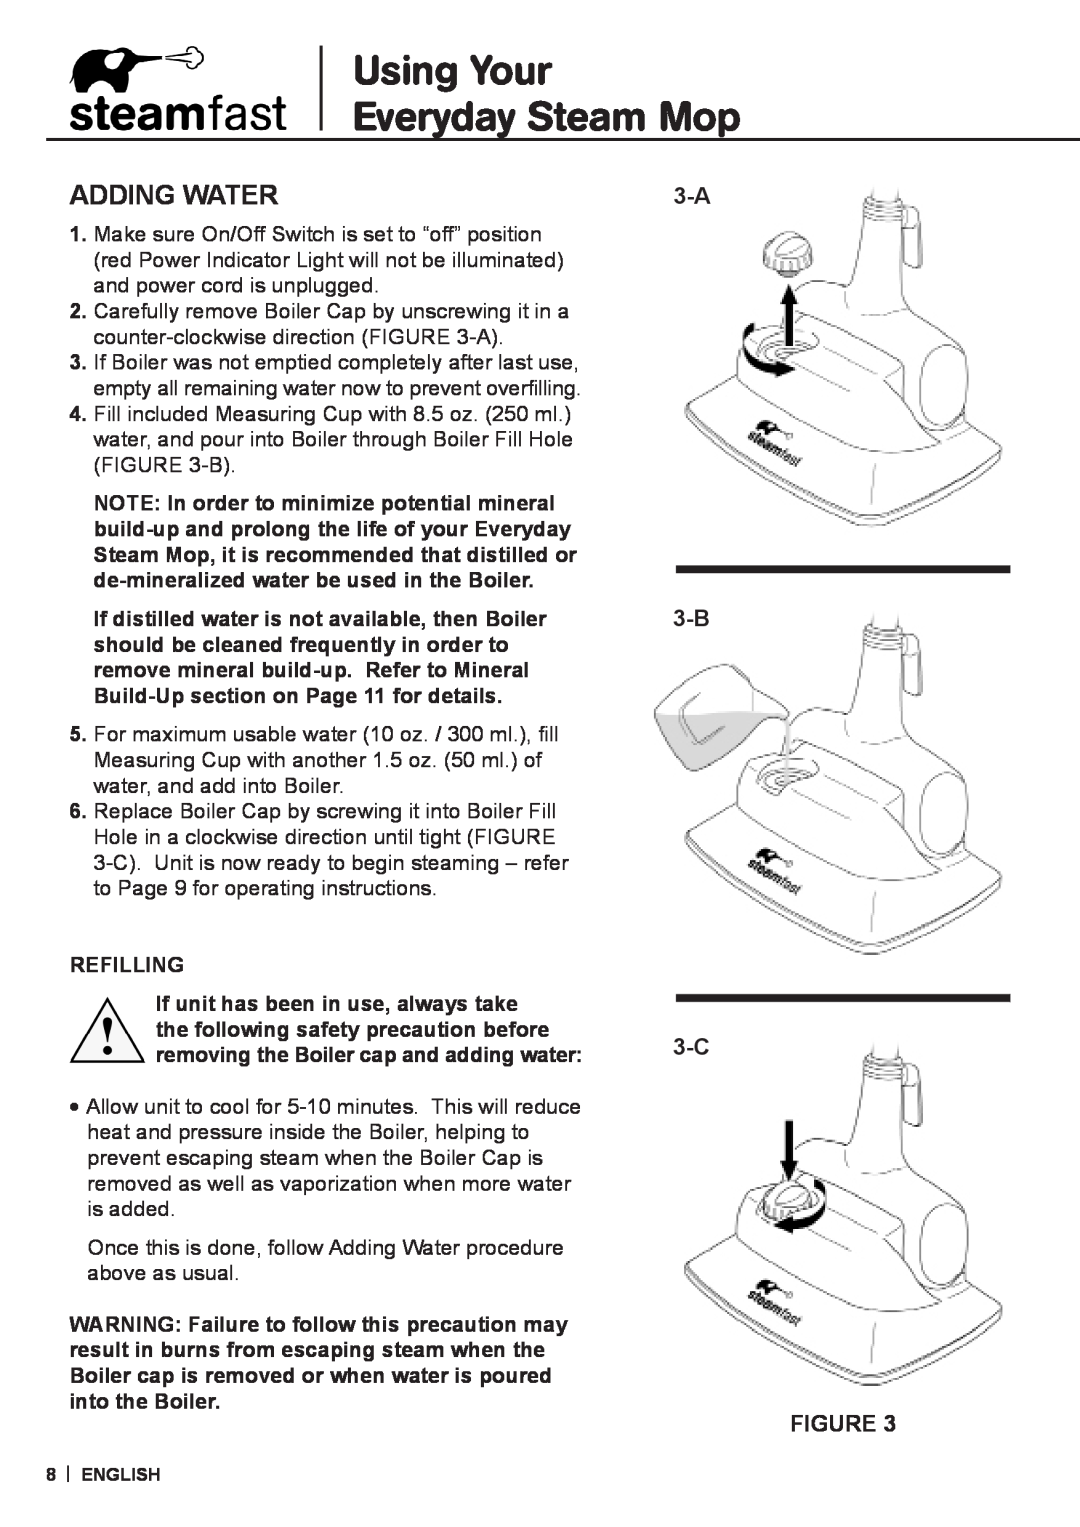
2.Carefully remove Boiler Cap by unscrewing it in a
3.If Boiler was not emptied completely after last use, empty all remaining water now to prevent overfilling.
4.Fill included Measuring Cup with 8.5 oz. (250 ml.) water, and pour into Boiler through Boiler Fill Hole (FIGURE
NOTE: In order to minimize potential mineral
If distilled water is not available, then Boiler should be cleaned frequently in order to remove mineral
5.For maximum usable water (10 oz. / 300 ml.), fill Measuring Cup with another 1.5 oz. (50 ml.) of water, and add into Boiler.
6.Replace Boiler Cap by screwing it into Boiler Fill Hole in a clockwise direction until tight (FIGURE
REFILLING
If unit has been in use, always take the following safety precaution before removing the Boiler cap and adding water:
•Allow unit to cool for
Once this is done, follow Adding Water procedure above as usual.
WARNING: Failure to follow this precaution may result in burns from escaping steam when the Boiler cap is removed or when water is poured into the Boiler.
3-A
FIGURE 3
8 ENGLISH