| Wall Mounting | Started |
|
| |
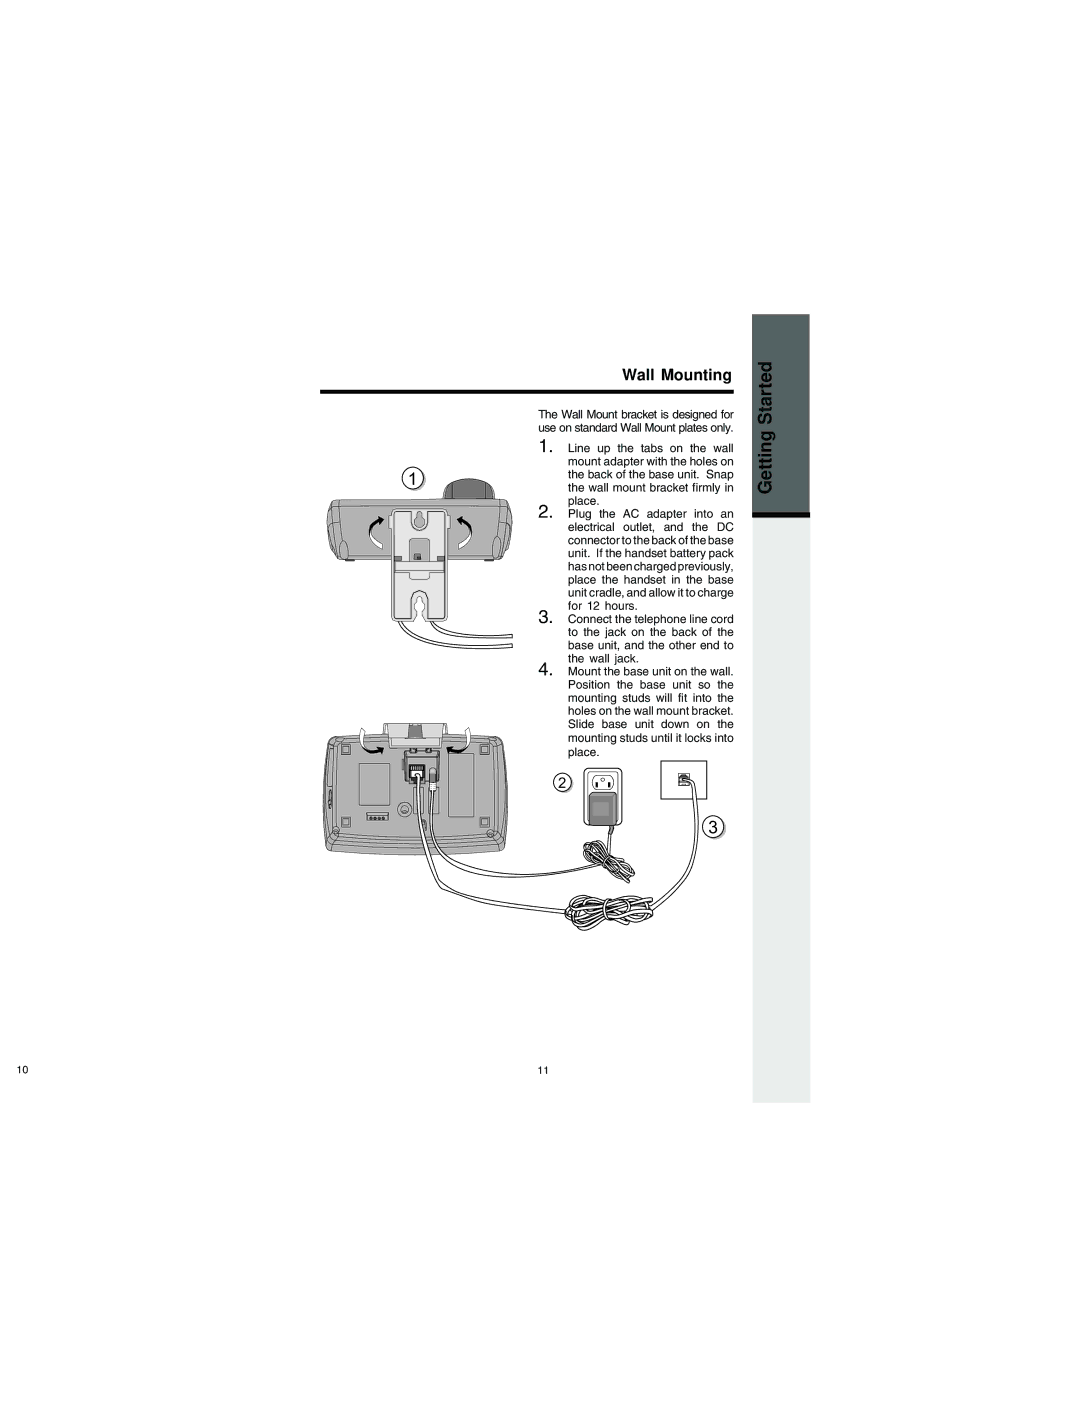
The Wall Mount bracket is designed for |
| |
use on standard Wall Mount plates only. | Getting | |
1 | the wall mount bracket firmly in | |
1. | Line up the tabs on the wall |
|
| mount adapter with the holes on |
|
| the back of the base unit. Snap |
|
2. | place. |
|
Plug the AC adapter into an |
| |
| electrical outlet, and the DC |
|
| connector to the back of the base |
|
| unit. If the handset battery pack |
|
| has not been charged previously, |
|
| place the handset in the base |
|
| unit cradle, and allow it to charge |
|
3. | for 12 hours. |
|
Connect the telephone line cord |
| |
| to the jack on the back of the |
|
| base unit, and the other end to |
|
4. | the wall jack. |
|
Mount the base unit on the wall. |
| |
| Position the base unit so the |
|
| mounting studs will fit into the |
|
| holes on the wall mount bracket. |
|
| Slide base unit down on the |
|
| mounting studs until it locks into |
|
| place. |
|
2
3
10 | 11 |