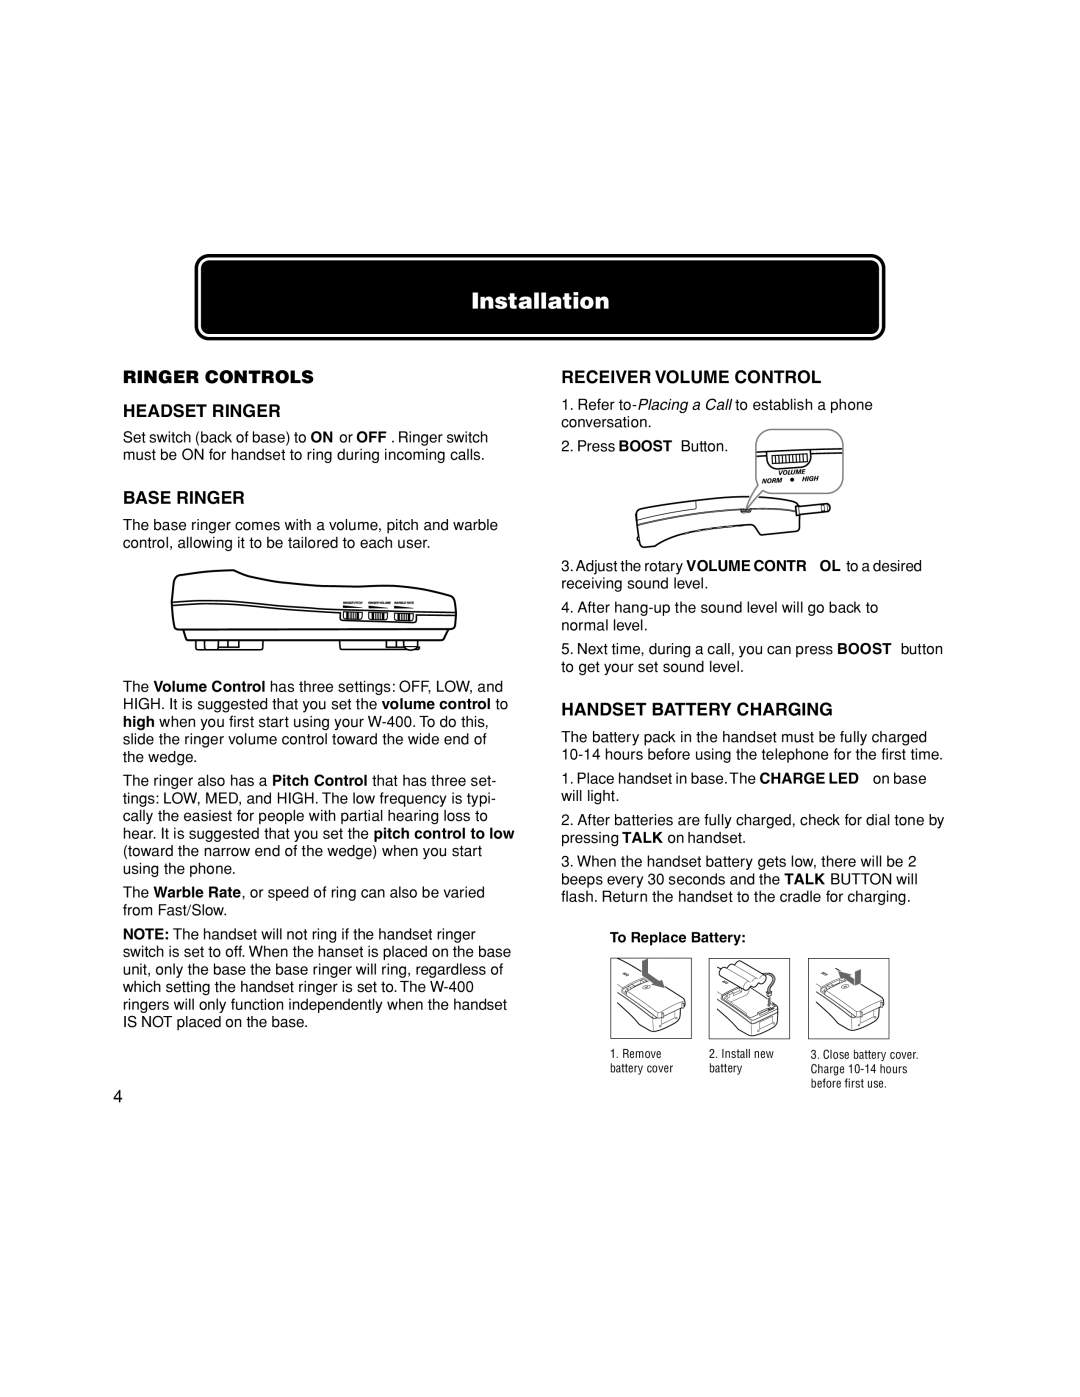
W-400 specifications
The Walker W-400 is a highly regarded utility vehicle known for its versatility and robust performance across various applications. This machine has gained popularity among landscaping professionals, golf course maintenance teams, and municipalities due to its efficient operation and ease of use.One of the main features of the Walker W-400 is its powerful engine. Equipped with a reliable engine, it delivers impressive torque and horsepower, enabling operators to tackle a variety of tasks with efficiency. This power is complemented by its hydrostatic transmission, which provides seamless speed control and smooth operation. The combination of these mechanics allows for precise maneuverability, essential for navigating tight spaces and delicate environments.
The W-400 is designed with an emphasis on productivity. Its high-capacity mowing decks can be swapped out quickly, allowing operators to switch between various attachments such as mulching blades or bagging systems. This feature is particularly useful for landscape professionals who require a multifunctional machine that can adapt to different seasonal demands. Furthermore, the integrated zero-turn steering capability enhances its agility, facilitating effortless navigation around obstacles.
Durability is another key characteristic of the Walker W-400. The use of high-quality materials and construction techniques ensures that this utility vehicle can withstand the rigors of daily use. Heavy-duty components and reinforced structures contribute to its long service life, making it a smart investment for businesses.
In terms of technology, the W-400 features advanced ergonomics that prioritize operator comfort. Its adjustable seat and intuitive control layout allow for extended periods of use without fatigue. Additionally, the integrated safety features, including roll-over protection and easy access to emergency controls, enhance operator confidence during operation.
The Walker W-400 also offers excellent serviceability. Accessible maintenance points and a straightforward design make routine maintenance tasks, such as oil changes and filter replacements, quick and hassle-free. This attention to ease of maintenance helps ensure that the vehicle remains in peak operating condition.
In conclusion, the Walker W-400 stands out for its powerful performance, versatility, and user-friendly design. It is a dependable choice for anyone looking to enhance their landscaping or maintenance capabilities. With its combination of efficiency, durability, and innovative technology, the Walker W-400 is well-suited for a broad range of applications, delivering exceptional results every time.