OPENING FORCE ADJUSTMENT
To determine that the opening force is not excessive, grasp the door handle or bottom edge during upward travel. If the opener does not stop or is hard to hold, decrease the open force setting. The opener should STOP without using exces- sive force.
To change the opening force follow the procedure listed below.
1.Operate the door to the fully closed position.
2.Press the PROGRAM SWITCH button three times. The STATUS LED and the overhead lamp will flash on and off. The blink rate which corresponds to the force setting will consist of 1 to 5 fast blinks follow with a long pause between blink sets.
3.The first time an attempt is made to increase the force, the setting will begin at the lightest setting (1 blink).
4.To increase the force, press and release the door up/down button on any control (The STATUS LED will remain lit during button press).
5.Continue to press and release the door button until the desired force setting is achieved.
6.Press the PROGRAM SWITCH once to confirm setting.
Adjustment # 2 Contact Obstruction Sensing (Closing Direction)
The opener is designed to automatically reverse the door during closing travel whenever it comes in contact with an object up to the last 1 inch of travel above the floor. An object on the floor with a height less than 1” will cause the door to stop. (Test according to instructions on Step 27.)
If opener reverses properly with a 1” high solid test object laid flat on garage floor (Step 27) and stops without the solid test object in the fully closed position, proceed to Adjustment # 3.
When door comes in contact with a 1” high solid test object laid flat on garage floor and stops instead of reversing, reset the door close limits according to instruction in Step 27, adjusting until door reverses upon contact with the 1” high solid test object.
If door reverses when it comes in contact with the floor, reset the door close limits according to instruction in Step 27.
Adjustment # 3 Positive Mechanical Door Lock
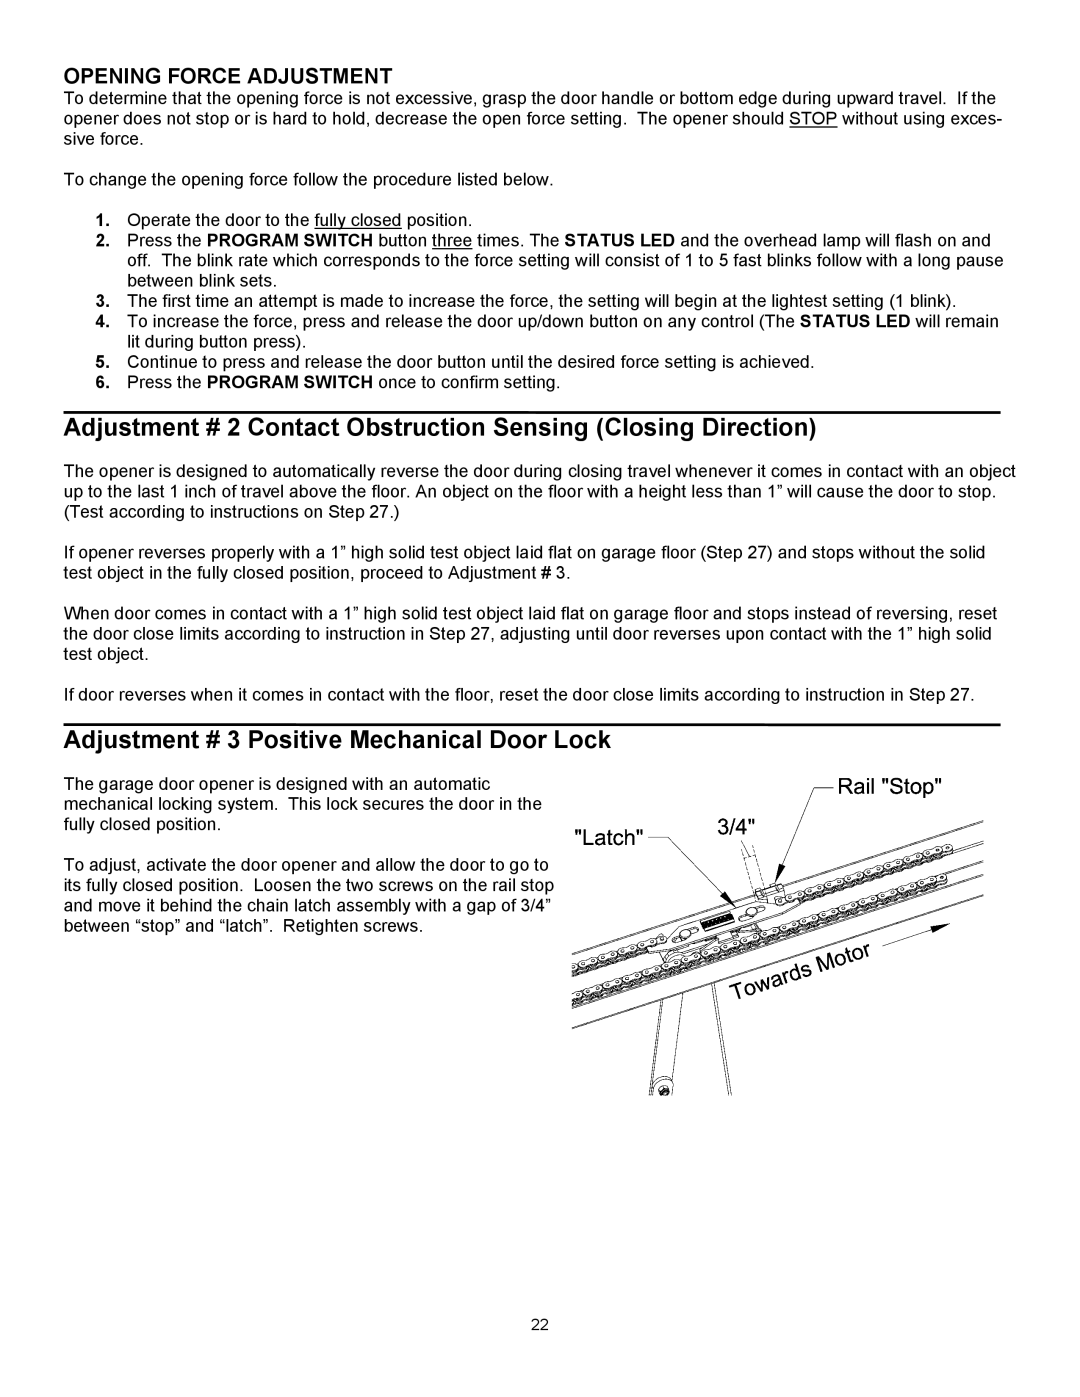
The garage door opener is designed with an automatic mechanical locking system. This lock secures the door in the fully closed position.
To adjust, activate the door opener and allow the door to go to its fully closed position. Loosen the two screws on the rail stop and move it behind the chain latch assembly with a gap of 3/4” between “stop” and “latch”. Retighten screws.
22