Step 9
Install igniter
Note - The igniter wires are already attached to the Gas Catcher Ignition Chamber and the igniter. This was done to factory test the ignition system.
The igniter lock nut is on the igniter.
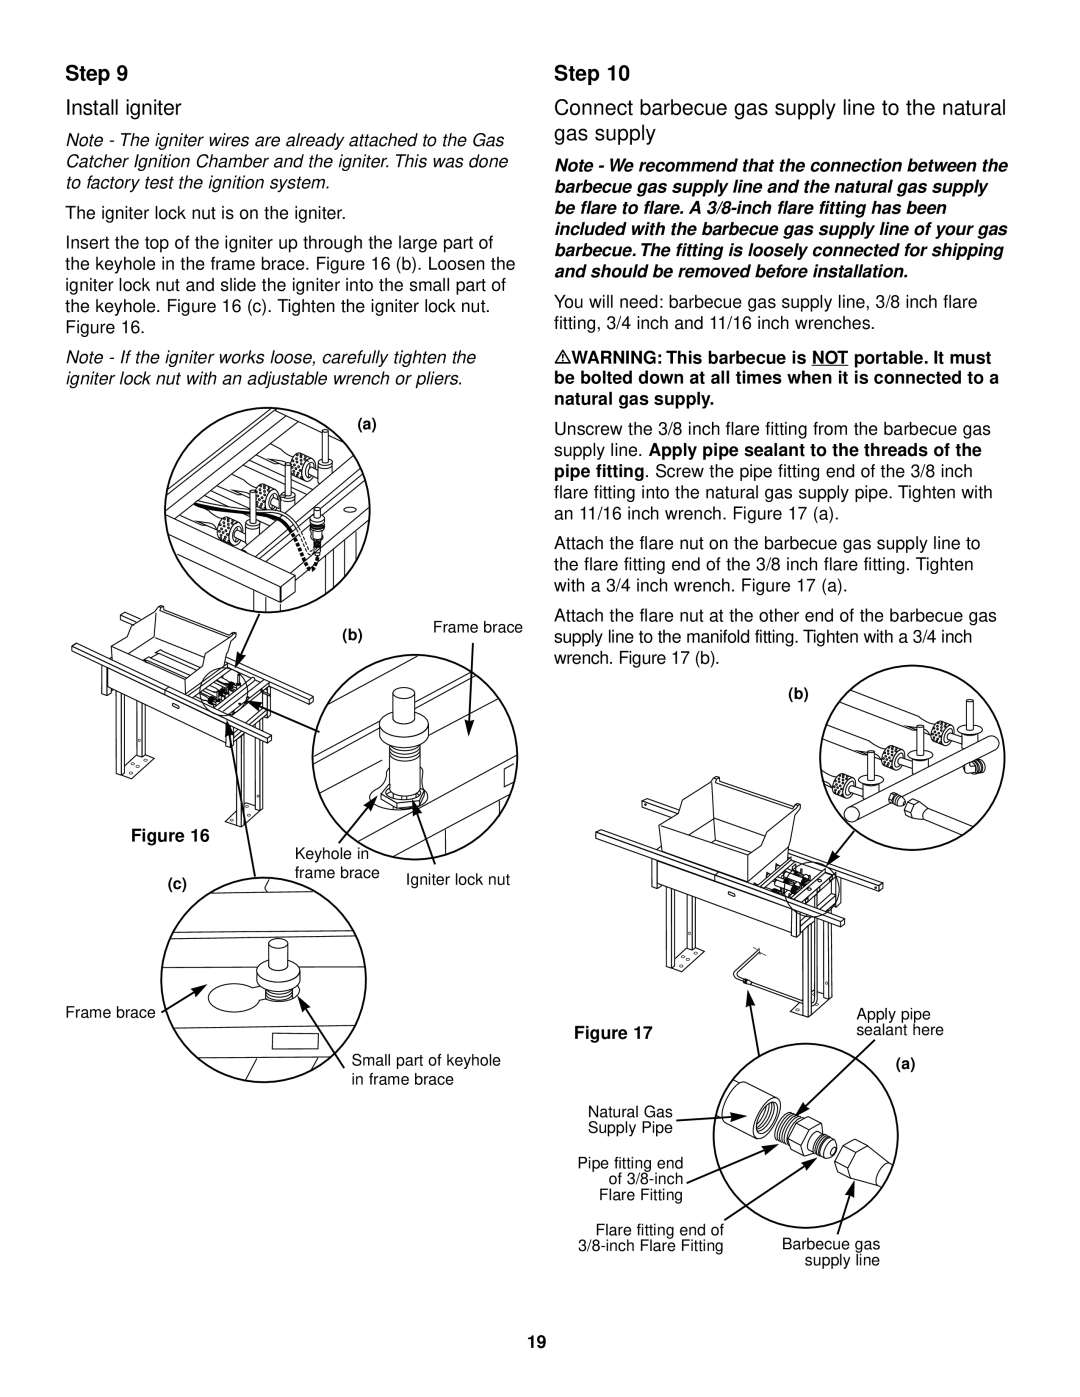
Insert the top of the igniter up through the large part of the keyhole in the frame brace. Figure 16 (b). Loosen the igniter lock nut and slide the igniter into the small part of the keyhole. Figure 16 (c). Tighten the igniter lock nut. Figure 16.
Note - If the igniter works loose, carefully tighten the igniter lock nut with an adjustable wrench or pliers.
(a)
(b) | Frame brace |
|
Figure 16 | Keyhole in |
|
|
| |
(c) | frame brace | Igniter lock nut |
|
Frame brace ![]()
Small part of keyhole in frame brace
Step 10
Connect barbecue gas supply line to the natural gas supply
Note - We recommend that the connection between the barbecue gas supply line and the natural gas supply be flare to flare. A
You will need: barbecue gas supply line, 3/8 inch flare fitting, 3/4 inch and 11/16 inch wrenches.
mWARNING: This barbecue is NOT portable. It must be bolted down at all times when it is connected to a natural gas supply.
Unscrew the 3/8 inch flare fitting from the barbecue gas supply line. Apply pipe sealant to the threads of the pipe fitting. Screw the pipe fitting end of the 3/8 inch flare fitting into the natural gas supply pipe. Tighten with an 11/16 inch wrench. Figure 17 (a).
Attach the flare nut on the barbecue gas supply line to the flare fitting end of the 3/8 inch flare fitting. Tighten with a 3/4 inch wrench. Figure 17 (a).
Attach the flare nut at the other end of the barbecue gas supply line to the manifold fitting. Tighten with a 3/4 inch wrench. Figure 17 (b).
(b)
| Apply pipe |
Figure 17 | sealant here |
| (a) |
Natural Gas
Supply Pipe
Pipe fitting end of
Flare fitting end of
19
