Manual Lighting
DANGER
Failure to open lid while igniting the barbecue, or not waiting 5 minutes to allow the gas to clear if the barbecue does not light, may result in an explosive
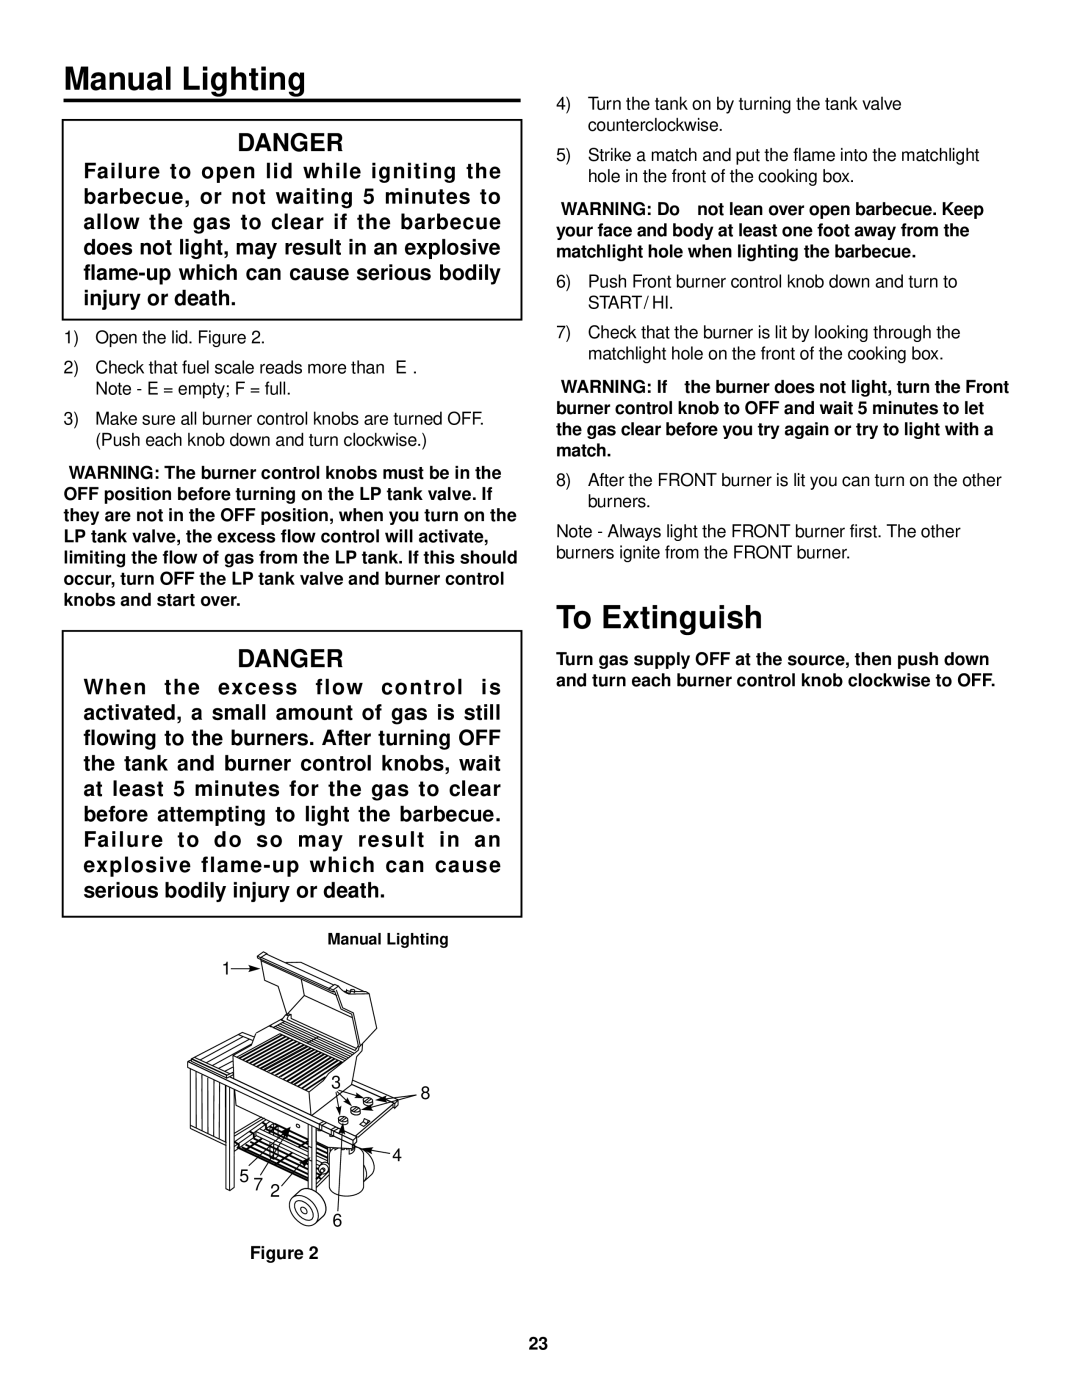
1)Open the lid. Figure 2.
2)Check that fuel scale reads more than “E”. Note - E = empty; F = full.
3)Make sure all burner control knobs are turned OFF. (Push each knob down and turn clockwise.)
WARNING: The burner control knobs must be in the OFF position before turning on the LP tank valve. If they are not in the OFF position, when you turn on the LP tank valve, the excess flow control will activate, limiting the flow of gas from the LP tank. If this should occur, turn OFF the LP tank valve and burner control knobs and start over.
DANGER
When the excess flow control is activated, a small amount of gas is still flowing to the burners. After turning OFF the tank and burner control knobs, wait at least 5 minutes for the gas to clear before attempting to light the barbecue. Failure to do so may result in an explosive
Manual Lighting
1
4)Turn the tank on by turning the tank valve counterclockwise.
5)Strike a match and put the flame into the matchlight hole in the front of the cooking box.
WARNING: Do not lean over open barbecue. Keep your face and body at least one foot away from the matchlight hole when lighting the barbecue.
6)Push Front burner control knob down and turn to START/ HI.
7)Check that the burner is lit by looking through the matchlight hole on the front of the cooking box.
WARNING: If the burner does not light, turn the Front burner control knob to OFF and wait 5 minutes to let the gas clear before you try again or try to light with a match.
8)After the FRONT burner is lit you can turn on the other burners.
Note - Always light the FRONT burner first. The other burners ignite from the FRONT burner.
To Extinguish
Turn gas supply OFF at the source, then push down and turn each burner control knob clockwise to OFF.
3
8
![]()
![]()
![]()
![]()
![]() 4 5 7 2
4 5 7 2![]()
![]()
6
Figure 2
23
