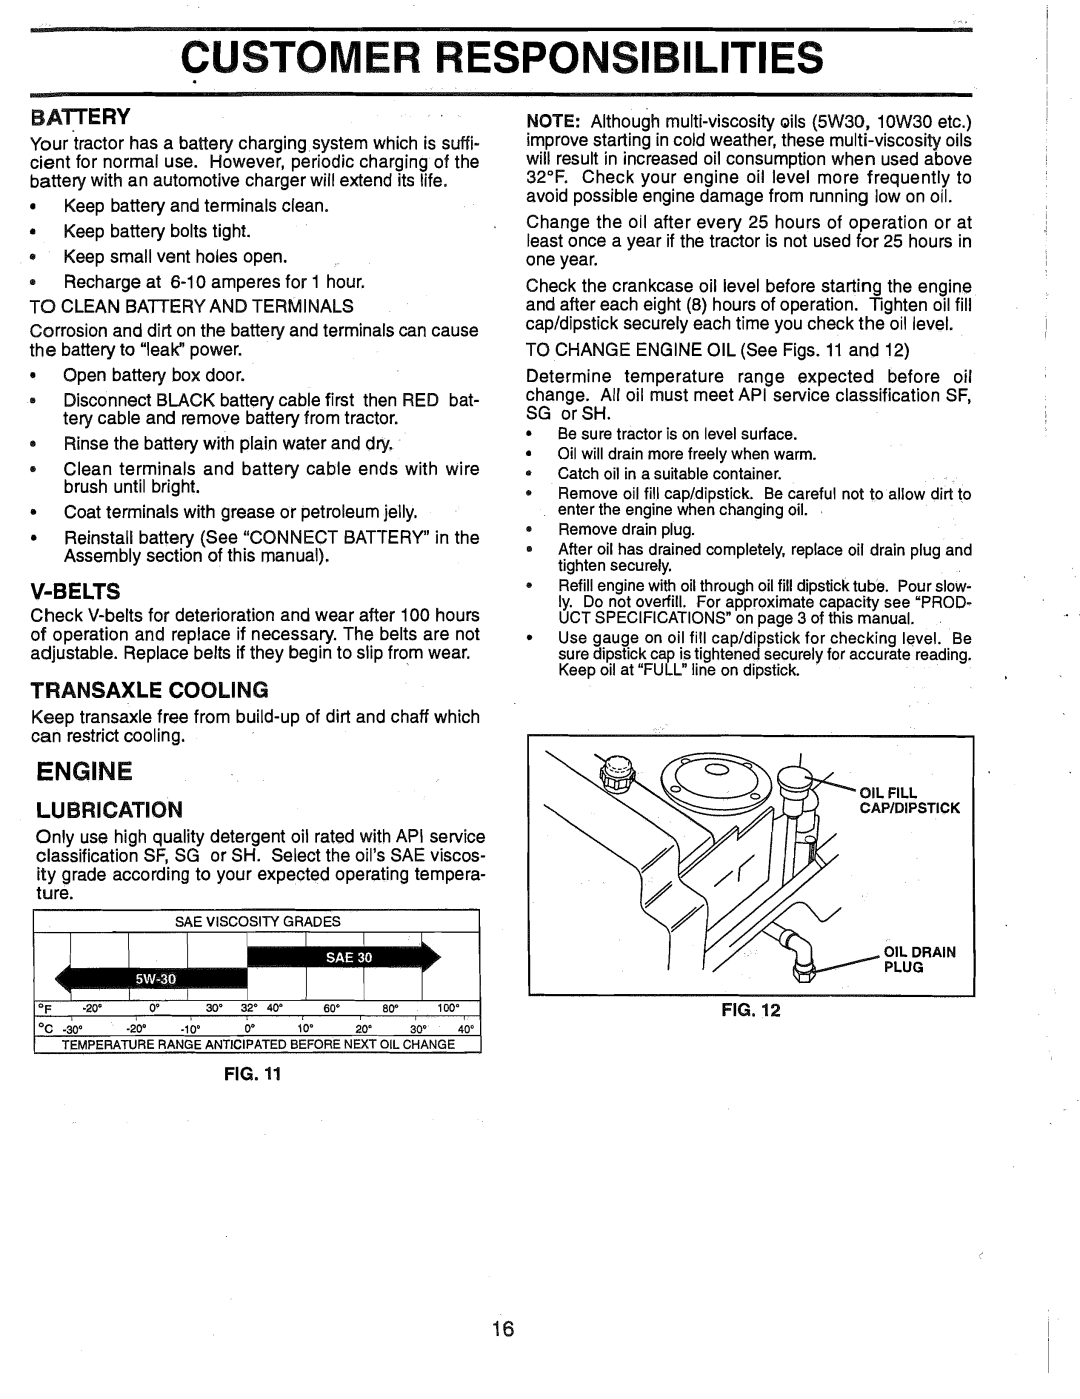
165412, HD12538G specifications
The Weed Eater HD12538G,165412 is a powerful and efficient string trimmer designed to tackle even the most challenging yard maintenance tasks. Built with homeowners and landscaping professionals in mind, this tool combines robust performance with user-friendly features, making it a popular choice among gardening enthusiasts.One of the standout features of the HD12538G is its potent 25cc 2-cycle engine. This engine is designed to provide ample power and torque, allowing users to trim grass, weeds, and overgrown vegetation with ease. Its lightweight construction enhances maneuverability, reducing fatigue during extended use and enabling users to navigate tight spaces or uneven terrain effortlessly.
Equipped with a flexible and durable dual-line head, the Weed Eater HD12538G efficiently delivers precise cutting action. The auto-feed spool technology automatically feeds the cutting line as needed, eliminating the hassle of manual adjustments and enabling users to maintain focus on their trimming tasks. The trimmer is also compatible with various line sizes, providing versatility to suit different cutting conditions.
In terms of design, the HD12538G features an ergonomic handle and a convenient shoulder strap, offering optimal comfort during operation. The adjustable handle allows for customizable height settings, catering to users of different statures and ensuring comfortable control whether trimming hedges or edging around sidewalks. This thoughtful design reduces strain on the arms and back, making yard work a less daunting task.
Another significant advantage of the Weed Eater HD12538G is its ease of use and straightforward assembly. Users can quickly set up the trimmer and be ready to go in no time, making it an ideal choice for those new to yard maintenance or those who are looking for a reliable tool without a steep learning curve.
In terms of technological advancements, the trimmer boasts a low-emission engine that adheres to environmental regulations. It enables users to maintain their gardens while minimizing their carbon footprint. This makes it not only a practical choice but also a responsible one for eco-conscious consumers.
Overall, the Weed Eater HD12538G,165412 stands out in the market for its powerful performance, ease of use, comfort features, and environmentally friendly design. Whether you're maintaining a small backyard or managing larger landscaping projects, this trimmer combines functionality with user-oriented design, setting a high standard for modern gardening tools.