CABLE DIAGRAM
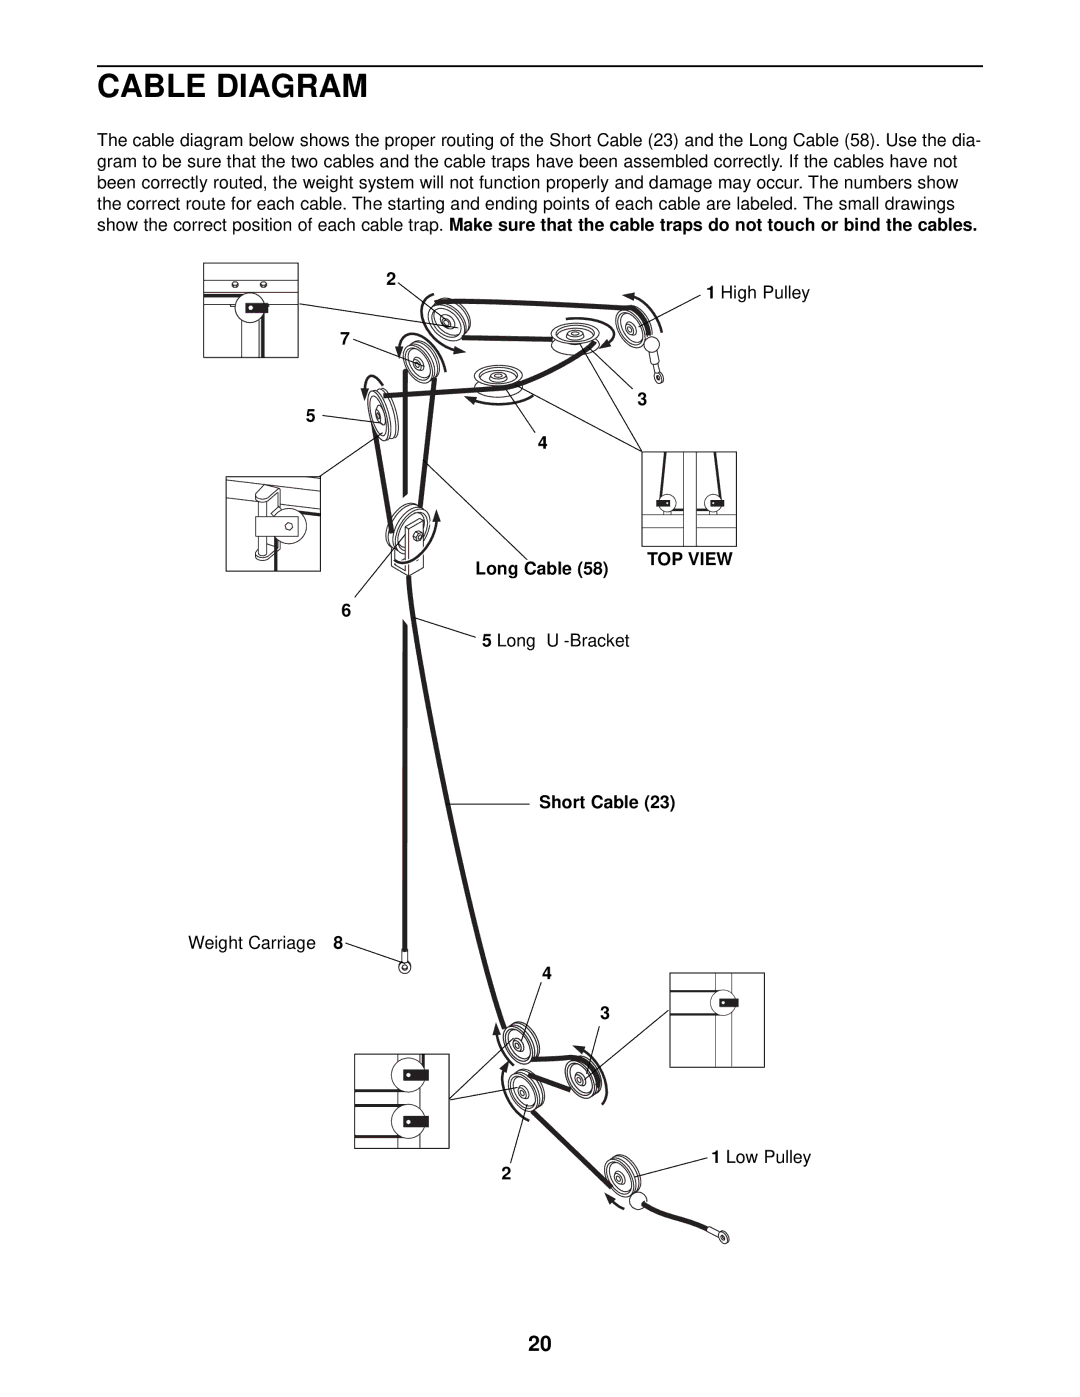
The cable diagram below shows the proper routing of the Short Cable (23) and the Long Cable (58). Use the dia- gram to be sure that the two cables and the cable traps have been assembled correctly. If the cables have not been correctly routed, the weight system will not function properly and damage may occur. The numbers show the correct route for each cable. The starting and ending points of each cable are labeled. The small drawings show the correct position of each cable trap. Make sure that the cable traps do not touch or bind the cables.
2
7
3
5
4
Long Cable (58) | TOP VIEW |
| |
6 |
|
|
|
Short Cable (23)
Weight Carriage— 8
4
3
2
20
