ASSEMBLY
To hire an authorized service technician to assemble the treadmill, call
In addition to the included hex keys , assembly requires a Phillips screwdriver | , an | ||
adjustable wrench | , and needlenose pliers | . Use the drawings below to identify the hard- | |
ware used during assembly. Note: If a part is not in the hardware kit, check to see if it has been preattached to one of the parts to be assembled. Extra hardware may be included. To avoid damaging plastic parts, do not use power tools for assembly.
16mm Screw | 18mm Screw | 19mm Screw | 19mm Tek | M8 x 15mm |
|
| Screw | Bolt | |
M5 Star | M10 Flat | M6 Flat | M8 x 52mm Bolt | |
Washer | Washer | |||
| Washer |
| M6 x 58mm Bolt | |
M8 Star |
| M8 Nut | ||
|
|
| ||
Washer | M8 Flat |
| M10 x 58mm Bolt | |
| M6 Nut | |||
| Washer | |||
M10 Star | M10 x 110mm Bolt |
|
| ||
Washer |
|
| |||
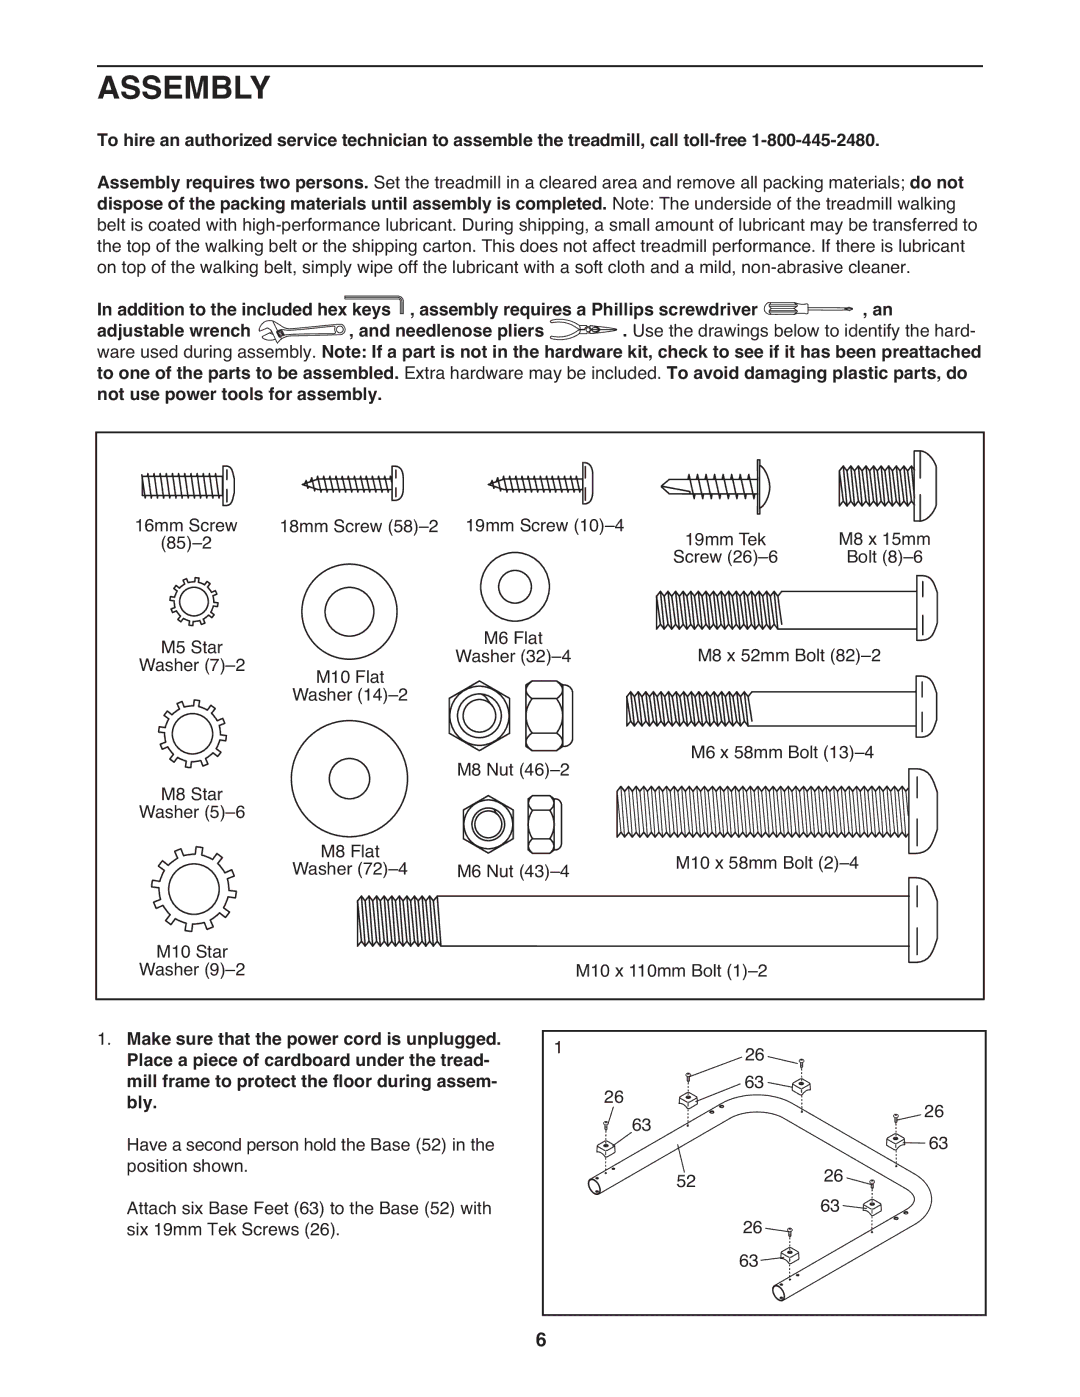
1. Make sure that the power cord is unplugged. | 1 |
| 26 |
|
|
Place a piece of cardboard under the tread- |
|
|
| ||
mill frame to protect the floor during assem- | 26 |
| 63 |
| 26 |
bly. | 63 |
|
| ||
Have a second person hold the Base (52) in the |
|
| 26 | 63 | |
position shown. |
| 52 |
|
| |
Attach six Base Feet (63) to the Base (52) with |
|
| 26 | 63 |
|
six 19mm Tek Screws (26). |
|
|
|
| |
|
|
| 63 |
|
|
| 6 |
|
|
|
|