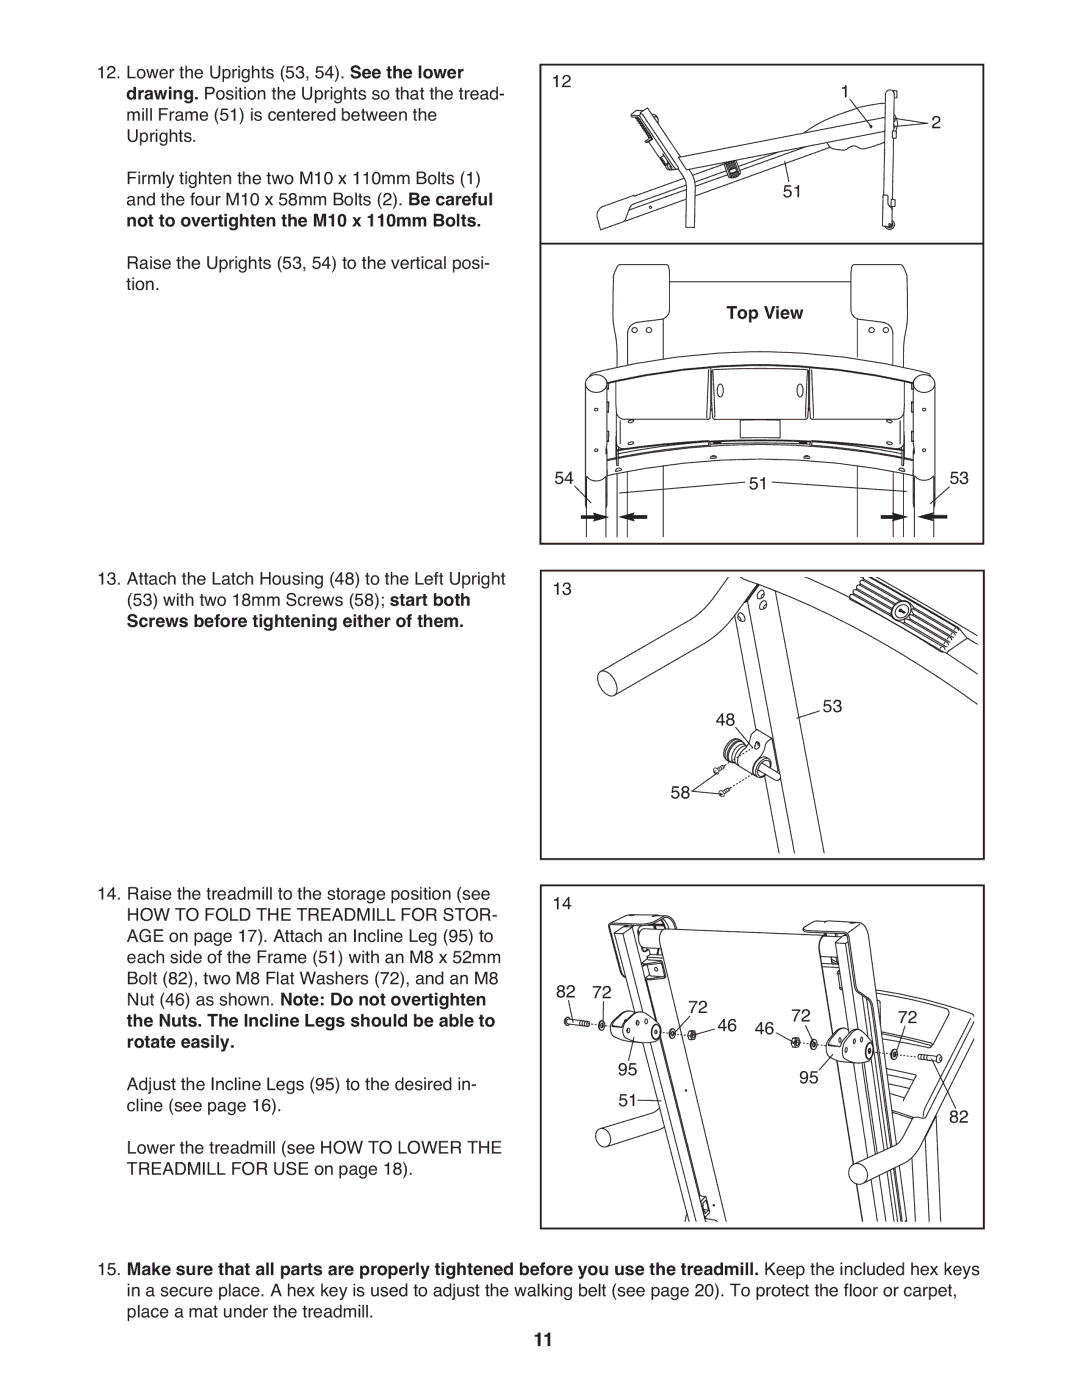
12.Lower the Uprights (53, 54). See the lower drawing. Position the Uprights so that the tread- mill Frame (51) is centered between the Uprights.
Firmly tighten the two M10 x 110mm Bolts (1) and the four M10 x 58mm Bolts (2). Be careful not to overtighten the M10 x 110mm Bolts. Raise the Uprights (53, 54) to the vertical posi- tion.
13.Attach the Latch Housing (48) to the Left Upright (53) with two 18mm Screws (58); start both
Screws before tightening either of them.
14.Raise the treadmill to the storage position (see
HOW TO FOLD THE TREADMILL FOR STOR- AGE on page 17). Attach an Incline Leg (95) to each side of the Frame (51) with an M8 x 52mm Bolt (82), two M8 Flat Washers (72), and an M8 Nut (46) as shown. Note: Do not overtighten the Nuts. The Incline Legs should be able to rotate easily.
Adjust the Incline Legs (95) to the desired in- cline (see page 16).
Lower the treadmill (see HOW TO LOWER THE TREADMILL FOR USE on page 18).
12 | 1 | 2 |
|
| |
| 51 |
|
Top View
54 |
|
| 51 |
| 53 |
13 |
|
|
|
|
|
|
| 48 |
|
| 53 |
|
| 58 |
|
|
|
14 |
|
|
|
|
|
82 | 72 | 72 46 | 46 | 72 | 72 |
|
| ||||
|
| 95 |
| 95 |
|
|
| 51 |
|
| 82 |
|
|
|
|
|
15.Make sure that all parts are properly tightened before you use the treadmill. Keep the included hex keys in a secure place. A hex key is used to adjust the walking belt (see page 20). To protect the floor or carpet,
place a mat under the treadmill.11