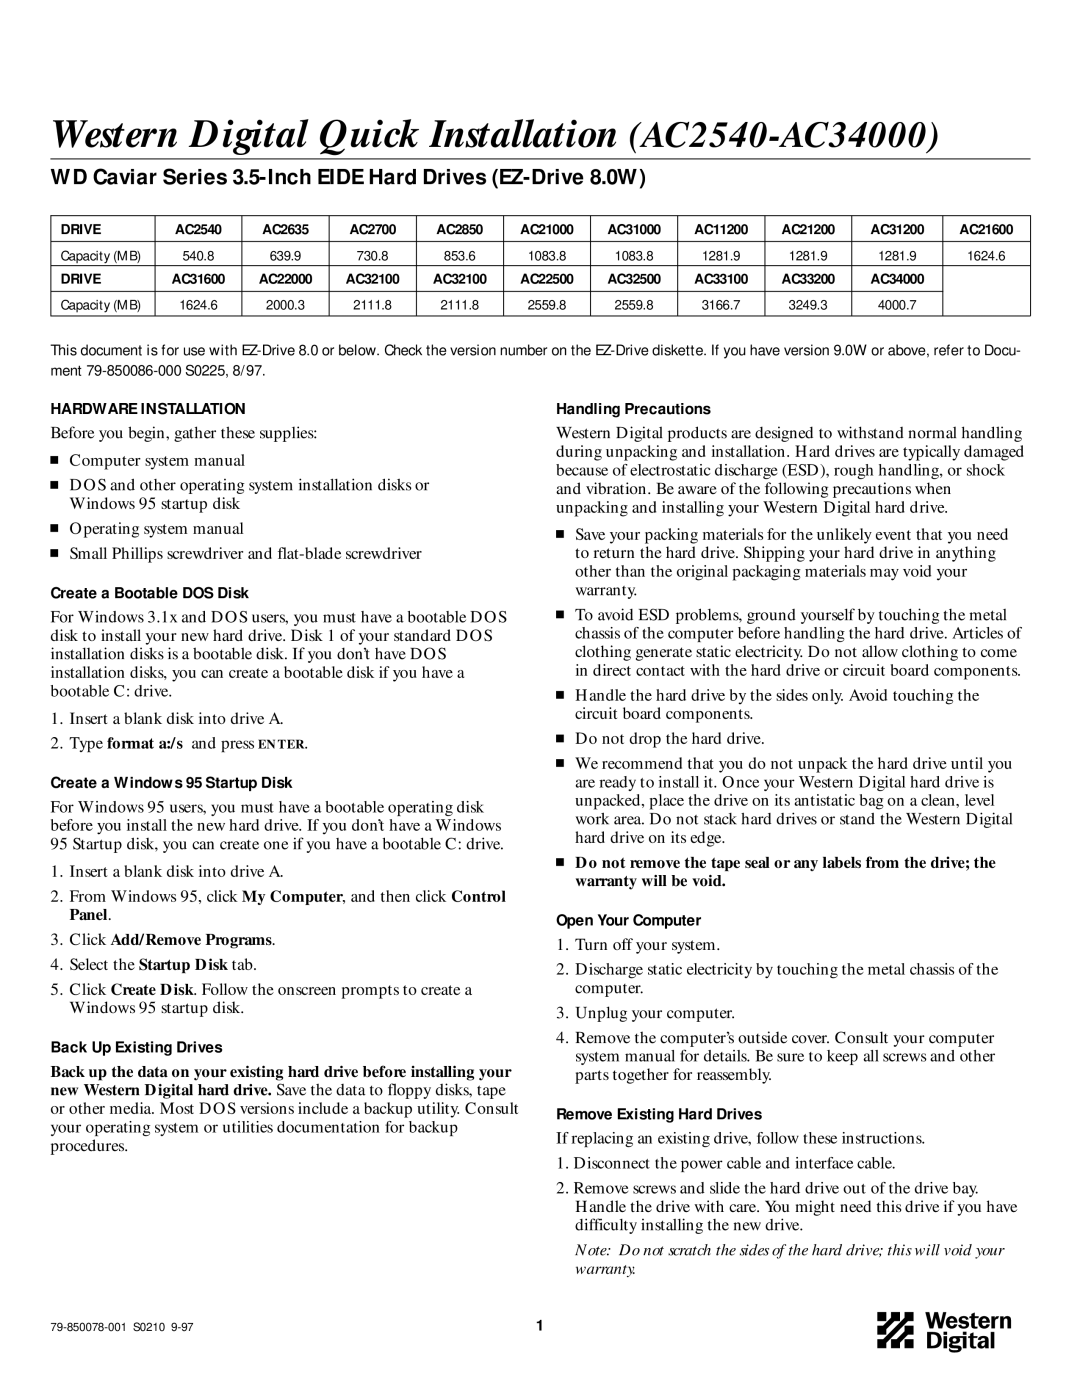
Western Digital Quick Installation (AC2540-AC34000)
WD Caviar Series 3.5-Inch EIDE Hard Drives (EZ-Drive 8.0W)
DRIVE | AC2540 | AC2635 | AC2700 | AC2850 | AC21000 | AC31000 | AC11200 | AC21200 | AC31200 | AC21600 |
|
|
|
|
|
|
|
|
|
|
|
Capacity (MB) | 540.8 | 639.9 | 730.8 | 853.6 | 1083.8 | 1083.8 | 1281.9 | 1281.9 | 1281.9 | 1624.6 |
DRIVE | AC31600 | AC22000 | AC32100 | AC32100 | AC22500 | AC32500 | AC33100 | AC33200 | AC34000 |
|
|
|
|
|
|
|
|
|
|
|
|
Capacity (MB) | 1624.6 | 2000.3 | 2111.8 | 2111.8 | 2559.8 | 2559.8 | 3166.7 | 3249.3 | 4000.7 |
|
|
|
|
|
|
|
|
|
|
|
|
This document is for use with
HARDWARE INSTALLATION
Before you begin, gather these supplies:
Computer system manual
DOS and other operating system installation disks or Windows 95 startup disk
Operating system manual
Small Phillips screwdriver and
Create a Bootable DOS Disk
For Windows 3.1x and DOS users, you must have a bootable DOS disk to install your new hard drive. Disk 1 of your standard DOS installation disks is a bootable disk. If you don’t have DOS installation disks, you can create a bootable disk if you have a bootable C: drive.
1.Insert a blank disk into drive A.
2.Type format a:/s and press ENTER.
Create a Windows 95 Startup Disk
For Windows 95 users, you must have a bootable operating disk before you install the new hard drive. If you don’t have a Windows 95 Startup disk, you can create one if you have a bootable C: drive.
1.Insert a blank disk into drive A.
2.From Windows 95, click My Computer, and then click Control Panel.
3.Click Add/Remove Programs.
4.Select the Startup Disk tab.
5.Click Create Disk. Follow the onscreen prompts to create a Windows 95 startup disk.
Back Up Existing Drives
Back up the data on your existing hard drive before installing your new Western Digital hard drive. Save the data to floppy disks, tape or other media. Most DOS versions include a backup utility. Consult your operating system or utilities documentation for backup procedures.
Handling Precautions
Western Digital products are designed to withstand normal handling during unpacking and installation. Hard drives are typically damaged because of electrostatic discharge (ESD), rough handling, or shock and vibration. Be aware of the following precautions when unpacking and installing your Western Digital hard drive.
Save your packing materials for the unlikely event that you need to return the hard drive. Shipping your hard drive in anything other than the original packaging materials may void your warranty.
To avoid ESD problems, ground yourself by touching the metal chassis of the computer before handling the hard drive. Articles of clothing generate static electricity. Do not allow clothing to come in direct contact with the hard drive or circuit board components.
Handle the hard drive by the sides only. Avoid touching the circuit board components.
Do not drop the hard drive.
We recommend that you do not unpack the hard drive until you are ready to install it. Once your Western Digital hard drive is unpacked, place the drive on its antistatic bag on a clean, level work area. Do not stack hard drives or stand the Western Digital hard drive on its edge.
Do not remove the tape seal or any labels from the drive; the warranty will be void.
Open Your Computer
1.Turn off your system.
2.Discharge static electricity by touching the metal chassis of the computer.
3.Unplug your computer.
4.Remove the computer’s outside cover. Consult your computer system manual for details. Be sure to keep all screws and other parts together for reassembly.
Remove Existing Hard Drives
If replacing an existing drive, follow these instructions.
1.Disconnect the power cable and interface cable.
2.Remove screws and slide the hard drive out of the drive bay. Handle the drive with care. You might need this drive if you have difficulty installing the new drive.
Note: Do not scratch the sides of the hard drive; this will void your warranty.
1 |
