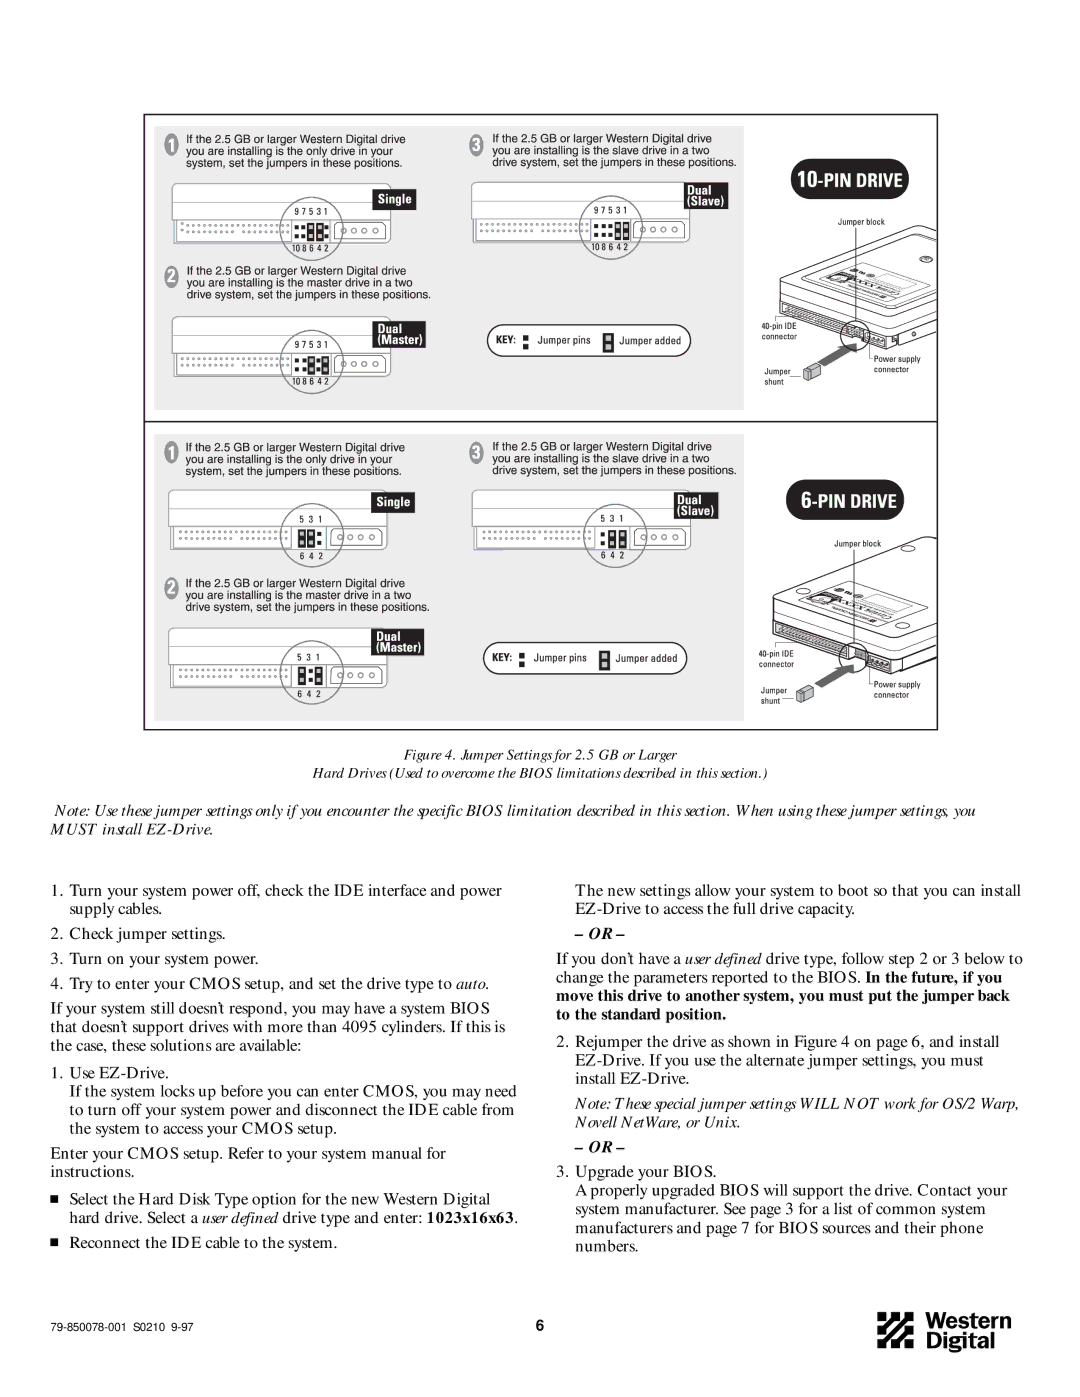
Figure 4. Jumper Settings for 2.5 GB or Larger
Hard Drives (Used to overcome the BIOS limitations described in this section.)
Note: Use these jumper settings only if you encounter the specific BIOS limitation described in this section. When using these jumper settings, you MUST install
1.Turn your system power off, check the IDE interface and power supply cables.
2.Check jumper settings.
3.Turn on your system power.
4.Try to enter your CMOS setup, and set the drive type to auto.
If your system still doesn’t respond, you may have a system BIOS that doesn’t support drives with more than 4095 cylinders. If this is the case, these solutions are available:
1.Use
If the system locks up before you can enter CMOS, you may need to turn off your system power and disconnect the IDE cable from the system to access your CMOS setup.
Enter your CMOS setup. Refer to your system manual for instructions.
Select the Hard Disk Type option for the new Western Digital hard drive. Select a user defined drive type and enter: 1023x16x63.
Reconnect the IDE cable to the system.
The new settings allow your system to boot so that you can install
– OR –
If you don’t have a user defined drive type, follow step 2 or 3 below to change the parameters reported to the BIOS. In the future, if you move this drive to another system, you must put the jumper back to the standard position.
2.Rejumper the drive as shown in Figure 4 on page 6, and install
Note: These special jumper settings WILL NOT work for OS/2 Warp, Novell NetWare, or Unix.
– OR –
3.Upgrade your BIOS.
A properly upgraded BIOS will support the drive. Contact your system manufacturer. See page 3 for a list of common system manufacturers and page 7 for BIOS sources and their phone numbers.
| 6 |