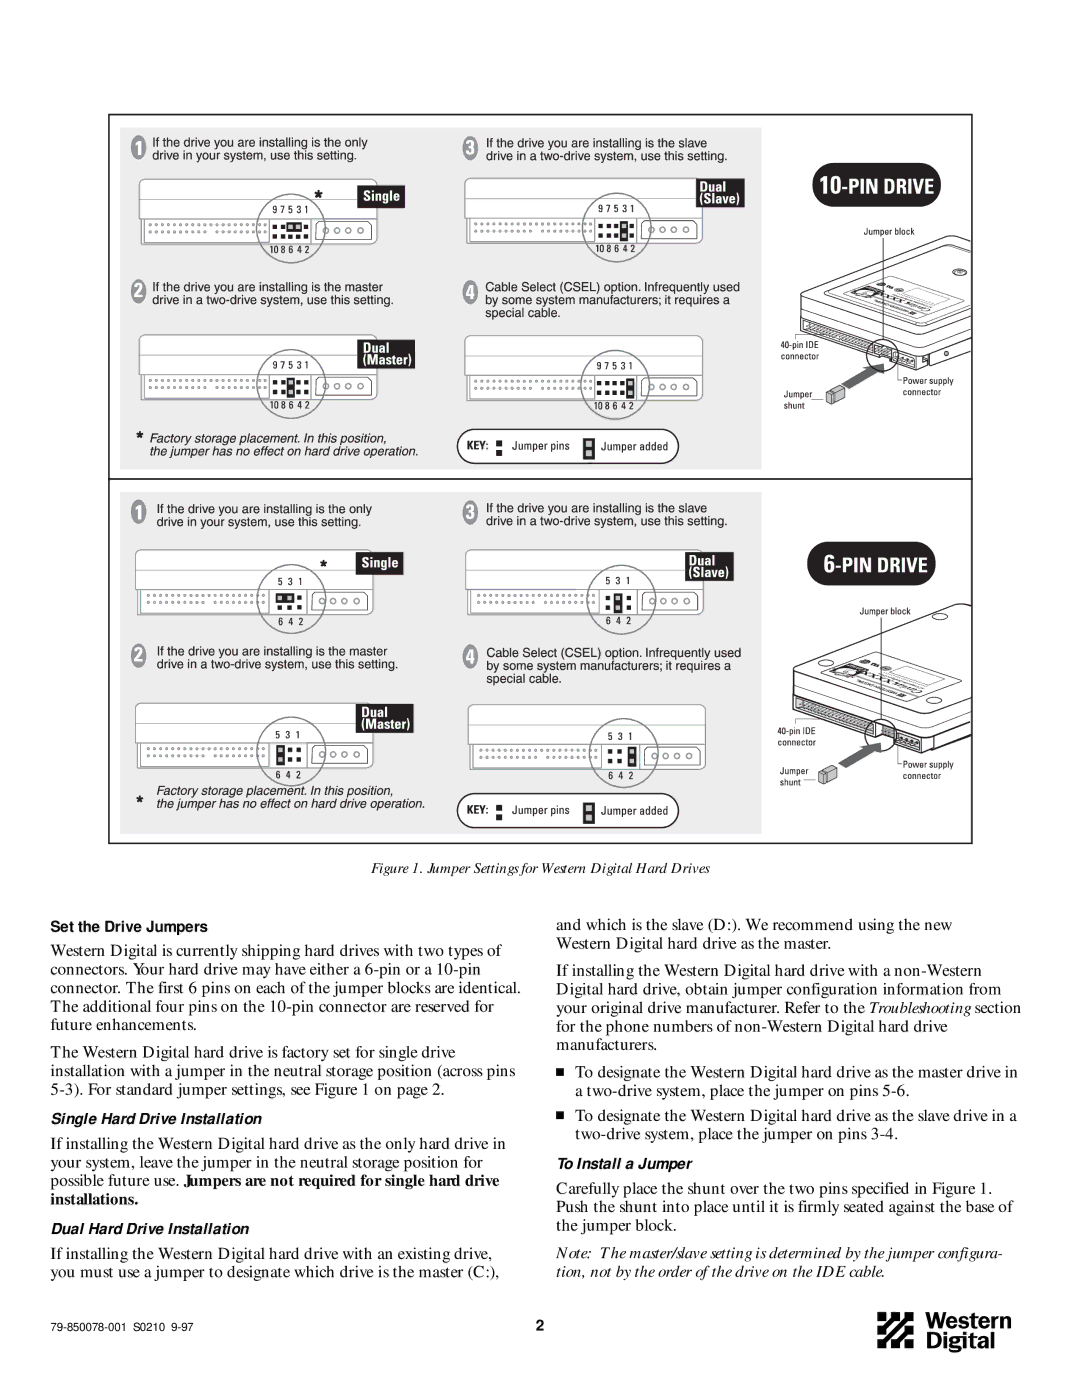
Figure 1. Jumper Settings for Western Digital Hard Drives
Set the Drive Jumpers
Western Digital is currently shipping hard drives with two types of connectors. Your hard drive may have either a
The Western Digital hard drive is factory set for single drive installation with a jumper in the neutral storage position (across pins
Single Hard Drive Installation
If installing the Western Digital hard drive as the only hard drive in your system, leave the jumper in the neutral storage position for possible future use. Jumpers are not required for single hard drive installations.
Dual Hard Drive Installation
If installing the Western Digital hard drive with an existing drive, you must use a jumper to designate which drive is the master (C:),
and which is the slave (D:). We recommend using the new Western Digital hard drive as the master.
If installing the Western Digital hard drive with a
To designate the Western Digital hard drive as the master drive in a
To designate the Western Digital hard drive as the slave drive in a
To Install a Jumper
Carefully place the shunt over the two pins specified in Figure 1. Push the shunt into place until it is firmly seated against the base of the jumper block.
Note: The master/slave setting is determined by the jumper configura- tion, not by the order of the drive on the IDE cable.
2 |
