4.To determine the length of copper tubing you will need, measure from connection on lower left rear of refrigerator to water pipe. Add 7 feet (2.1 m) to allow for moving refrigerator for cleaning. Use
5.Using a grounded drill, drill a
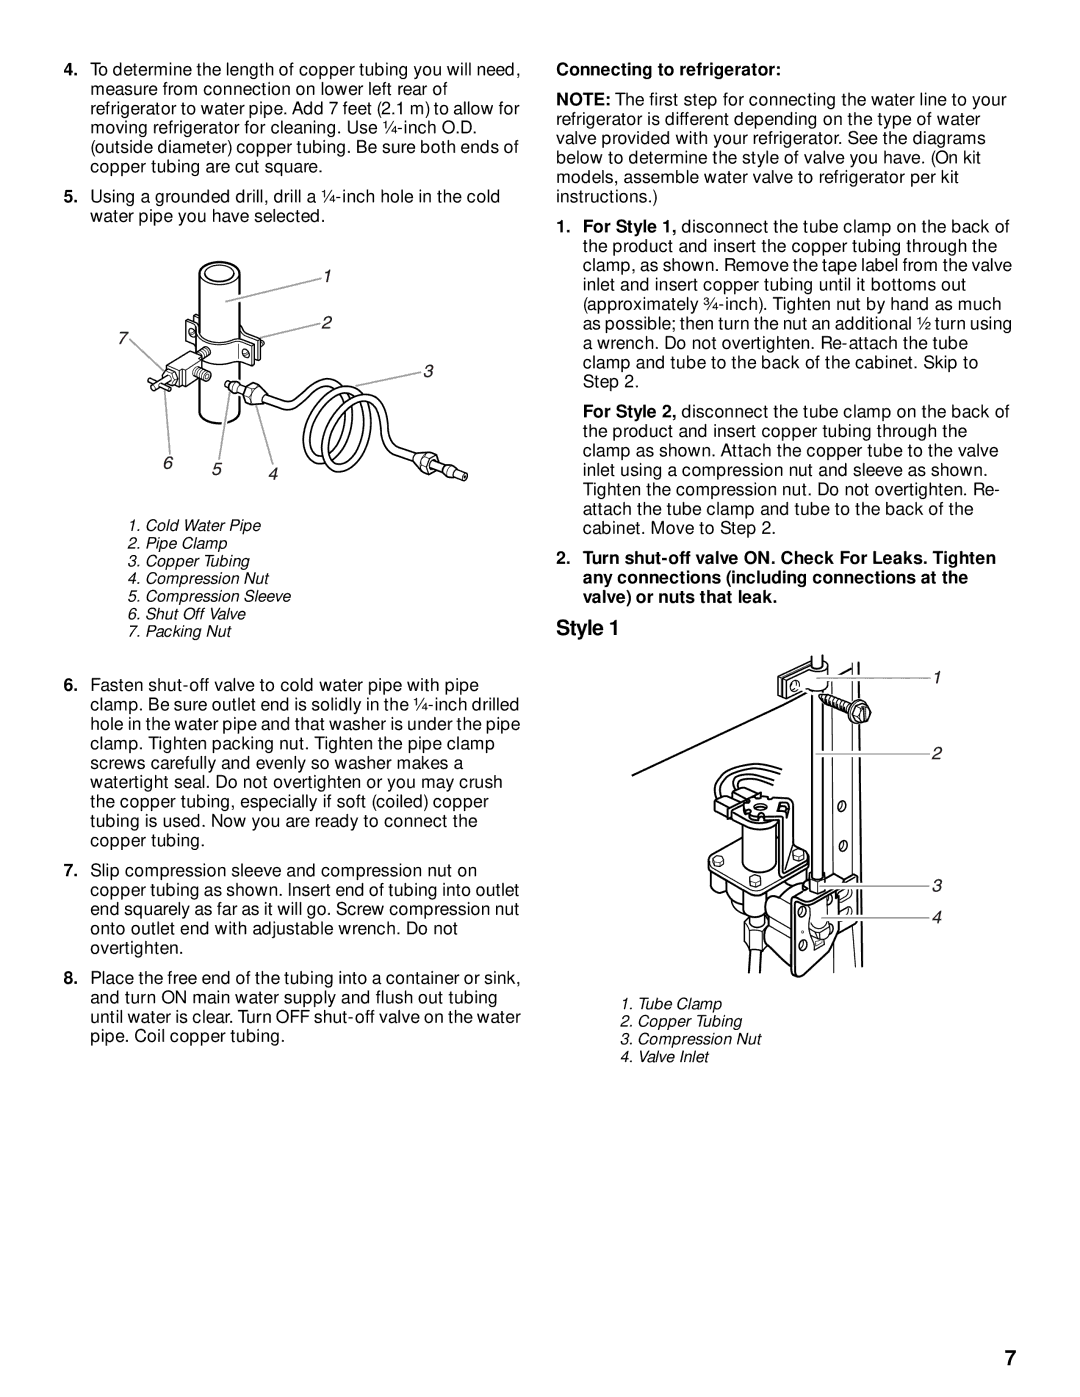
1.Cold Water Pipe
2.Pipe Clamp
3.Copper Tubing
4.Compression Nut
5.Compression Sleeve
6.Shut Off Valve
7.Packing Nut
6.Fasten
7.Slip compression sleeve and compression nut on copper tubing as shown. Insert end of tubing into outlet end squarely as far as it will go. Screw compression nut onto outlet end with adjustable wrench. Do not overtighten.
8.Place the free end of the tubing into a container or sink, and turn ON main water supply and flush out tubing until water is clear. Turn OFF
Connecting to refrigerator:
NOTE: The first step for connecting the water line to your refrigerator is different depending on the type of water valve provided with your refrigerator. See the diagrams below to determine the style of valve you have. (On kit models, assemble water valve to refrigerator per kit instructions.)
1.For Style 1, disconnect the tube clamp on the back of the product and insert the copper tubing through the clamp, as shown. Remove the tape label from the valve inlet and insert copper tubing until it bottoms out (approximately
For Style 2, disconnect the tube clamp on the back of the product and insert copper tubing through the clamp as shown. Attach the copper tube to the valve inlet using a compression nut and sleeve as shown. Tighten the compression nut. Do not overtighten. Re- attach the tube clamp and tube to the back of the cabinet. Move to Step 2.
2.Turn
Style 1
1.Tube Clamp
2.Copper Tubing
3.Compression Nut
4.Valve Inlet
7