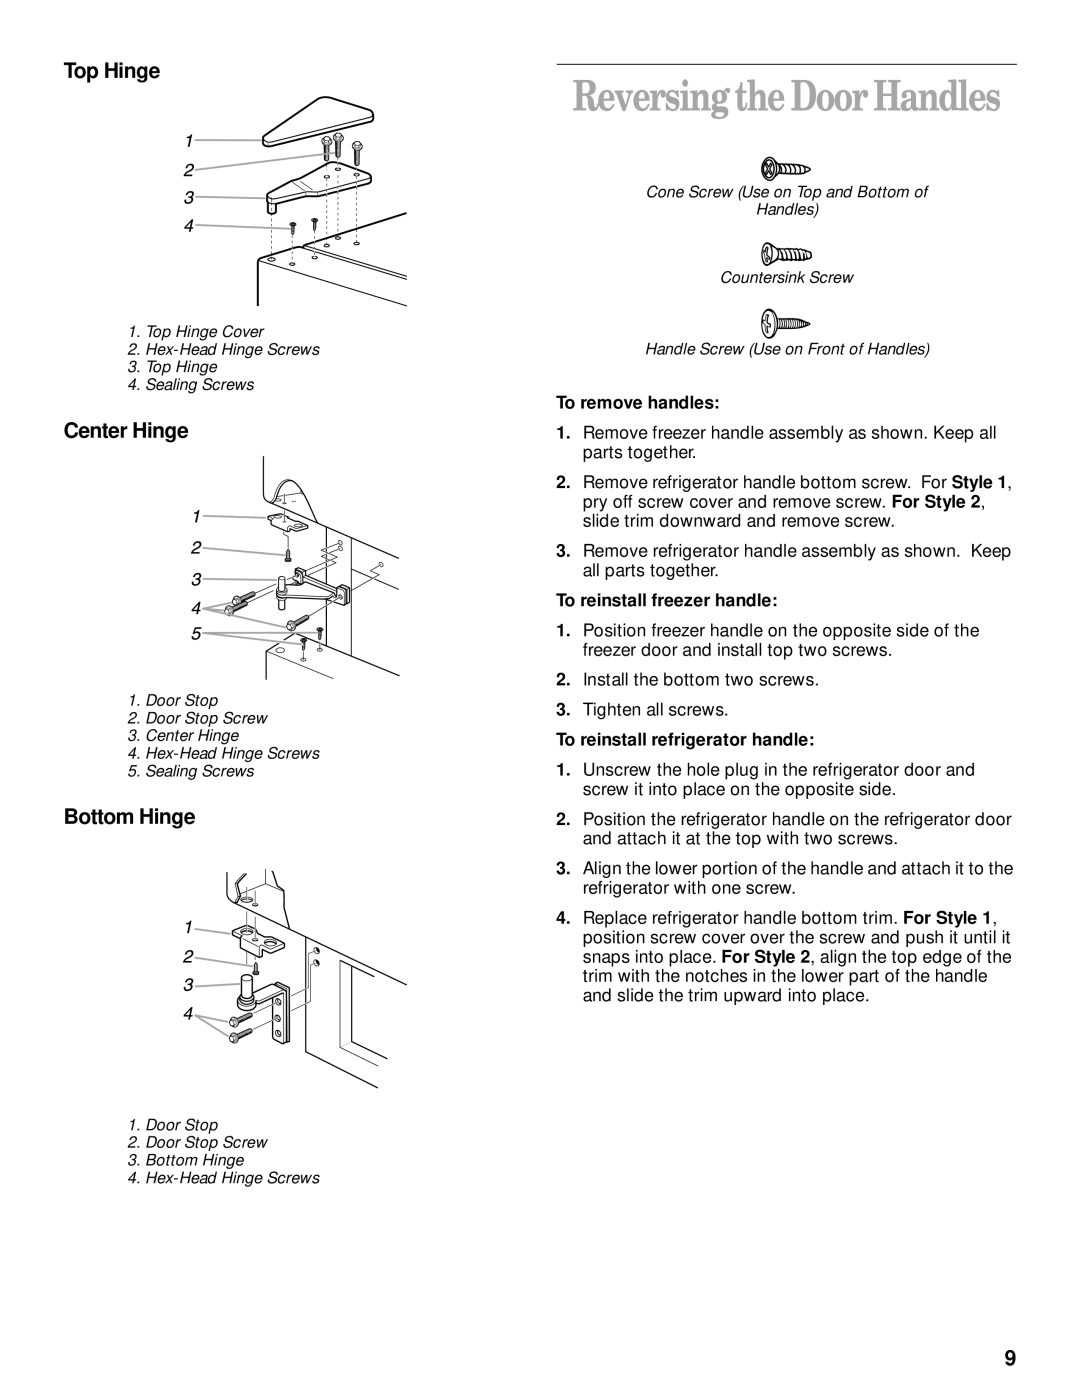
Top Hinge
1.Top Hinge Cover
2.
3.Top Hinge
4.Sealing Screws
Center Hinge
1.Door Stop
2.Door Stop Screw
3.Center Hinge
4.
5.Sealing Screws
Bottom Hinge
1.Door Stop
2.Door Stop Screw
3.Bottom Hinge
4.
Reversingthe DoorHandles
Cone Screw (Use on Top and Bottom of
Handles)
Countersink Screw
Handle Screw (Use on Front of Handles)
To remove handles:
1.Remove freezer handle assembly as shown. Keep all parts together.
2.Remove refrigerator handle bottom screw. For Style 1, pry off screw cover and remove screw. For Style 2, slide trim downward and remove screw.
3.Remove refrigerator handle assembly as shown. Keep all parts together.
To reinstall freezer handle:
1.Position freezer handle on the opposite side of the freezer door and install top two screws.
2.Install the bottom two screws.
3.Tighten all screws.
To reinstall refrigerator handle:
1.Unscrew the hole plug in the refrigerator door and screw it into place on the opposite side.
2.Position the refrigerator handle on the refrigerator door and attach it at the top with two screws.
3.Align the lower portion of the handle and attach it to the refrigerator with one screw.
4.Replace refrigerator handle bottom trim. For Style 1, position screw cover over the screw and push it until it snaps into place. For Style 2, align the top edge of the trim with the notches in the lower part of the handle and slide the trim upward into place.
9