Top View
B
A |
C |
A.
B.Window channel
C.#8 x ³⁄₄"
6.Insert one of the #8 x ³⁄₄"
7.Repeat for
A B C
A. Hole for #8 x ³⁄₄"
B. Threaded hole
C. #6 - 32 x ¹⁄₄"
8.Insert foam seal behind the top of the lower window sash and against the glass of the upper window.
9.Place
10.Use a ³⁄₃₂" drill bit to drill a starter hole through the hole in the bracket and into the window sash.
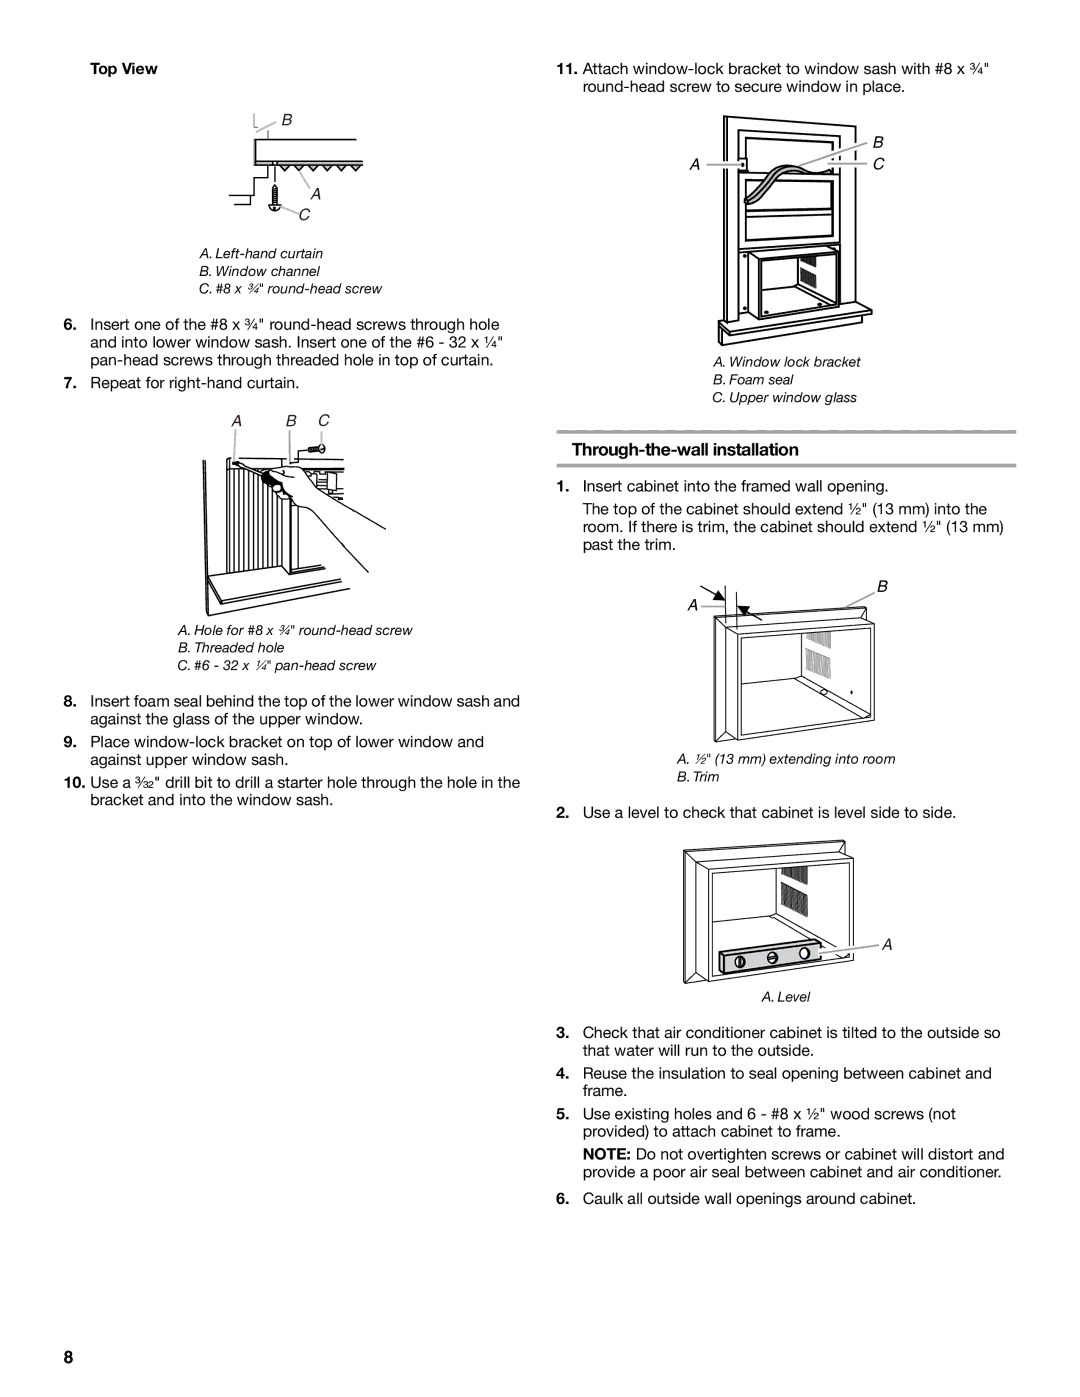
11.Attach
B
A ![]() C
C
A. Window lock bracket
B. Foam seal
C. Upper window glass
Through-the-wall installation
1.Insert cabinet into the framed wall opening.
The top of the cabinet should extend ¹⁄₂" (13 mm) into the room. If there is trim, the cabinet should extend ¹⁄₂" (13 mm) past the trim.
B
A
A. ¹⁄₂" (13 mm) extending into room
B.Trim
2.Use a level to check that cabinet is level side to side.
![]() A
A
A.Level
3.Check that air conditioner cabinet is tilted to the outside so that water will run to the outside.
4.Reuse the insulation to seal opening between cabinet and frame.
5.Use existing holes and 6 - #8 x ¹⁄₂" wood screws (not provided) to attach cabinet to frame.
NOTE: Do not overtighten screws or cabinet will distort and provide a poor air seal between cabinet and air conditioner.
6.Caulk all outside wall openings around cabinet.
8