I N S T A L L I N G Y O U R A I R C O N D I T I O N E R
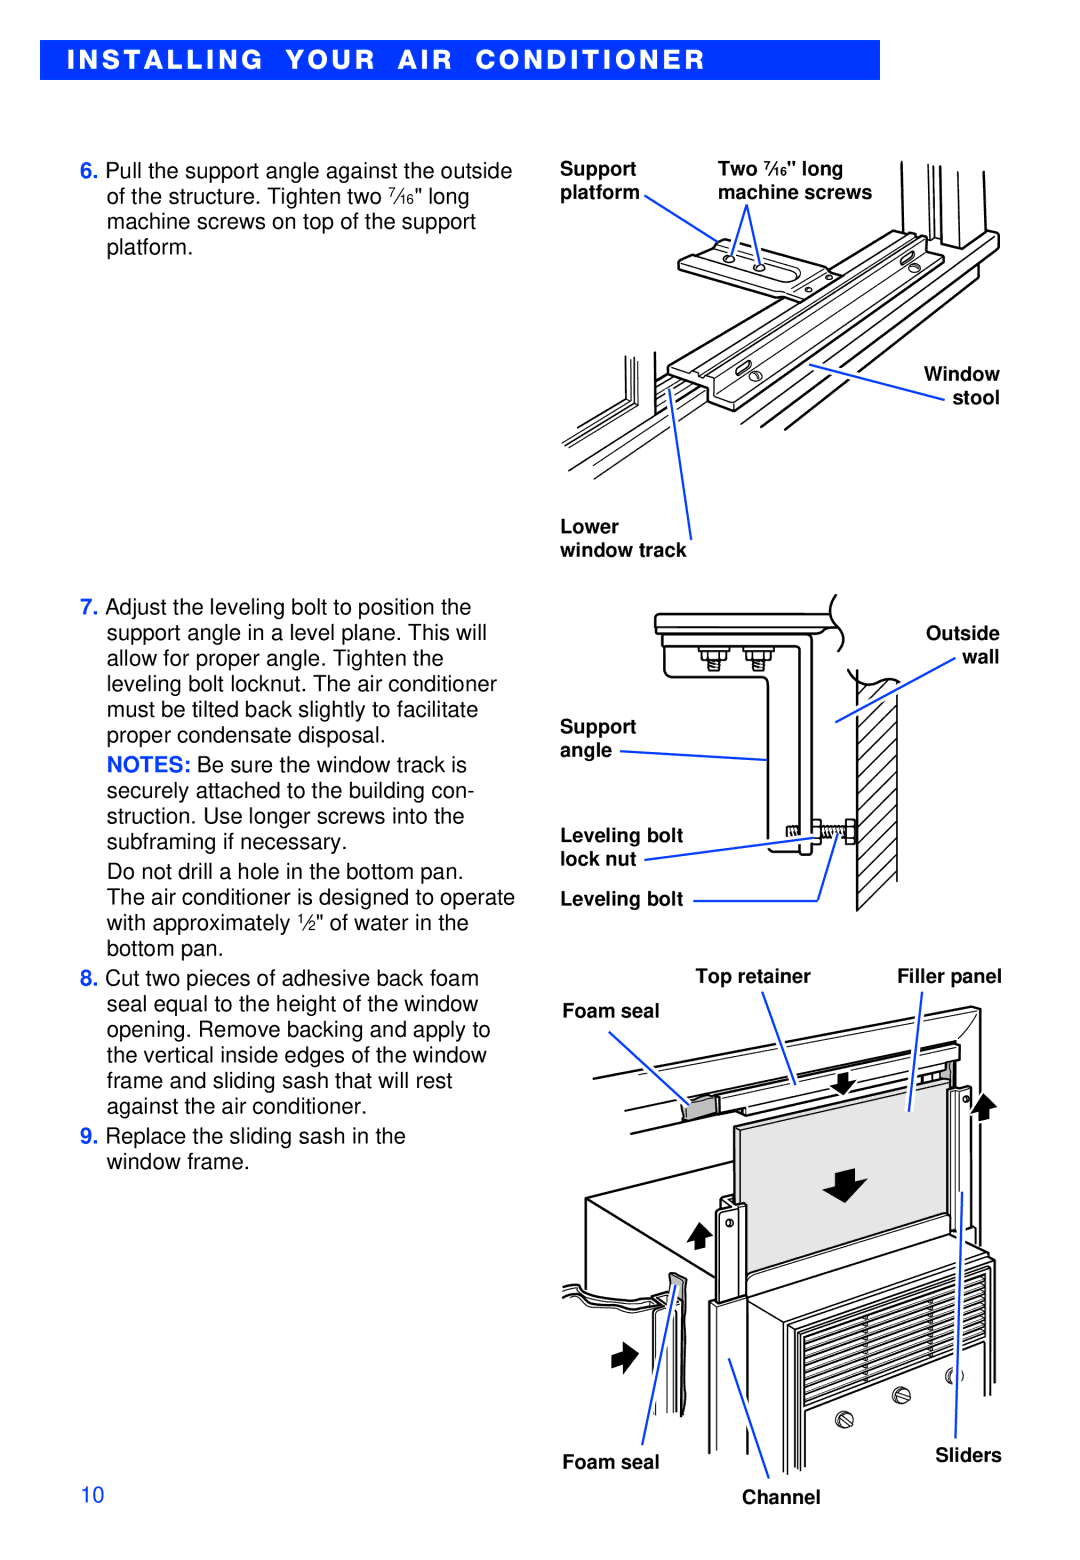
6.Pull the support angle against the outside of the structure. Tighten two 7⁄16" long machine screws on top of the support platform.
7.Adjust the leveling bolt to position the support angle in a level plane. This will allow for proper angle. Tighten the leveling bolt locknut. The air conditioner must be tilted back slightly to facilitate proper condensate disposal.
NOTES: Be sure the window track is securely attached to the building con- struction. Use longer screws into the subframing if necessary.
Do not drill a hole in the bottom pan.
The air conditioner is designed to operate with approximately 1⁄2" of water in the bottom pan.
8.Cut two pieces of adhesive back foam seal equal to the height of the window opening. Remove backing and apply to the vertical inside edges of the window frame and sliding sash that will rest against the air conditioner.
9.Replace the sliding sash in the window frame.
Support | Two 7⁄16" long |
platform | machine screws |
Window stool
Lower window track
Outside wall
Support angle
Leveling bolt lock nut
Leveling bolt
Top retainer | Filler panel |
Foam seal
| Foam seal | Sliders |
|
| |
10 |
| Channel |