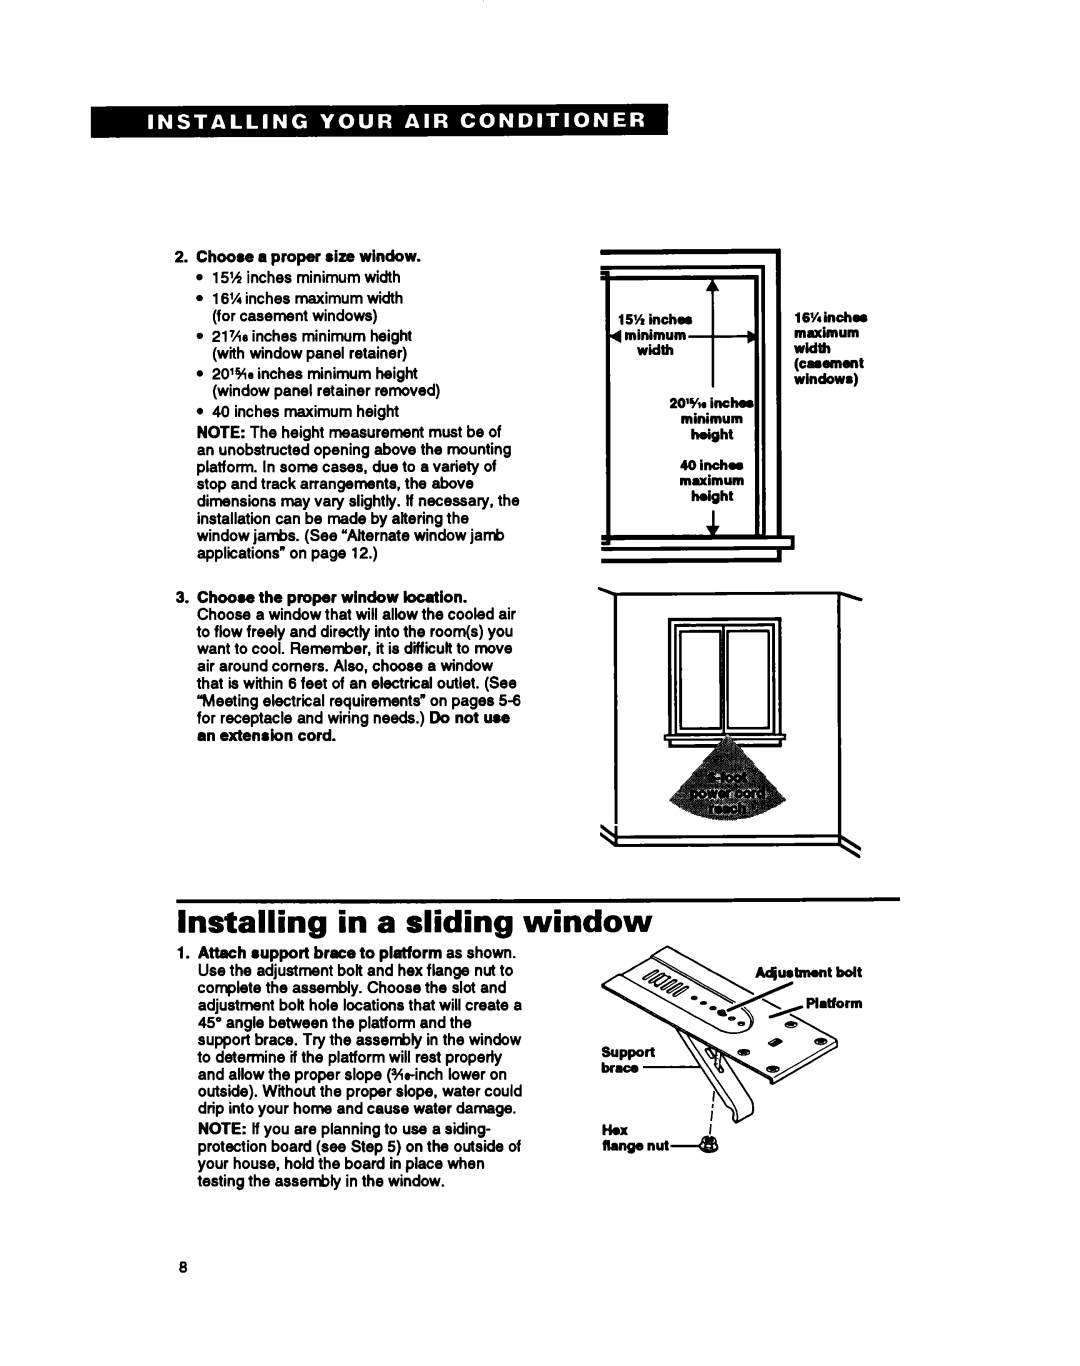
2.Choore a proper size window. l 15% inches minimum width
l 18% inches maximum width (for casement windows)
l 21%e inches minimum height (with window panel retainer)
l 20% inches minimum height (window panel retainer removed)
l 40 inches maximum height
NOTE: The height measurement must be of an unobstructed opening above the mounting platform. In some cases, due to a variety of stop and track arrangements, the above dimensions may vary slightly. lf necessary, the installation can be made by altering the window jambs. (See “Alternatewindow jamb applications” on page 12.)
3.Choose the prof~r window location. Choose a window that will allow the cooled air to flow freely and directly into the room(s) you want to cool. Remember, it is difficult to move air around comers. Also, choose a window that is within 8 feet of an electrical outlet. (See “Meetingelectrical requirements” on pages
15%inch08 |
| 16%in&w |
4 minimum | D | maximum |
| Width | |
Width |
| |
|
| (cwemannt |
|
| windows) |
20’KI illcha
minimum
height
46 inchw
maximum
haight
I4
I1
Installing in a sliding window
1.Attach support brece to platform as shown. Use the adjustment bolt and hex flange nut to complete the assembly. Choose the slot and adjustment bott hole locations that will create a 45’ angle between the platform and the support brace. Try the assembly in the window to determine if the platform will rest properly and allow the proper slope (?&inch lower on outside). Without the proper slope, water could drip into your home and cause water damage.
NOTE: lf you are planning to use a siding- protection board (see Step 5) on the outside of your house, hold the board in place when testing the assembly in the window.
8
