7.On some models, the ice maker is equipped with a built-in water strainer. If your water conditions require a second water strainer, install it in the ¹⁄₄" (6.35 mm) water line at either tube connection. Obtain a water strainer from your nearest appliance dealer.

Style 3

1.Unplug refrigerator or disconnect power.

2.Remove and discard the black nylon plug from the gray water tube on the rear of the refrigerator.

3.If the gray water tube supplied with the refrigerator is not long enough, a ¹⁄₄" x ¹⁄₄" (6.35 mm x 6.35 mm) coupling is needed in order to connect the water tubing to an existing household water line. Thread the provided nut onto the coupling on the end of the copper tubing.

NOTE: Tighten the nut by hand. Then tighten it with a wrench two more turns. Do not overtighten.

A

B

C

D

E F G

A. Refrigerator water tubing


E. Ferrule (purchased)

B. Nut (provided)


F. Nut (purchased)

C. Bulb


G. Household water line

D. Coupling (purchased)


4.Turn shutoff valve ON.

5.Check for leaks. Tighten any nuts or connections (including connections at the valve) that leak.

Complete the Installation

WARNING

Electrical Shock Hazard

Plug into a grounded 3 prong outlet.

Do not remove ground prong.

Do not use an adapter.

Do not use an extension cord.

Failure to follow these instructions can result in death, fire, or electrical shock.

1.Plug into a grounded 3 prong outlet.

2.Flush the water system. See “Prepare the Water System” or “Water and Ice Dispensers.”

NOTE: Allow 24 hours to produce the first batch of ice. Allow 3 days to completely fill ice container.

Install Air Filter

(on somemodels)

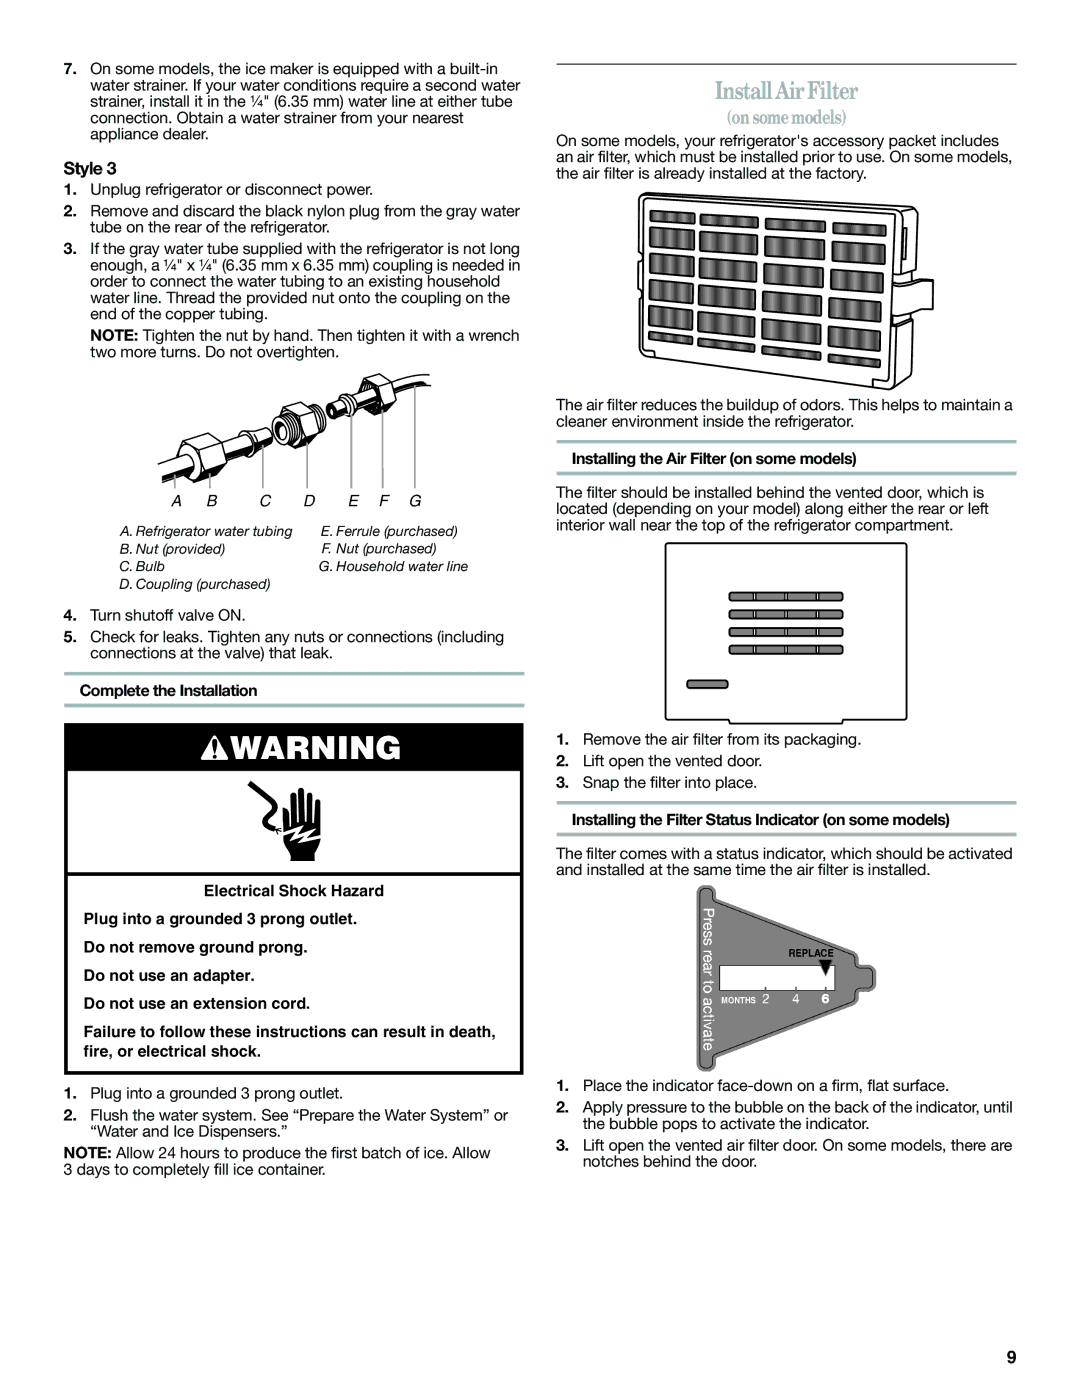
On some models, your refrigerator's accessory packet includes an air filter, which must be installed prior to use. On some models, the air filter is already installed at the factory.

The air filter reduces the buildup of odors. This helps to maintain a cleaner environment inside the refrigerator.

Installing the Air Filter (on some models)

The filter should be installed behind the vented door, which is located (depending on your model) along either the rear or left interior wall near the top of the refrigerator compartment.

1.Remove the air filter from its packaging.

2.Lift open the vented door.

3.Snap the filter into place.

Installing the Filter Status Indicator (on some models)

The filter comes with a status indicator, which should be activated and installed at the same time the air filter is installed.

REPLACE

MONTHS

1.Place the indicator face-down on a firm, flat surface.

2.Apply pressure to the bubble on the back of the indicator, until the bubble pops to activate the indicator.

3.Lift open the vented air filter door. On some models, there are notches behind the door.

9

Page 9
Image 9
Whirlpool GSF26C4EXT, ED2KHAXVT manual Install Air Filter, Installing the Air Filter on some models

GSF26C4EXT, ED2KHAXVT specifications

The Whirlpool ED2KHAXVT and GSF26C4EXT are two prominent refrigerator models that embody a blend of modern technology and practical design, aiming to enhance the user's kitchen experience. These units offer a range of features tailored to meet diverse household needs, making them standout choices for consumers.

The Whirlpool ED2KHAXVT is a top-freezer refrigerator known for its spacious interior and efficient organization. With an impressive capacity of 21 cubic feet, it provides ample storage for groceries and meal prep, allowing users to easily store everything from large food items to smaller everyday essentials. This model features adjustable spill-proof shelves that are easy to clean and prevent messes from spreading, enhancing the user’s convenience.

One of the key technologies in the ED2KHAXVT is the Adaptive Defrost system, which monitors the compressor run time and only defrosts when necessary. This not only ensures optimal food preservation but also reduces energy consumption, making it an environmentally friendly choice. Additionally, the model includes a dual-temperature controlled crisper drawer, which is perfect for keeping fruits and vegetables fresh longer.

On the other hand, the GSF26C4EXT is a side-by-side refrigerator that offers both style and functionality. It features a striking stainless steel finish, contributing to a modern kitchen aesthetic. With roughly 25 cubic feet of total capacity, it boasts a well-organized interior with adjustable shelves and door bins, designed to keep items easily accessible. The water and ice dispenser located on the door provides instant access to cold water and ice, adding convenience for families and busy individuals.

The GSF26C4EXT incorporates innovative features like the Accu-Chill temperature management system, which uses sensors to regulate the internal temperature, ensuring optimal performance without compromising energy efficiency. Furthermore, the model is equipped with a FreshFlow produce preserver which effectively keeps fruits and vegetables fresh by controlling the ethylene gas levels within the refrigerator.

Both models come with energy-efficient ratings, making them cost-effective choices for daily use. Their thoughtful design and advanced technology cater to the needs of modern households, proving to be reliable appliances that stand the test of time. With versatile storage solutions and reduced energy consumption, the Whirlpool ED2KHAXVT and GSF26C4EXT excel in delivering performance and practicality, sealing their status as preferred selections for discerning consumers.