4.Determine the length of copper tubing you need. Measure from the connection on the lower left rear of refrigerator to the water pipe. Add 7 ft. (2.1 m) to allow for cleaning. Use ¹⁄₄ in. (6.35 mm) O.D. (outside diameter) copper tubing. Be sure both ends of copper tubing are cut square.
5.Using a grounded drill, drill a ¹⁄₄ in. hole in the cold water pipe you have selected.
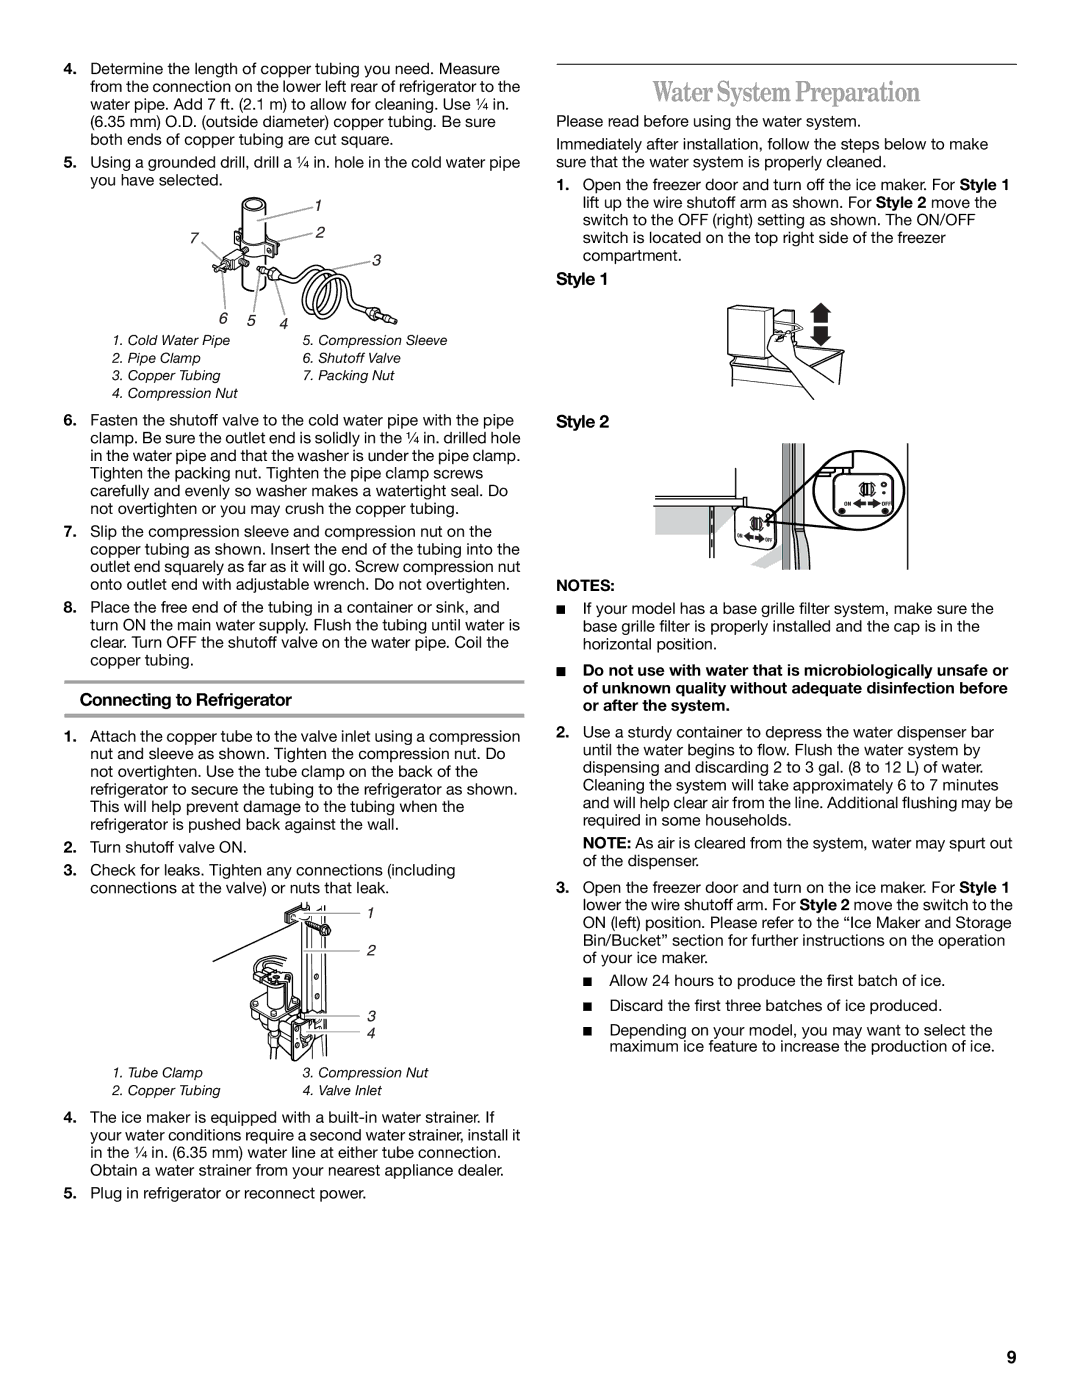
1. | Cold Water Pipe | 5. | Compression Sleeve |
2. | Pipe Clamp | 6. | Shutoff Valve |
3. | Copper Tubing | 7. | Packing Nut |
4.Compression Nut
6.Fasten the shutoff valve to the cold water pipe with the pipe clamp. Be sure the outlet end is solidly in the ¹⁄₄ in. drilled hole in the water pipe and that the washer is under the pipe clamp. Tighten the packing nut. Tighten the pipe clamp screws carefully and evenly so washer makes a watertight seal. Do not overtighten or you may crush the copper tubing.
7.Slip the compression sleeve and compression nut on the copper tubing as shown. Insert the end of the tubing into the outlet end squarely as far as it will go. Screw compression nut onto outlet end with adjustable wrench. Do not overtighten.
8.Place the free end of the tubing in a container or sink, and turn ON the main water supply. Flush the tubing until water is clear. Turn OFF the shutoff valve on the water pipe. Coil the copper tubing.
Connecting to Refrigerator
1.Attach the copper tube to the valve inlet using a compression nut and sleeve as shown. Tighten the compression nut. Do not overtighten. Use the tube clamp on the back of the refrigerator to secure the tubing to the refrigerator as shown. This will help prevent damage to the tubing when the refrigerator is pushed back against the wall.
2.Turn shutoff valve ON.
3.Check for leaks. Tighten any connections (including connections at the valve) or nuts that leak.
1. | Tube Clamp | 3. | Compression Nut |
2. | Copper Tubing | 4. | Valve Inlet |
4.The ice maker is equipped with a
5.Plug in refrigerator or reconnect power.
Water System Preparation
Please read before using the water system.
Immediately after installation, follow the steps below to make sure that the water system is properly cleaned.
1.Open the freezer door and turn off the ice maker. For Style 1 lift up the wire shutoff arm as shown. For Style 2 move the switch to the OFF (right) setting as shown. The ON/OFF switch is located on the top right side of the freezer compartment.
Style 1
Style 2
NOTES:
■If your model has a base grille filter system, make sure the base grille filter is properly installed and the cap is in the horizontal position.
■Do not use with water that is microbiologically unsafe or of unknown quality without adequate disinfection before or after the system.
2.Use a sturdy container to depress the water dispenser bar until the water begins to flow. Flush the water system by dispensing and discarding 2 to 3 gal. (8 to 12 L) of water. Cleaning the system will take approximately 6 to 7 minutes and will help clear air from the line. Additional flushing may be required in some households.
NOTE: As air is cleared from the system, water may spurt out of the dispenser.
3.Open the freezer door and turn on the ice maker. For Style 1 lower the wire shutoff arm. For Style 2 move the switch to the ON (left) position. Please refer to the “Ice Maker and Storage Bin/Bucket” section for further instructions on the operation of your ice maker.
■Allow 24 hours to produce the first batch of ice.
■Discard the first three batches of ice produced.
■Depending on your model, you may want to select the maximum ice feature to increase the production of ice.
9