4.Align and replace the top left hinge as shown (see Graphic 4). Tighten screws.
![]() WARNING
WARNING
Electrical Shock Hazard
Reconnect both ground wires.
Failure to do so can result in death or electrical shock.
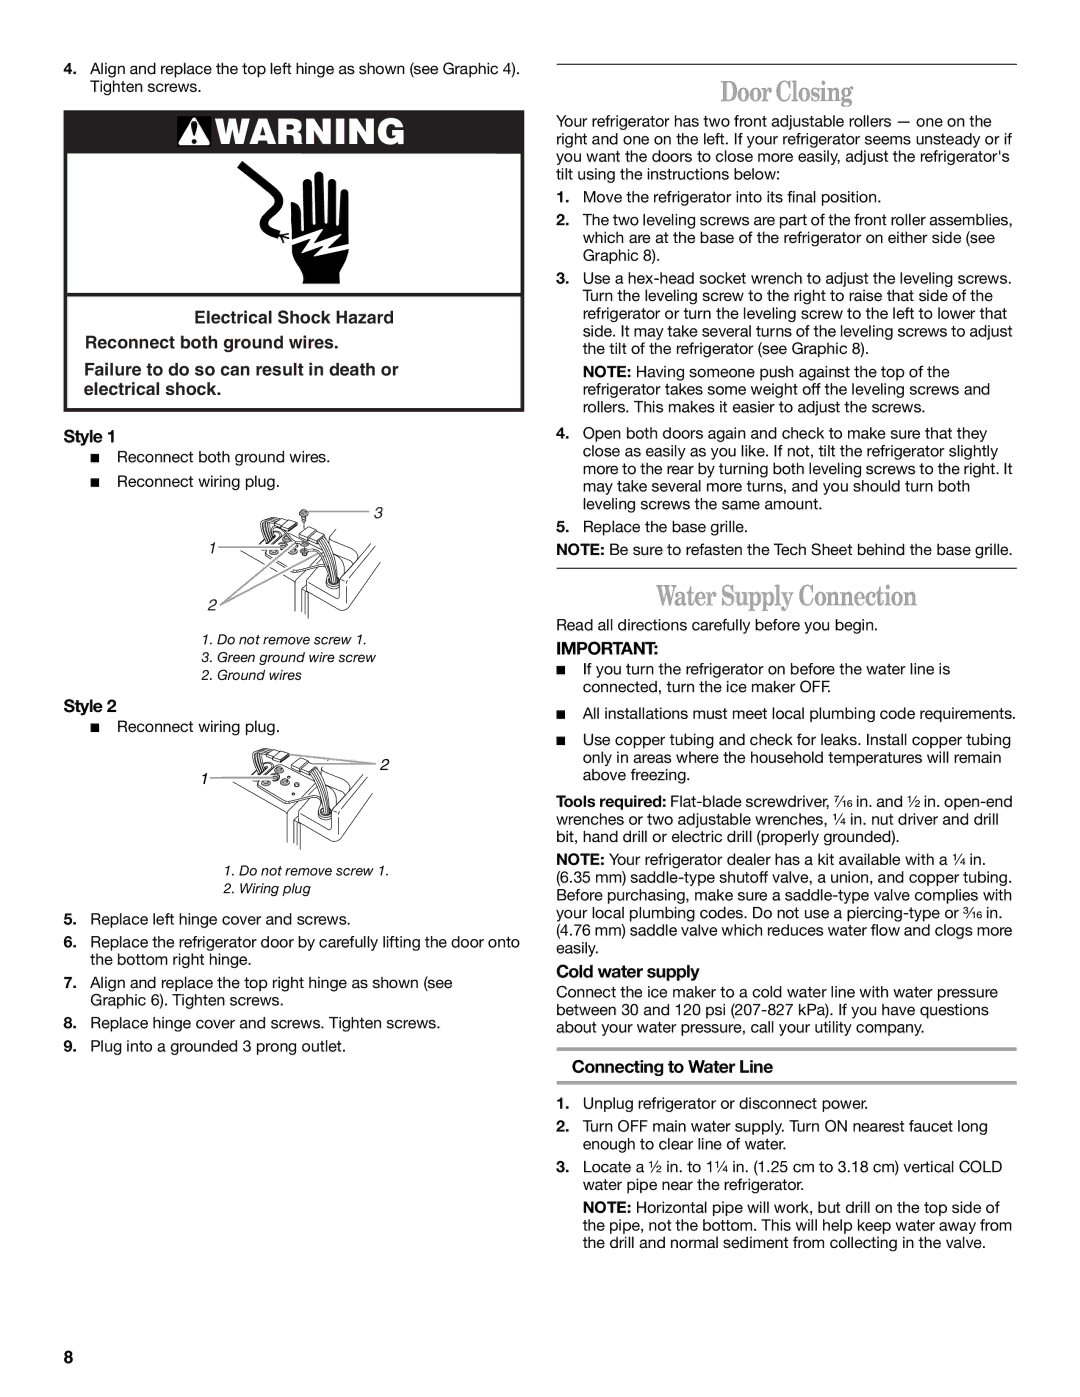
Style 1
■Reconnect both ground wires.
■Reconnect wiring plug.
3
1
2
1.Do not remove screw 1.
3.Green ground wire screw
2.Ground wires
Style 2
■Reconnect wiring plug.
![]()
![]()
![]() 2 1
2 1 ![]()
![]()
1.Do not remove screw 1.
2.Wiring plug
5.Replace left hinge cover and screws.
6.Replace the refrigerator door by carefully lifting the door onto the bottom right hinge.
7.Align and replace the top right hinge as shown (see Graphic 6). Tighten screws.
8.Replace hinge cover and screws. Tighten screws.
9.Plug into a grounded 3 prong outlet.
Door Closing
Your refrigerator has two front adjustable rollers — one on the right and one on the left. If your refrigerator seems unsteady or if you want the doors to close more easily, adjust the refrigerator's tilt using the instructions below:
1.Move the refrigerator into its final position.
2.The two leveling screws are part of the front roller assemblies, which are at the base of the refrigerator on either side (see Graphic 8).
3.Use a
NOTE: Having someone push against the top of the refrigerator takes some weight off the leveling screws and rollers. This makes it easier to adjust the screws.
4.Open both doors again and check to make sure that they close as easily as you like. If not, tilt the refrigerator slightly more to the rear by turning both leveling screws to the right. It may take several more turns, and you should turn both leveling screws the same amount.
5.Replace the base grille.
NOTE: Be sure to refasten the Tech Sheet behind the base grille.
Water Supply Connection
Read all directions carefully before you begin.
IMPORTANT:
■If you turn the refrigerator on before the water line is connected, turn the ice maker OFF.
■All installations must meet local plumbing code requirements.
■Use copper tubing and check for leaks. Install copper tubing only in areas where the household temperatures will remain above freezing.
Tools required:
NOTE: Your refrigerator dealer has a kit available with a ¹⁄₄ in. (6.35 mm)
Cold water supply
Connect the ice maker to a cold water line with water pressure between 30 and 120 psi
Connecting to Water Line
1.Unplug refrigerator or disconnect power.
2.Turn OFF main water supply. Turn ON nearest faucet long enough to clear line of water.
3.Locate a ½ in. to 1¹⁄₄ in. (1.25 cm to 3.18 cm) vertical COLD water pipe near the refrigerator.
NOTE: Horizontal pipe will work, but drill on the top side of the pipe, not the bottom. This will help keep water away from the drill and normal sediment from collecting in the valve.
8