USING YOUR RANGE
ADJUSTING THE OVEN TEMPERATURE CONTROL
Although your new oven is properly adjusted to provide accurate temperatures, it may cook faster or slower than your old oven.
If you are not satisfied with the baking/roasting results, you can change the offset temperature by following the steps below.
NOTE: DO NOT measure oven temperature with a thermometer. Opening the oven door will lower the oven temperature and give you an incorrect reading. Also, the thermometer temperature reading will change as your oven cycles.
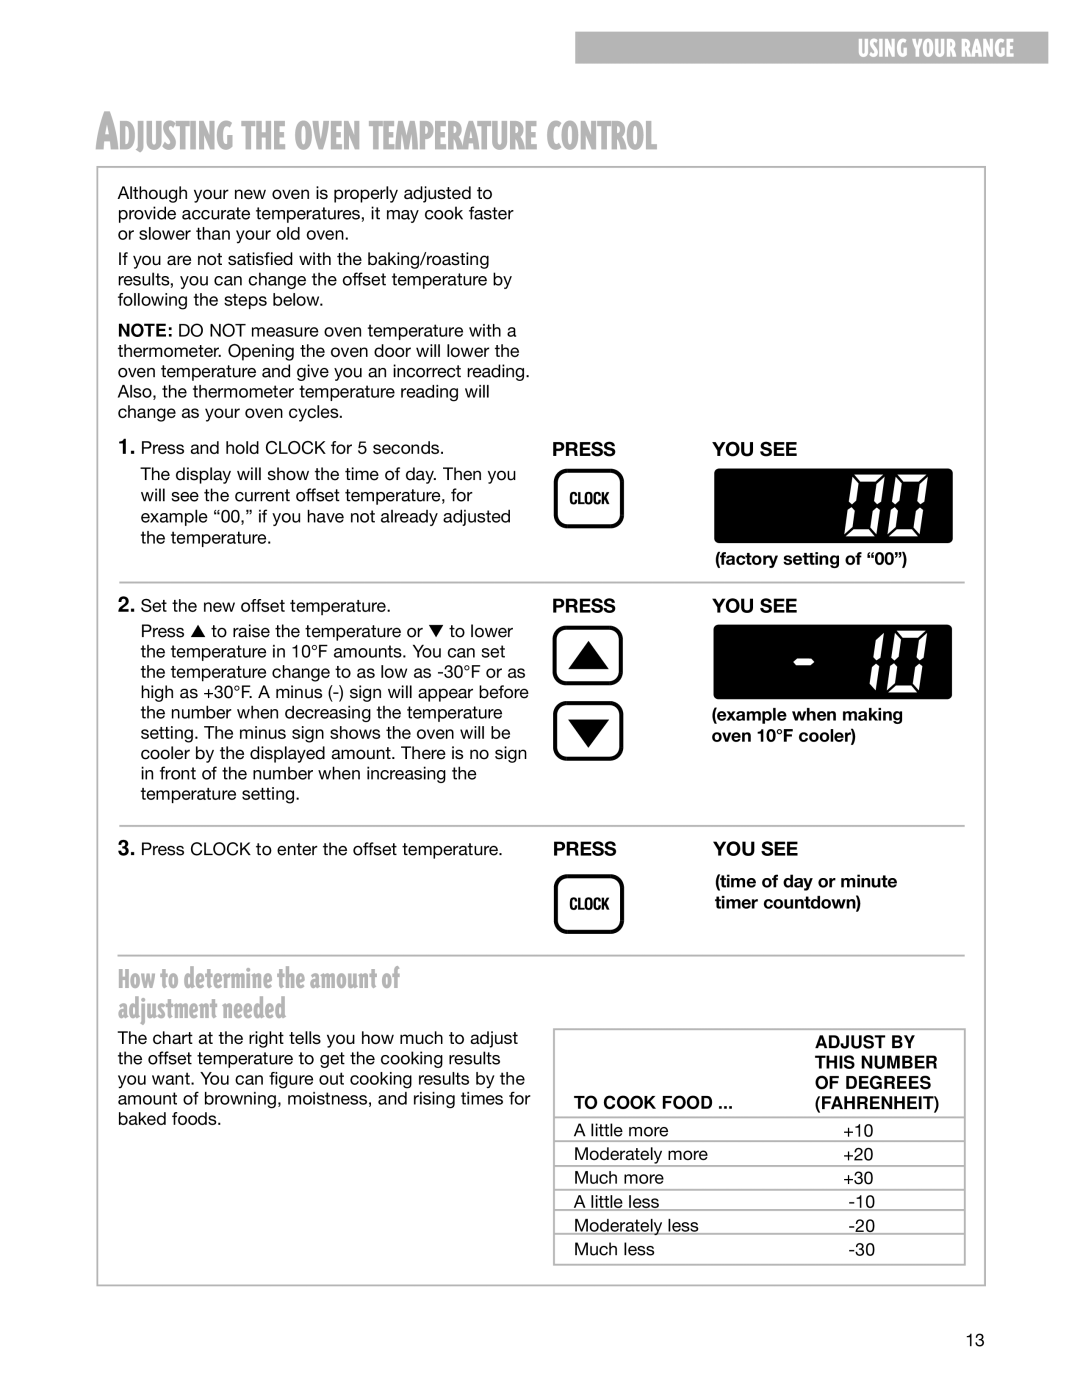
1. Press and hold CLOCK for 5 seconds. | PRESS | YOU SEE |
The display will show the time of day. Then you |
|
|
will see the current offset temperature, for |
|
|
example “00,” if you have not already adjusted |
|
|
the temperature. |
|
|
|
| (factory setting of “00”) |
2. Set the new offset temperature. | PRESS |
Press s to raise the temperature or t to lower |
|
the temperature in 10°F amounts. You can set |
|
the temperature change to as low as |
|
high as +30°F. A minus |
|
the number when decreasing the temperature |
|
setting. The minus sign shows the oven will be |
|
cooler by the displayed amount. There is no sign |
|
in front of the number when increasing the |
|
temperature setting. |
|
YOU SEE
(example when making oven 10°F cooler)
3. Press CLOCK to enter the offset temperature. | PRESS | YOU SEE |
(time of day or minute timer countdown)
How to determine the amount of adjustment needed
The chart at the right tells you how much to adjust the offset temperature to get the cooking results you want. You can figure out cooking results by the amount of browning, moistness, and rising times for baked foods.
| ADJUST BY |
| THIS NUMBER |
TO COOK FOOD ... | OF DEGREES |
(FAHRENHEIT) | |
|
|
A little more | +10 |
Moderately more | +20 |
Much more | +30 |
A little less | |
Moderately less | |
Much less | |
|
|
13