Choosing the proper location
Read the following items before choosing the location for the freezer. See “Completing the installation” below before sliding freezer into place.
1.Pick a safe place, indoors, away from flammables such as gasoline.
2.Check the strength of the floor. It should hold the weight of a fully loaded freezer.
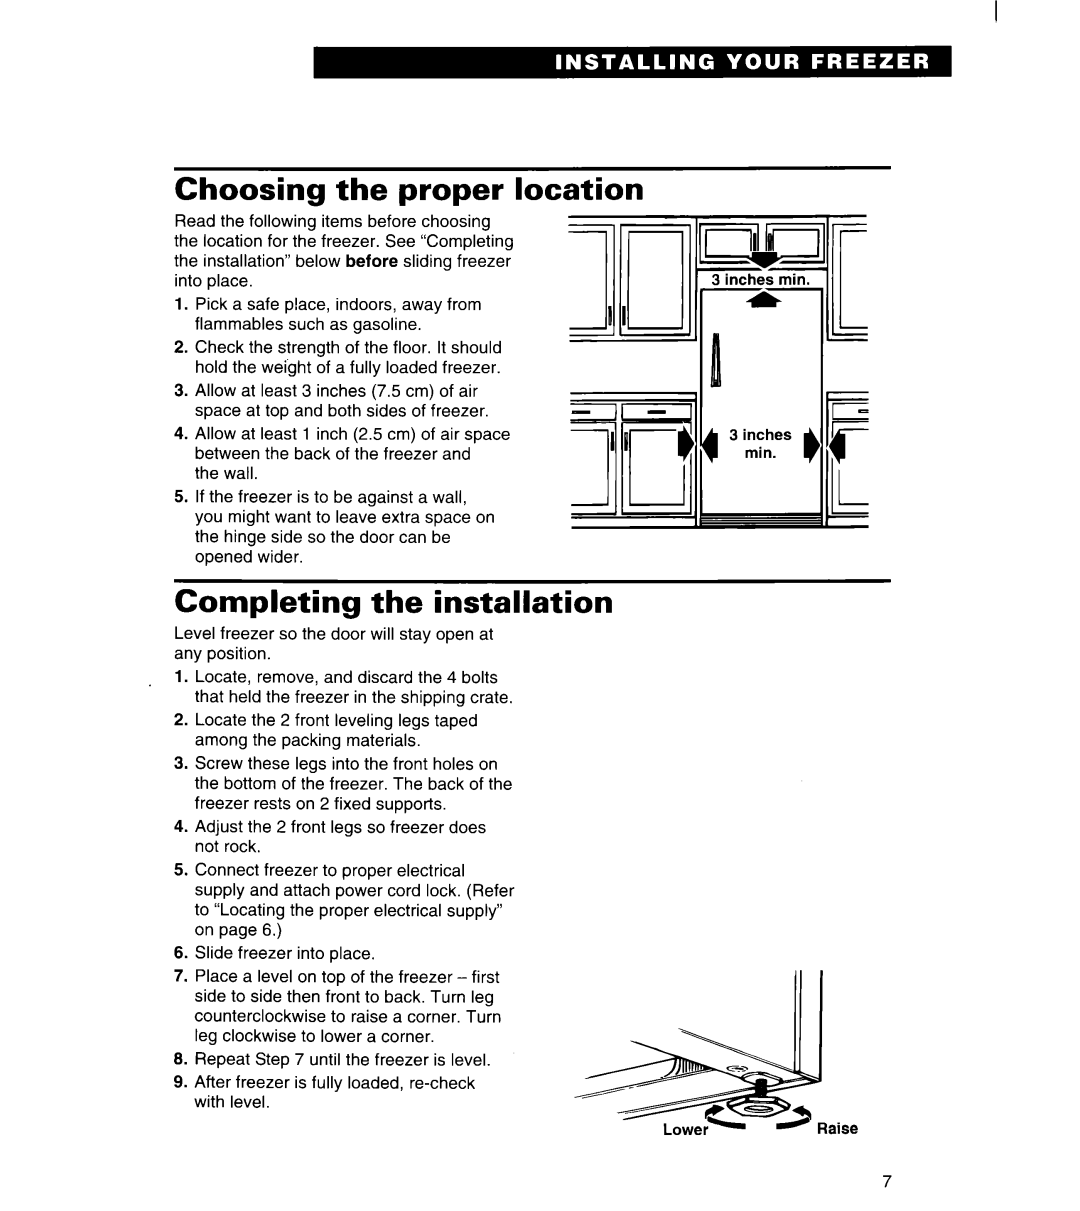
3.Allow at least 3 inches (7.5 cm) of air space at top and both sides of freezer.
4.Allow at least 1 inch (2.5 cm) of air space between the back of the freezer and
the wall.
5.If the freezer is to be against a wall,
you might want to leave extra space on the hinge side so the door can be opened wider.
Completing the installation
Level freezer so the door will stay open at any position.
1.Locate, remove, and discard the 4 bolts that held the freezer in the shipping crate.
2.Locate the 2 front leveling legs taped among the packing materials.
3.Screw these legs into the front holes on the bottom of the freezer. The back of the freezer rests on 2 fixed supports.
4.Adjust the 2 front legs so freezer does not rock.
5.Connect freezer to proper electrical
supply and attach power cord lock. (Refer to “Locating the proper electrical supply” on page 6.)
6.Slide freezer into place.
7.Place a level on top of the freezer - first side to side then front to back. Turn leg counterclockwise to raise a corner. Turn leg clockwise to lower a corner.
6.Repeat Step 7 until the freezer is level.
9.After freezer is fully loaded,
7