Installing Your Freezer
Proper installation of any appliance is very important. This section will tell you,everything you need to know to install your freezer properly.
Installing the handle
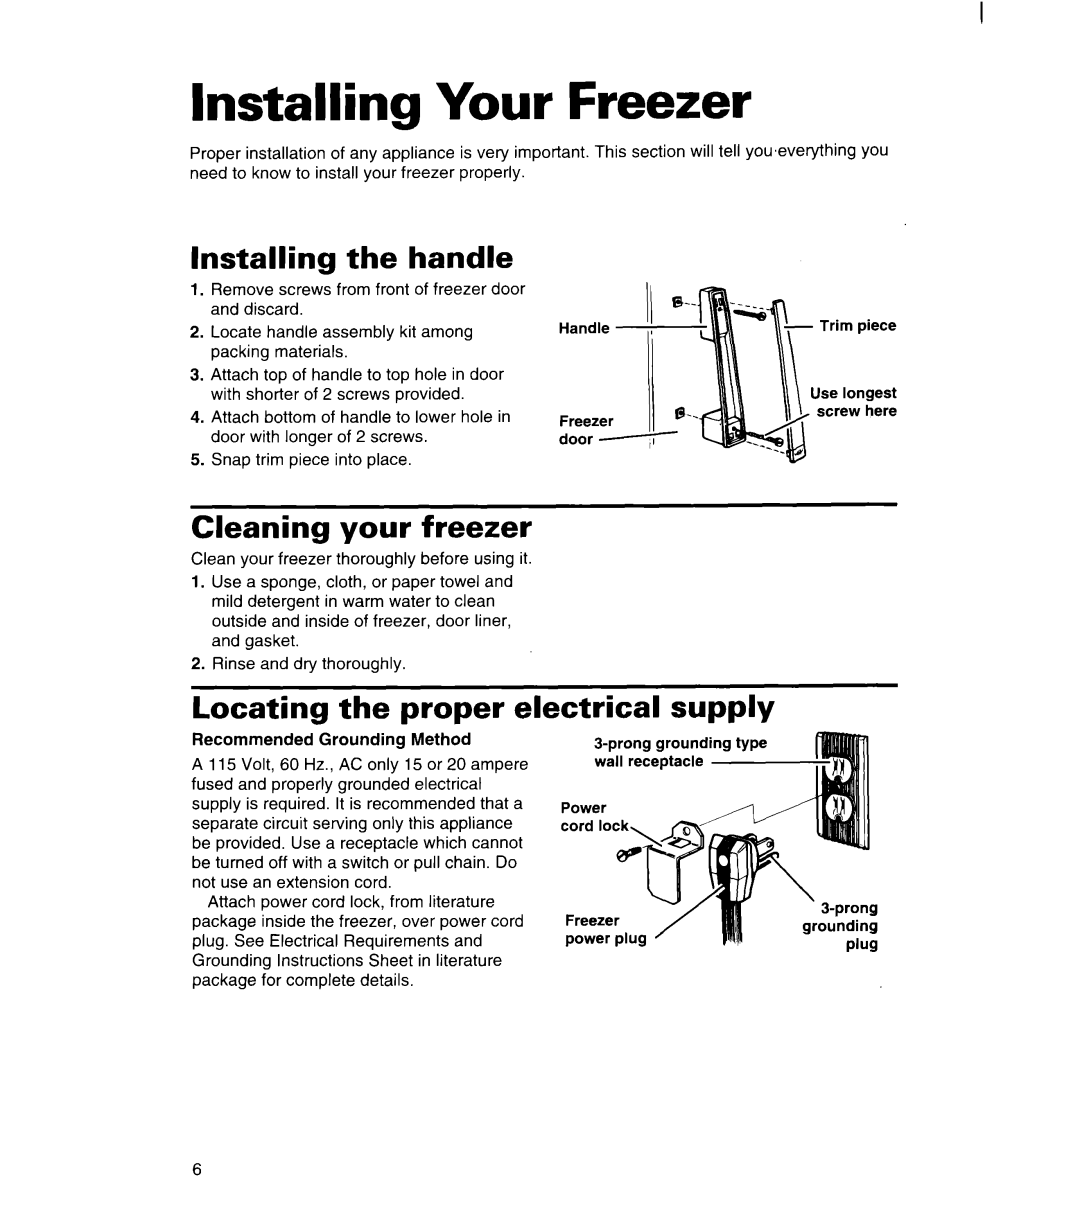
1.Remove screws from front of freezer door and discard.
2.Locate handle assembly kit among packing materials.
3.Attach top of handle to top hole in door with shorter of 2 screws provided.
4.Attach bottom of handle to lower hole in door with longer of 2 screws.
5.Snap trim piece into place.
Handle II | II | Trim | piece | |
|
|
| Use longest | |
Freezer |
|
| screw | here |
|
|
|
| |
door - | I’ |
|
|
|
Cleaning your freezer
Clean your freezer thoroughly before using it.
1.Use a sponge, cloth, or paper towel and mild detergent in warm water to clean outside and inside of freezer, door liner, and gasket.
2.Rinse and dry thoroughly.
Locating the proper electrical supply
Recommended Grounding Method
A 115 Volt, 60 Hz., AC only 15 or 20 ampere fused and properly grounded electrical supply is required. It is recommended that a separate circuit serving only this appliance be provided. Use a receptacle which cannot be turned off with a switch or pull chain. Do not use an extension cord.
Attach power cord lock, from literature package inside the freezer, over power cord plug. See Electrical Requirements and Grounding Instructions Sheet in literature package for complete details.
6