Install the Compactor
IMPORTANT: Do not grasp control panel to move compactor.
1.Move the compactor to its final position.
2.Grasp sides of compactor drawer and place bottom of drawer into tracks. Lift at the handle so drawer will go over drawer stops. Close drawer. Check to see that drawer opens freely. If the toe plate rubs against floor, see “Adjusting the Toe Plate” for further instructions.
3.Plug into a grounded 3 prong outlet.
Adjusting the Toe Plate
If the toe plate rubs the floor covering, the toe plate clearance may be changed as follows:
1.Mark on each side of the toe plate the amount of toe plate that rubs the floor covering.
2.Remove the drawer from the unit. (See Step 3 in the “Unpacking” section.)
3.Use a ruler and a pencil or chalk to draw a line between the marks on each side of toe plate.
4.Use scissors or utility knife to cut toe plate along line.
5.Replace drawer. If toe plate still rubs floor covering, repeat steps
COMPACTOR USE
How Your Compactor Works
The compacting ram is the part of the compactor which compresses the trash. The compacting ram does not go to the bottom of the drawer. You will not see compacting of trash the first few times you load the compactor.
NOTE: The compactor drawer should be more than ¹⁄₂ full before the compactor can begin to compress the load.
You may hear a noise when glass breaks. Strong glass bottles may not break at all. The trash in a full compactor bag will be about ¹⁄₄ the size of its original bulk.
Load bulky trash, bottles, and cans in the center of the drawer. Bottles or cans not placed in the center may become caught between the ram and the drawer. The Drawer Monitor Switch then senses a “misload” and causes the ram to return to the “up” position without compacting.
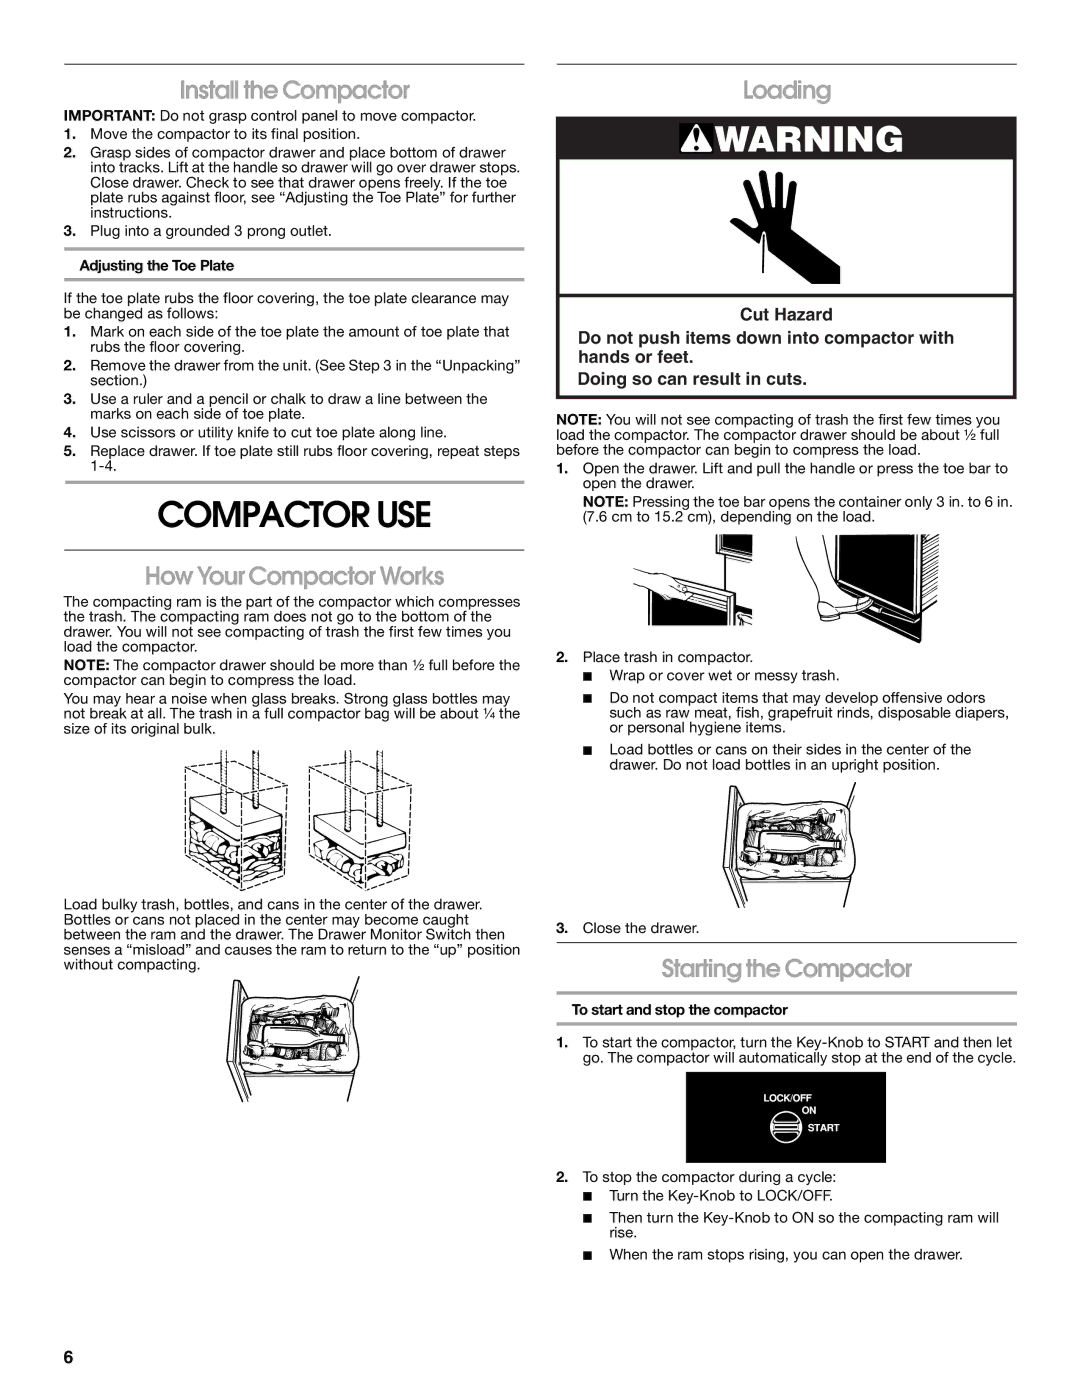
Loading
![]() WARNING
WARNING
Cut Hazard
Do not push items down into compactor with hands or feet.
Doing so can result in cuts.
NOTE: You will not see compacting of trash the first few times you load the compactor. The compactor drawer should be about ¹⁄₂ full before the compactor can begin to compress the load.
1.Open the drawer. Lift and pull the handle or press the toe bar to open the drawer.
NOTE: Pressing the toe bar opens the container only 3 in. to 6 in. (7.6 cm to 15.2 cm), depending on the load.
2.Place trash in compactor.
■Wrap or cover wet or messy trash.
■Do not compact items that may develop offensive odors such as raw meat, fish, grapefruit rinds, disposable diapers, or personal hygiene items.
■Load bottles or cans on their sides in the center of the drawer. Do not load bottles in an upright position.
3.Close the drawer.
Starting the Compactor
To start and stop the compactor
1.To start the compactor, turn the
2.To stop the compactor during a cycle:
■Turn the
■Then turn the
■When the ram stops rising, you can open the drawer.
6