InstallLevelingLegs
Install the front leveling feet
1.Prop up the front of the washer/dryer about 4" (102 mm) with a wood block or similar object. The block needs to support the weight of the washer/dryer.
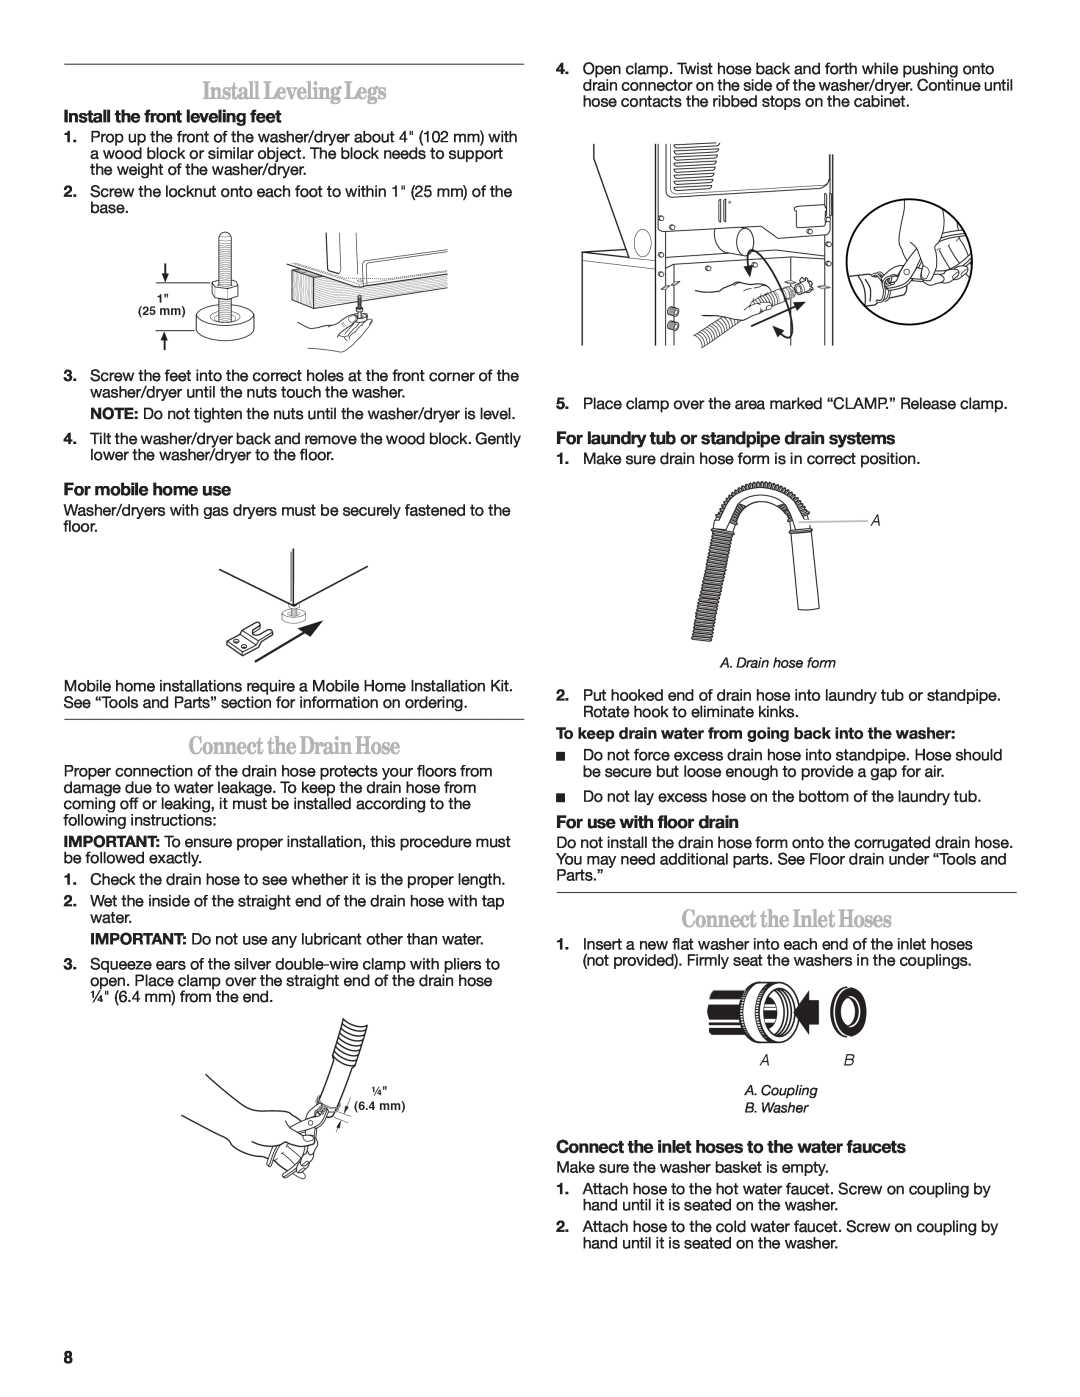
2.Screw the locknut onto each foot to within 1" (25 mm) of the base.
1"
(25 mm)
3.Screw the feet into the correct holes at the front corner of the washer/dryer until the nuts touch the washer.
NOTE: Do not tighten the nuts until the washer/dryer is level.
4.Tilt the washer/dryer back and remove the wood block. Gently lower the washer/dryer to the floor.
For mobile home use
Washer/dryers with gas dryers must be securely fastened to the floor.
Mobile home installations require a Mobile Home Installation Kit. See “Tools and Parts” section for information on ordering.
ConnecttheDrainHose
Proper connection of the drain hose protects your floors from damage due to water leakage. To keep the drain hose from coming off or leaking, it must be installed according to the following instructions:
IMPORTANT: To ensure proper installation, this procedure must be followed exactly.
1.Check the drain hose to see whether it is the proper length.
2.Wet the inside of the straight end of the drain hose with tap water.
IMPORTANT: Do not use any lubricant other than water.
3.Squeeze ears of the silver
¼"
![]()
![]()
![]() (6.4 mm)
(6.4 mm)
4.Open clamp. Twist hose back and forth while pushing onto drain connector on the side of the washer/dryer. Continue until hose contacts the ribbed stops on the cabinet.
5.Place clamp over the area marked “CLAMP.” Release clamp.
For laundry tub or standpipe drain systems
1.Make sure drain hose form is in correct position.
![]() A
A
A.Drain hose form
2.Put hooked end of drain hose into laundry tub or standpipe. Rotate hook to eliminate kinks.
To keep drain water from going back into the washer:
Do not force excess drain hose into standpipe. Hose should be secure but loose enough to provide a gap for air.
Do not lay excess hose on the bottom of the laundry tub.
For use with floor drain
Do not install the drain hose form onto the corrugated drain hose. You may need additional parts. See Floor drain under “Tools and Parts.”
ConnecttheInletHoses
1.Insert a new flat washer into each end of the inlet hoses (not provided). Firmly seat the washers in the couplings.
AB
A.Coupling
B.Washer
Connect the inlet hoses to the water faucets
Make sure the washer basket is empty.
1.Attach hose to the hot water faucet. Screw on coupling by hand until it is seated on the washer.
2.Attach hose to the cold water faucet. Screw on coupling by hand until it is seated on the washer.
8