
RS22AQXGN03 specifications
The Whirlpool RS22AQXGN03 is a versatile and stylish refrigerator that seamlessly combines functionality with modern aesthetics. Designed to meet the needs of contemporary households, this appliance is packed with features that enhance convenience, food preservation, and energy efficiency.One of the main attractions of the RS22AQXGN03 is its spacious interior, which offers ample room for groceries and kitchen essentials. With a capacity of approximately 22 cubic feet, it is well-suited for families or individuals who require significant storage space. The refrigerator section features adjustable shelves, allowing users to customize the layout according to their needs. Additionally, the door bins provide extra space for condiments, beverages, and smaller items, ensuring everything is organized and easily accessible.
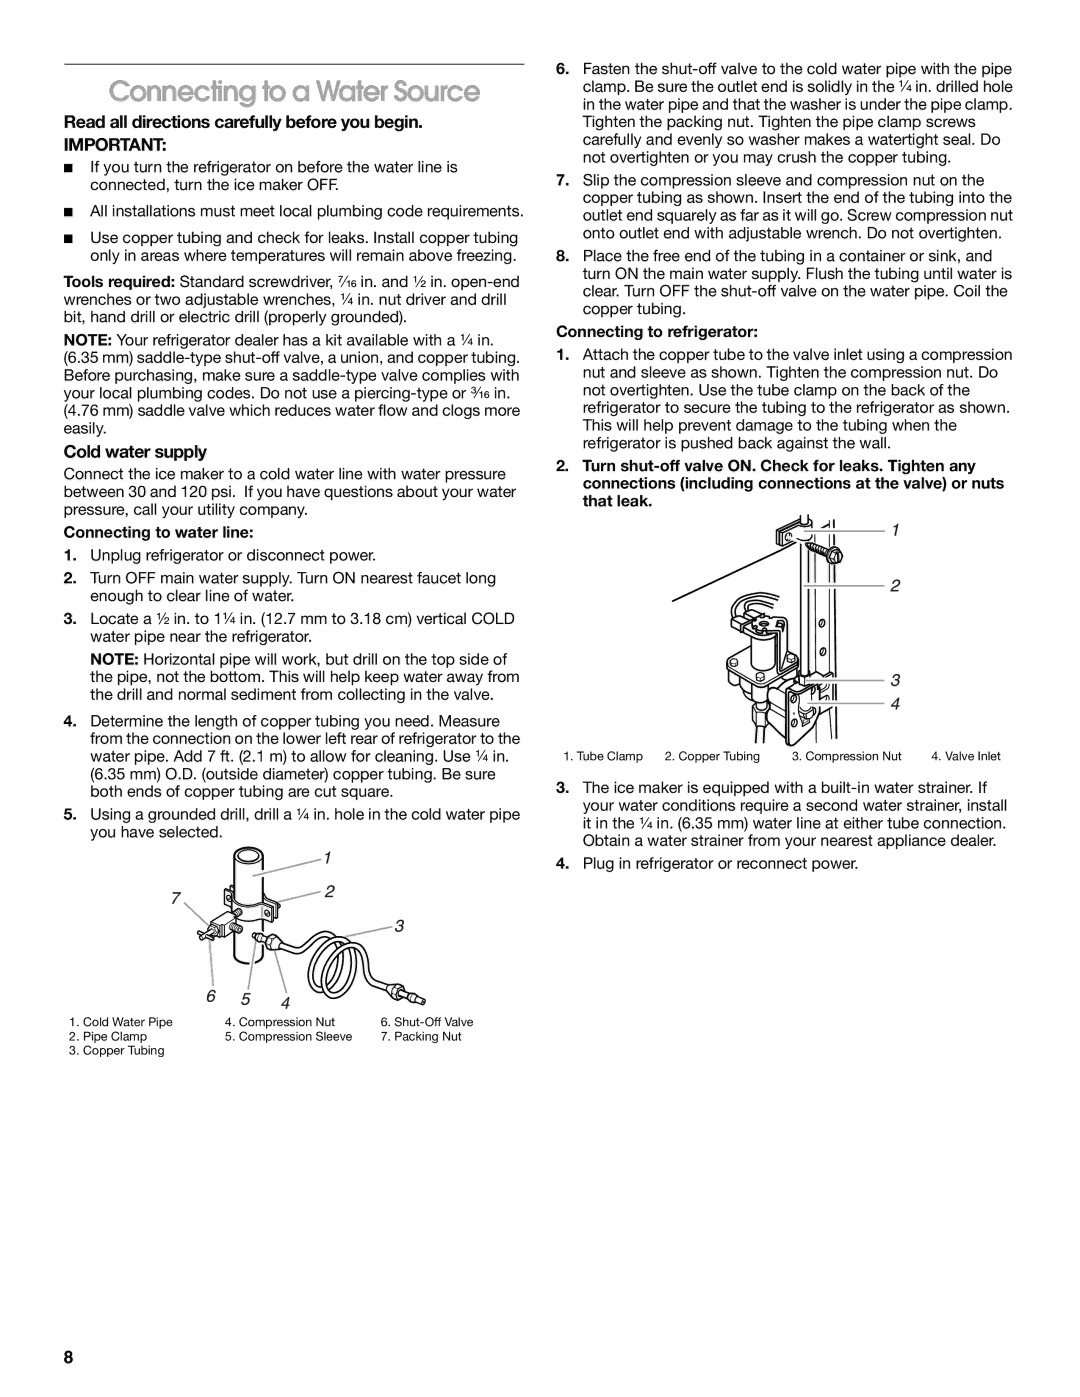
This model is equipped with Whirlpool's advanced Cooling System, which utilizes a two-tiered cooling process to maintain optimal temperatures. The FreshFlow™ air filter and humidity-controlled crispers keep fruits and vegetables fresher for longer by regulating humidity levels. Moreover, this technology minimizes the mixing of odors and keeps food tasting great, making it a smart choice for keeping ingredients at their best.
Energy efficiency is another highlight of the RS22AQXGN03. It features an Energy Star rating, ensuring that it operates efficiently and helps reduce energy costs without sacrificing performance. This eco-conscious design not only benefits the environment but also contributes to savings over time.
The RS22AQXGN03 also offers user-friendly technology, including electronic temperature controls, which enable precise management of interior conditions with just a push of a button. Users can easily adjust the temperature according to their preferences for optimal food preservation.
In terms of design, the Whirlpool RS22AQXGN03 boasts a sleek stainless steel finish that complements any kitchen décor. The modern appearance is not just about looks; the surface is also resistant to fingerprints, ensuring that it remains polished and clean with minimal effort. The refrigerator's LED lighting illuminates the interior thoroughly, making it easy to find items even in low light conditions.
In summary, the Whirlpool RS22AQXGN03 stands out with its combination of spacious design, advanced cooling technologies, energy efficiency, and modern aesthetics. It is an appliance built to enhance kitchen functionality while providing a stylish touch to any home. With its reliable performance and thoughtful features, this refrigerator represents an excellent choice for anyone looking to upgrade their kitchen experience.