Placement of Unit
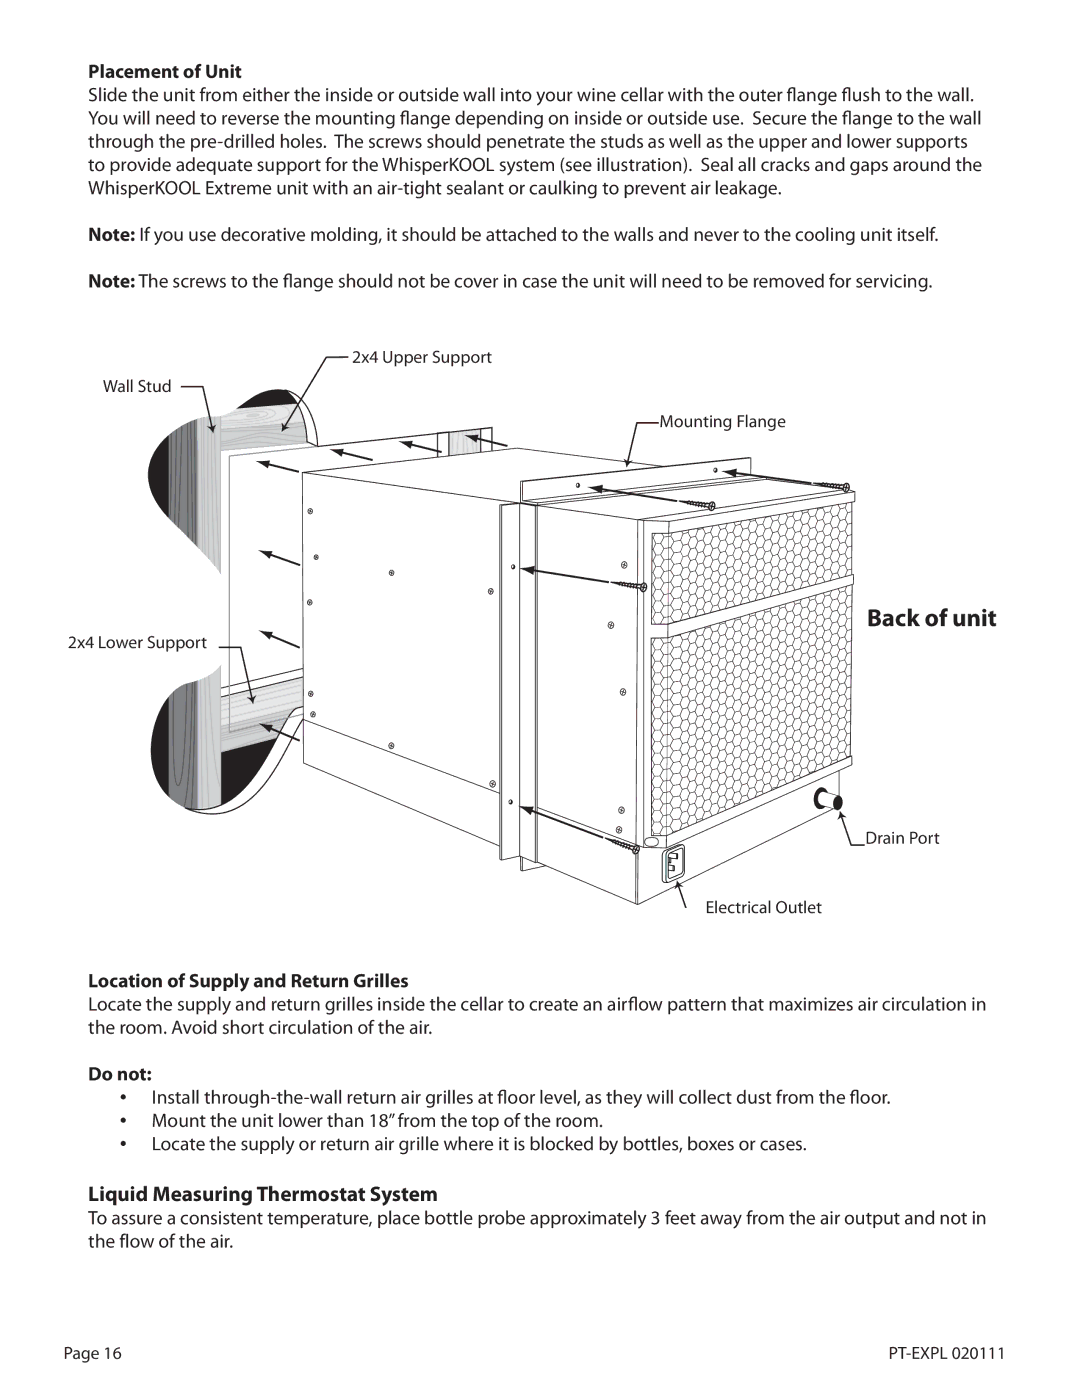
Slide the unit from either the inside or outside wall into your wine cellar with the outer flange flush to the wall. You will need to reverse the mounting flange depending on inside or outside use. Secure the flange to the wall through the
Note: If you use decorative molding, it should be attached to the walls and never to the cooling unit itself.
Note: The screws to the flange should not be cover in case the unit will need to be removed for servicing.
2x4 Upper Support
Wall Stud
Mounting Flange
Back of unit
2x4 Lower Support
![]() Drain Port
Drain Port
![]() Electrical Outlet
Electrical Outlet
Location of Supply and Return Grilles
Locate the supply and return grilles inside the cellar to create an airflow pattern that maximizes air circulation in the room. Avoid short circulation of the air.
Do not:
•Install
•Mount the unit lower than 18” from the top of the room.
•Locate the supply or return air grille where it is blocked by bottles, boxes or cases.
Liquid Measuring Thermostat System
To assure a consistent temperature, place bottle probe approximately 3 feet away from the air output and not in the flow of the air.
Page 16 |
|
