ErrorCodes
ERROR CODES: Curtis Cafe systems contain various safety features in the electronic circuitry that shut down the functions of the unit in the event of a system failure. Error codes are signalled by the READY light blinking one of two patterns:
WATERLEVELPROBLEM3LONGAND1SHORT
The code can be initiated by a variety of occurances.
A water line is turned off or a filter needs changing.
A water inlet valve may be malfunctioning.
A water level probe may be grounded.
There may be a loose connection or a defect in the control board.
TEMPERATURESENSORPROBLEM3LONGAND2SHORT
Power may be turned off.
Temperature sensor may have a bad connection or may not be tight against the tank.
Heating element may be burned out.
Control board may be faulty.
CAUTION: DO NOT use undiluted
bleach or chlorine.
Flushing the Whipper Chambers
Every three to four hours or more often if necessary flush the whipper chamber/dispensing system. A. Make sure power is ON.
B. Press and hold the STOP/WASH button. Select one of the PUSH dispensing buttons and press. Hot rinse water will flush out the system. Lift off the STOP/WASH button when water runs clear.
C. Clean up any water that may have spilled.
Cleaning
A. Switch off the unit at the power toggle switch, marked CONTROL, behind the unit.
B. Wipe all exterior surfaces with a damp cloth; removing any spills, dust or debris from the unit.
C. Remove the drip tray and louvered screen and wash out its contents. For hard to clean deposits, use a mild detergent solution.
D. Clean around the dispensing area, wiping with a nontoxic cleaner.
Instructions,DumpValveAdjustment
Changing the strength of the drink involves adjusting the product flow rate. This is usually done at the front control panel. The regulating of this mix should be done through reprogramming the settings. This setting affects the throw of product only. Through this method, you may change the flavor profile in 10% increments.
The Water flow is preset to ensure optimum mixing and proper chamber rinsing. The valves have been set at the factory and should not require adjusting. The factory flow rate setting is 10 oz. of water in 16 seconds (or 0.63 oz. /sec.).
We recommend that you regulate the water flow in the valve ONLYwhen replacing a valve.
Dumpvalve,waterflowadjustment:
I.Remove the canisters. Open the front door and on each canister, turn product delivery elbows upward. Take out all product canisters. The valve access panel is behind the canisters. Remove the panel to access the dump valves.
WARNING: As with all electrical equipment, caution must be taken to avoid electrical shock. Be sure the power cord is disconnected before removing components. The following steps will also involve working near hot surfaces.
II. Instructionsforreplacingavalve:
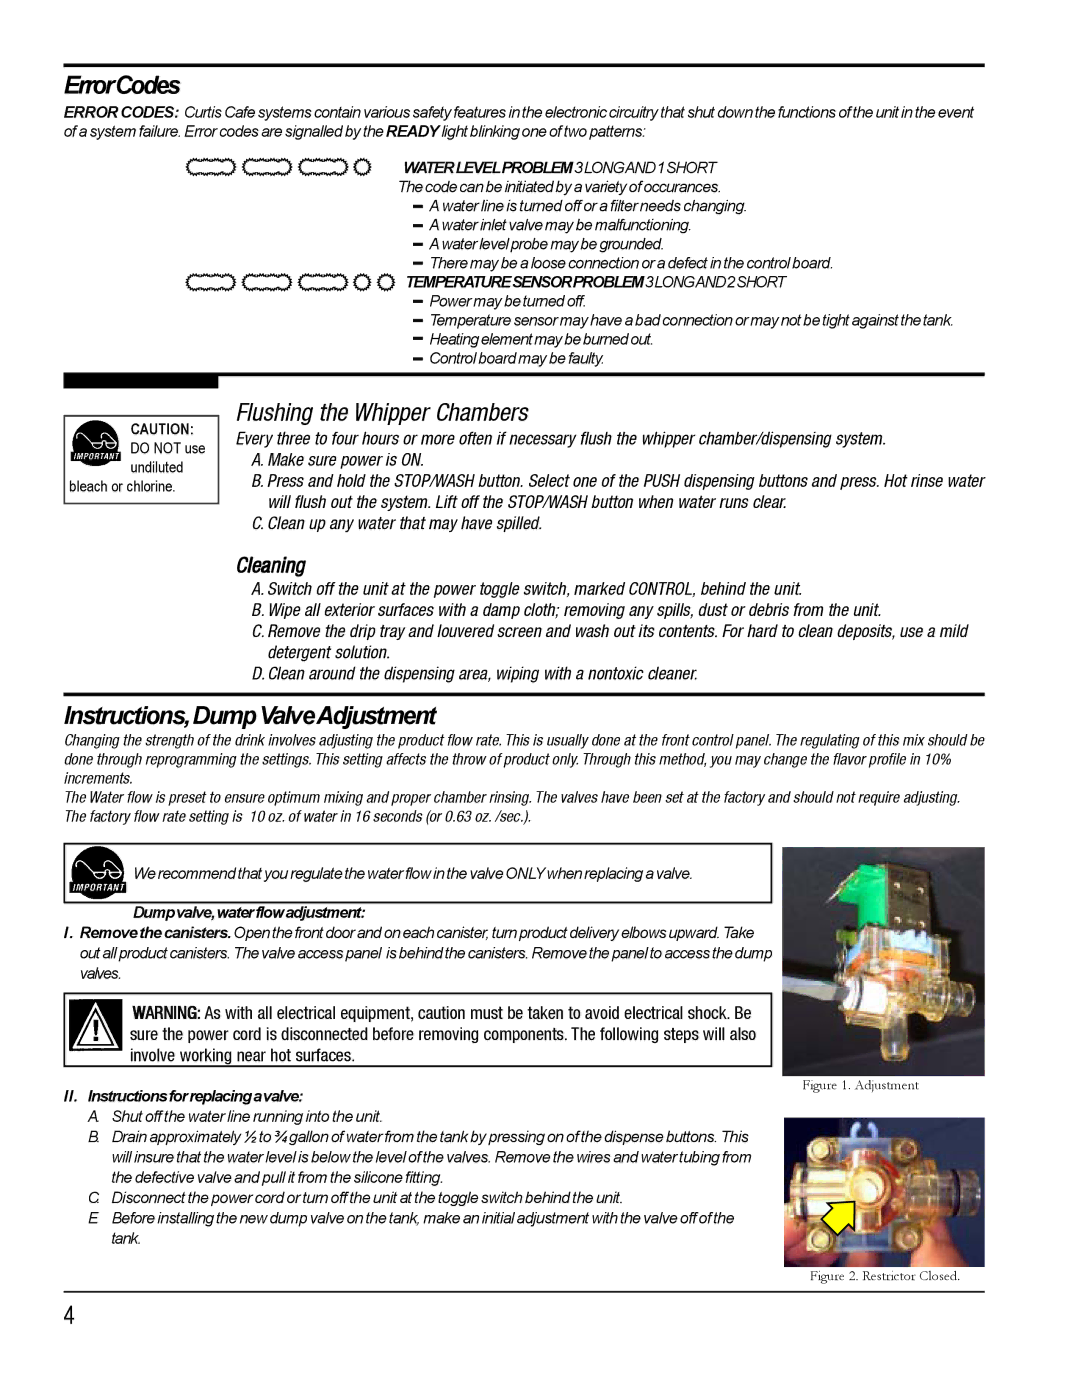
Figure 1. Adjustment
A. Shut off the water line running into the unit.
B. Drain approximately ½ to ¾ gallon of water from the tank by pressing on of the dispense buttons. This will insure that the water level is below the level of the valves. Remove the wires and water tubing from the defective valve and pull it from the silicone fitting.
C. Disconnect the power cord or turn off the unit at the toggle switch behind the unit.
E.Before installing the new dump valve on the tank, make an initial adjustment with the valve off of the tank.
Figure 2. Restrictor Closed.
4