2.Set the height for both at about
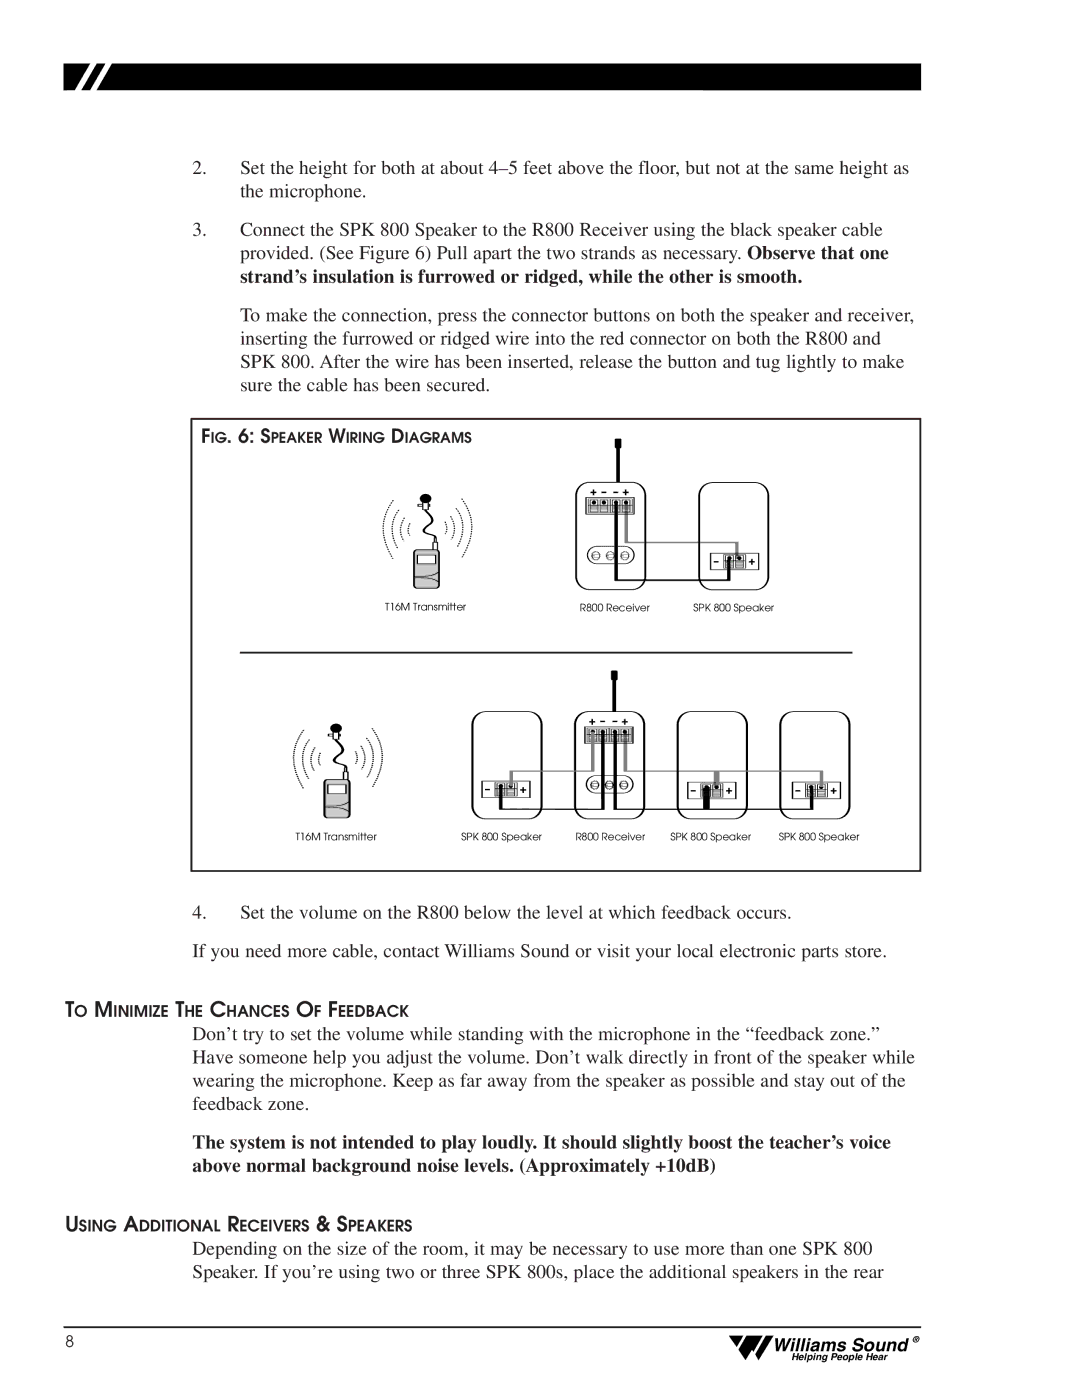
3.Connect the SPK 800 Speaker to the R800 Receiver using the black speaker cable provided. (See Figure 6) Pull apart the two strands as necessary. Observe that one strand’s insulation is furrowed or ridged, while the other is smooth.
To make the connection, press the connector buttons on both the speaker and receiver, inserting the furrowed or ridged wire into the red connector on both the R800 and SPK 800. After the wire has been inserted, release the button and tug lightly to make sure the cable has been secured.
FIG. 6: SPEAKER WIRING DIAGRAMS
+ – – +
– ![]() +
+
T16M Transmitter | R800 Receiver | SPK 800 Speaker |
|
|
|
+ – – +
– ![]() +
+
– ![]() +
+
– ![]() +
+
T16M Transmitter | SPK 800 Speaker | R800 Receiver | SPK 800 Speaker | SPK 800 Speaker |
4.Set the volume on the R800 below the level at which feedback occurs.
If you need more cable, contact Williams Sound or visit your local electronic parts store.
TO MINIMIZE THE CHANCES OF FEEDBACK
Don’t try to set the volume while standing with the microphone in the “feedback zone.” Have someone help you adjust the volume. Don’t walk directly in front of the speaker while wearing the microphone. Keep as far away from the speaker as possible and stay out of the feedback zone.
The system is not intended to play loudly. It should slightly boost the teacher’s voice above normal background noise levels. (Approximately +10dB)
USING ADDITIONAL RECEIVERS & SPEAKERS
Depending on the size of the room, it may be necessary to use more than one SPK 800 Speaker. If you’re using two or three SPK 800s, place the additional speakers in the rear
8 | Williams Sound ® |
Helping People Hear