INSTAL LATI ON INSTR U C TIO N S
UNPA CKING YOU R MIC ROWAVE
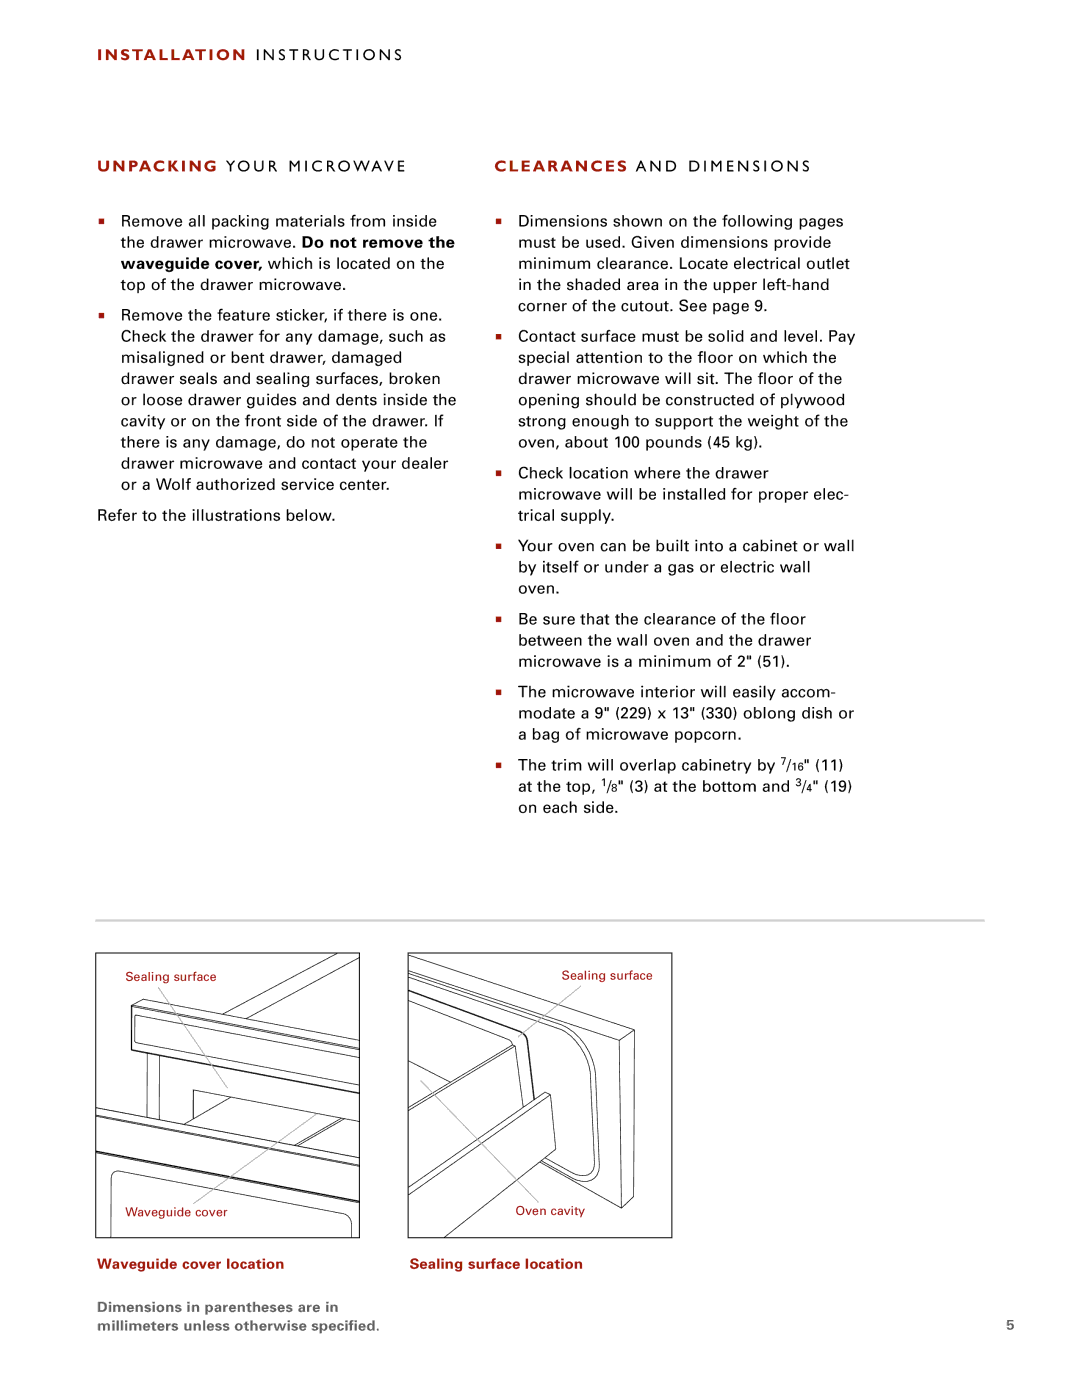
Remove all packing materials from inside the drawer microwave. Do not remove the waveguide cover, which is located on the top of the drawer microwave.
Remove the feature sticker, if there is one. Check the drawer for any damage, such as misaligned or bent drawer, damaged drawer seals and sealing surfaces, broken or loose drawer guides and dents inside the cavity or on the front side of the drawer. If there is any damage, do not operate the drawer microwave and contact your dealer or a Wolf authorized service center.
Refer to the illustrations below.
CLEAR ANC ES A N D D I ME N SI O N S
Dimensions shown on the following pages must be used. Given dimensions provide minimum clearance. Locate electrical outlet in the shaded area in the upper
Contact surface must be solid and level. Pay special attention to the floor on which the drawer microwave will sit. The floor of the opening should be constructed of plywood strong enough to support the weight of the oven, about 100 pounds (45 kg).
Check location where the drawer microwave will be installed for proper elec- trical supply.
Your oven can be built into a cabinet or wall by itself or under a gas or electric wall oven.
Be sure that the clearance of the floor between the wall oven and the drawer microwave is a minimum of 2" (51).
The microwave interior will easily accom- modate a 9" (229) x 13" (330) oblong dish or a bag of microwave popcorn.
The trim will overlap cabinetry by 7/16" (11) at the top, 1/8" (3) at the bottom and 3/4" (19) on each side.
Sealing surface |
Waveguide cover |
Waveguide cover location
Sealing surface |
Oven cavity |
Sealing surface location
Dimensions in parentheses are in |
|
millimeters unless otherwise specified. | 5 |
