HSN_7CupFoodProcManual 4/20/09 10:50 AM Page 13
Assembling Your Attachments
Using Your Mini Bowl
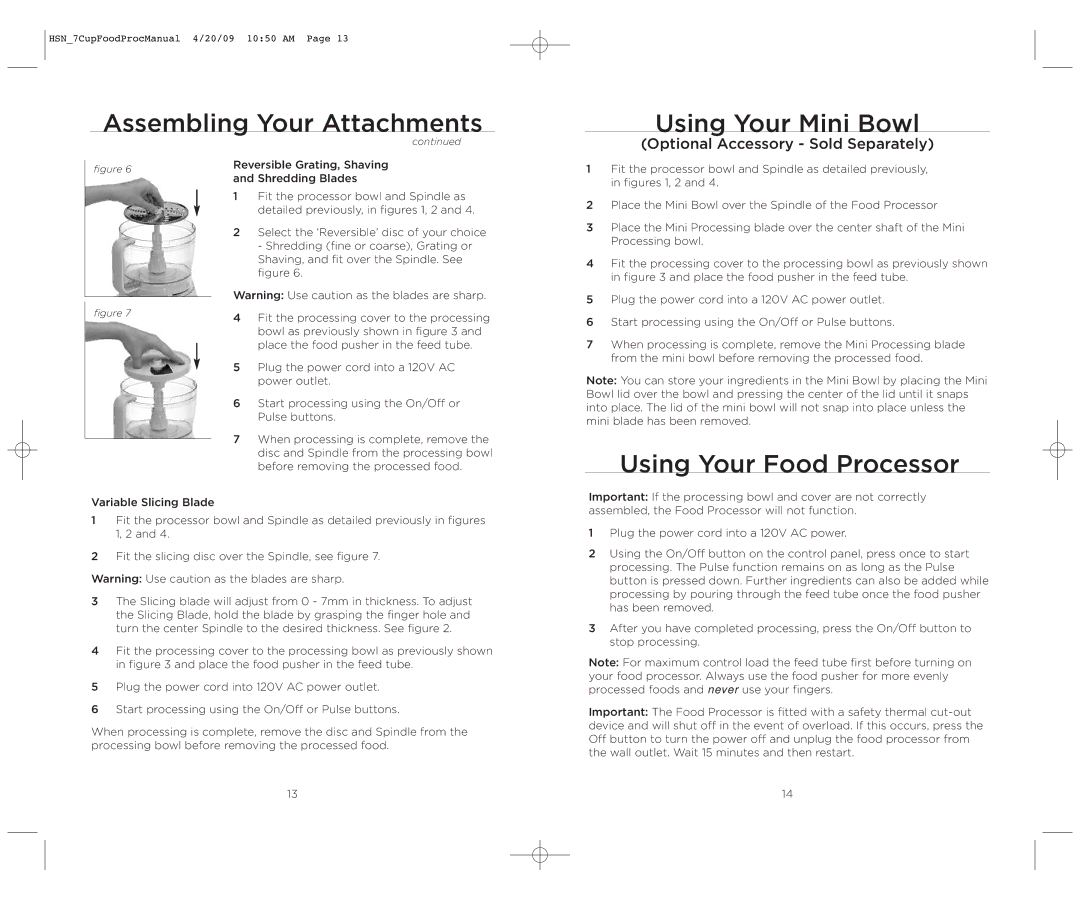
figure 6
figure 7
Variable Slicing Blade
continued
Reversible Grating, Shaving
and Shredding Blades
1Fit the processor bowl and Spindle as detailed previously, in figures 1, 2 and 4.
2Select the ‘Reversible’ disc of your choice - Shredding (fine or coarse), Grating or Shaving, and fit over the Spindle. See figure 6.
Warning: Use caution as the blades are sharp.
4Fit the processing cover to the processing bowl as previously shown in figure 3 and place the food pusher in the feed tube.
5Plug the power cord into a 120V AC power outlet.
6Start processing using the On/Off or Pulse buttons.
7When processing is complete, remove the disc and Spindle from the processing bowl before removing the processed food.
(Optional Accessory - Sold Separately)
1Fit the processor bowl and Spindle as detailed previously, in figures 1, 2 and 4.
2Place the Mini Bowl over the Spindle of the Food Processor
3Place the Mini Processing blade over the center shaft of the Mini Processing bowl.
4Fit the processing cover to the processing bowl as previously shown in figure 3 and place the food pusher in the feed tube.
5Plug the power cord into a 120V AC power outlet.
6Start processing using the On/Off or Pulse buttons.
7When processing is complete, remove the Mini Processing blade from the mini bowl before removing the processed food.
Note: You can store your ingredients in the Mini Bowl by placing the Mini Bowl lid over the bowl and pressing the center of the lid until it snaps into place. The lid of the mini bowl will not snap into place unless the mini blade has been removed.
Using Your Food Processor
Important: If the processing bowl and cover are not correctly assembled, the Food Processor will not function.
1Fit the processor bowl and Spindle as detailed previously in figures 1, 2 and 4.
2Fit the slicing disc over the Spindle, see figure 7.
Warning: Use caution as the blades are sharp.
3The Slicing blade will adjust from 0 - 7mm in thickness. To adjust the Slicing Blade, hold the blade by grasping the finger hole and turn the center Spindle to the desired thickness. See figure 2.
4Fit the processing cover to the processing bowl as previously shown in figure 3 and place the food pusher in the feed tube.
5Plug the power cord into 120V AC power outlet.
6Start processing using the On/Off or Pulse buttons.
When processing is complete, remove the disc and Spindle from the processing bowl before removing the processed food.
1Plug the power cord into a 120V AC power.
2Using the On/Off button on the control panel, press once to start processing. The Pulse function remains on as long as the Pulse button is pressed down. Further ingredients can also be added while processing by pouring through the feed tube once the food pusher has been removed.
3After you have completed processing, press the On/Off button to stop processing.
Note: For maximum control load the feed tube first before turning on your food processor. Always use the food pusher for more evenly processed foods and never use your fingers.
Important: The Food Processor is fitted with a safety thermal
13 | 14 |